Child themes can be modified without altering the original code of your theme, allowing you to make changes as small as changing a couple of colors, or as extensive as completely changing the look and feel of your theme. In this tutorial we’ll get to understand them a bit better and build one from scratch.

There are thousands of wonderful WordPress themes out there, but apart from hiring a specialist designer or developer you’re unlikely to find one that matches your vision perfectly – there will always be minor styles or functionality you’d like to tweak to make it perfect. This is where using a child theme comes in.
First, don’t modify theme files directly
When making changes to a website, an extraordinary number of people modify their theme files directly by adding or altering files within the current theme’s folder. This will create a number of issues down the line.
The most immediate is that any changes made to the theme in this way will be lost once the theme is updated. Because of this, updates will be skipped which could result in security problems or users will find their customizations gone once they do.
When you only have minor changes to make
- Making basic CSS changes. It can be overkill to use a child theme for a few basic changes like altering colors or tweaking a font size. In this case, it’s easier to use a custom CSS plugin like this one to make your alterations.
- Adding a simple function. There’s an easy to use WordPress plugin you can use that gives you the ability to easily and safely add your custom functions directly via the WordPress Dashboard.
- Changing something that’s already editable within the theme options. Many themes include a designated Theme Options section or allow for changes within the Customizer. It’s best to just use this functionality rather than creating your own.
For anything else, use a child theme
A much better idea is to use a child theme. This allows you to make any number of changes to a website without touching any of the original theme files.
Child themes can also be very useful for people who are new to WordPress development. Rather than starting to code a new theme from scratch, it’s much easier to start with a basic theme and then create a child theme to edit the structure into looking the way you want.
Let’s begin
In this example, we will be creating a simple child theme for our StartRight theme.
Step 1: Create a Directory for the Child Theme
- Navigate to your WordPress site’s theme directory (
/wp-content/themes). - Create a new folder and name it startright-child. It’s a best practice to give your child theme the same name as the parent with -child appended at the end.
startright |
startright-child |
Step 2: Create a style.css file
Within your new theme folder, create a file called style.css and fill in the information as outlined below.
|
1 2 3 4 5 6 7 8 9 10 11 12 |
/* Theme Name: StartRight Child Theme URI: http://www.createandcode.com/themes/startright/ Description: A starter child theme for the StartRight WordPress Theme Author: Create & Code Author URI: http://www.createandcode.com Template: startright Version: 1.0.0 */ /* =Theme customization starts here ------------------------------------------------------- */ |
Step 3: Adding some Custom CSS
Let’s add a custom rule to change one of the elements. I’d like to change the border color around the sidebar widgets from light grey to black:
 Using the Inspect Element feature in my browser I know the class name to change and so add it to my child theme’s style.css file.
|
1 2 3 4 5 6 7 8 9 10 11 12 13 14 |
/* Theme Name: StartRight Child Theme URI: http://www.createandcode.com/themes/startright/ Description: A starter child theme for the StartRight WordPress Theme Author: Create & Code Author URI: http://www.createandcode.com Template: startright Version: 1.0.0 */ /* =Theme customization starts here ------------------------------------------------------- */ .startright-content .widget_text.widget { border-color: #111;} |
Editing Other Template Files
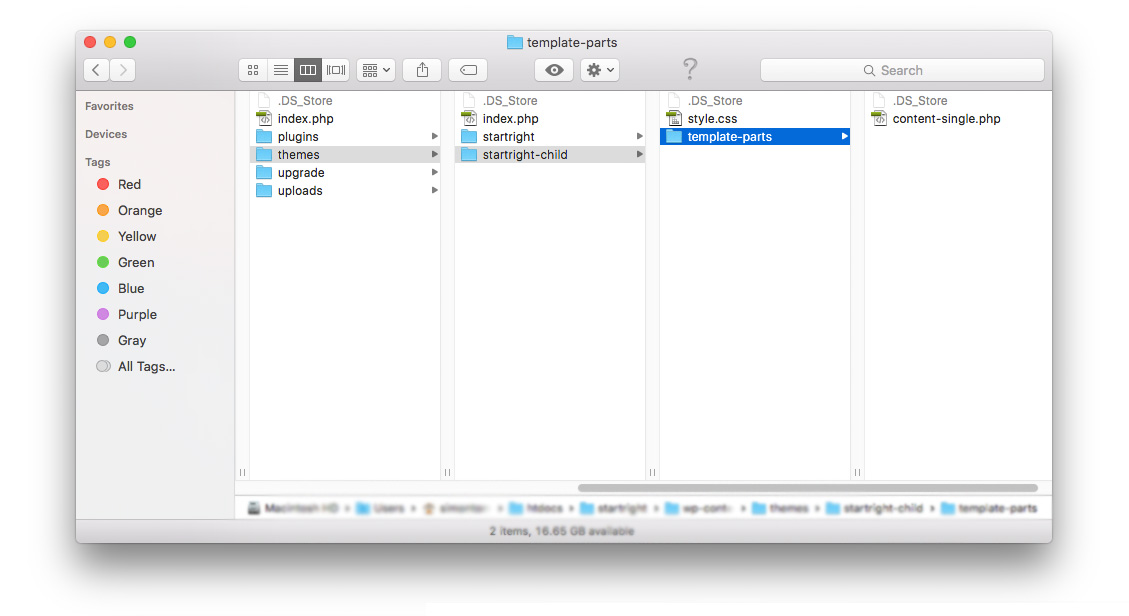
You can also make structural changes by adjusting the php template files. The first thing you need to do is create an identical structure in your child theme folder and copy the original file into it. The file name and location needs to be exactly the same.
For example, if you want to modify the the startright/template-parts/content-single.php, then you would copy and paste this file to startright-child/template-parts/content-single.php.
 WordPress knows to use this file in place of the old one because its name and location are the same. You can then open the file and make any necessary changes.
Finally, upload the Child Theme and activate it
Zip the startright-child folder into a file called startright-child.zip. You can add this just like any other theme in WordPress, via Appearance > Themes > Add New

Summary
So, creating a child theme in WordPress isn’t too difficult. It allows us to safely customize a website without editing any core files. There are key benefits to this; you can build on top of an existing theme and your changes are safe from theme updates; also, you will always have the original theme to revert to.
Child themes are also a great way to introduce yourself to the world of WordPress design and development and give you the peace of mind that you’re at no risk of breaking your site.
There is great documentation about child themes in the WordPress codex. If there is anything you need clarification on in this post, then this should be your first stop.
You can also download the StartRight child theme at the bottom of the theme’s details page.


