


Would you like a simple way to create sortable, filterable and scalable WooCommerce Product Tables?
But how can you make it possible without facing any hassle? The more scalable your WooCommerce store is, the more you can retain customers on your WooCommerce site.

Having a successful eCommerce business in this commercial and competitive industry, you need to combine well thought-out products with detailed product tables. A customer is always attracted to a clean product brief, and this is especially true for WooCommerce product stores.
In this post, we will go through how to create WooCommerce Product Tables using a wonderful plugin named Ninja Tables. Without further ado, let’s dive in!
How to Create WooCommerce Product Tables
To create a WooCommerce product table, the first thing you need to do is install a WooCommerce compatible theme. We recommend the popular Shoptimizer WooCommerce theme, it’s designed for speed and conversions and is great for any kind of store.
Using a quality WordPress plugin is always fun. The developers at WPManageNinja have done a great job of providing such a product like Ninja Tables Pro. The plugin allows you to create WooCommerce product tables that help you to style tables and make it a filterable/sortable list. Here is a step-by-step guide on how to achieve this.
Step 1: Install the plugin & configure it with WooCommerce
After purchasing, installing and activating Ninja Tables Pro, you need to configure it with the native WooCommerce plugin. Once you are done with the activation, now you can visit the dashboard of the plugin. From the dashboard, click on the Add Table button located on the top right corner.
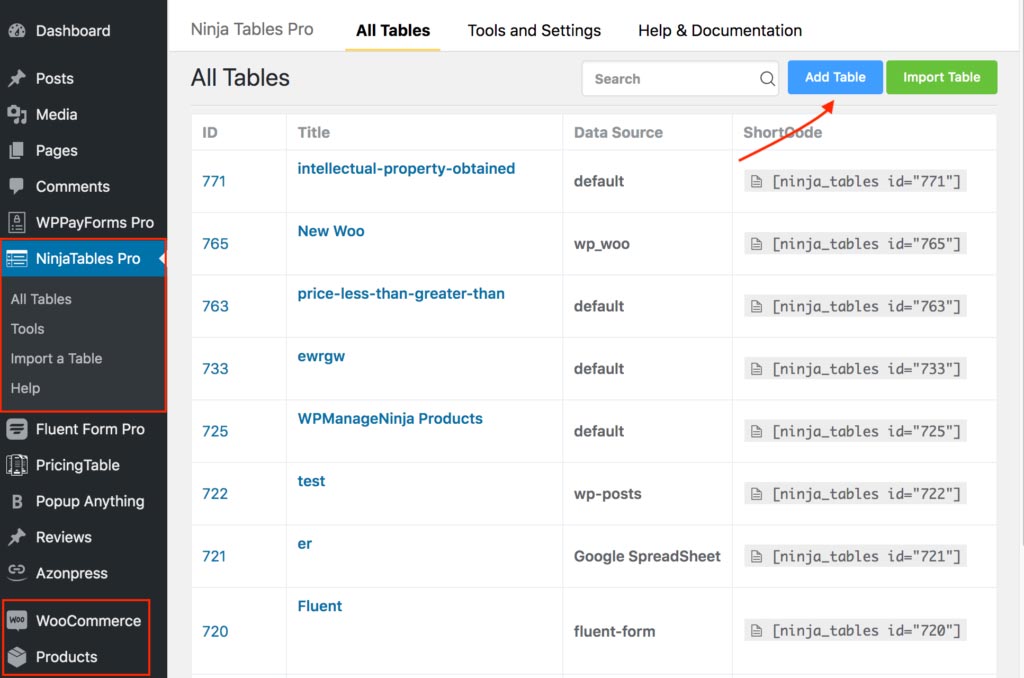
[N.B: To create WooCommerce product tables, you need to have the WooCommerce plugin installed within the theme you are using.]
Next, you’ll find a pop-up with multiple advanced options located within the left sidebar for creating tables.
Step 2: Integrating with WooCommerce
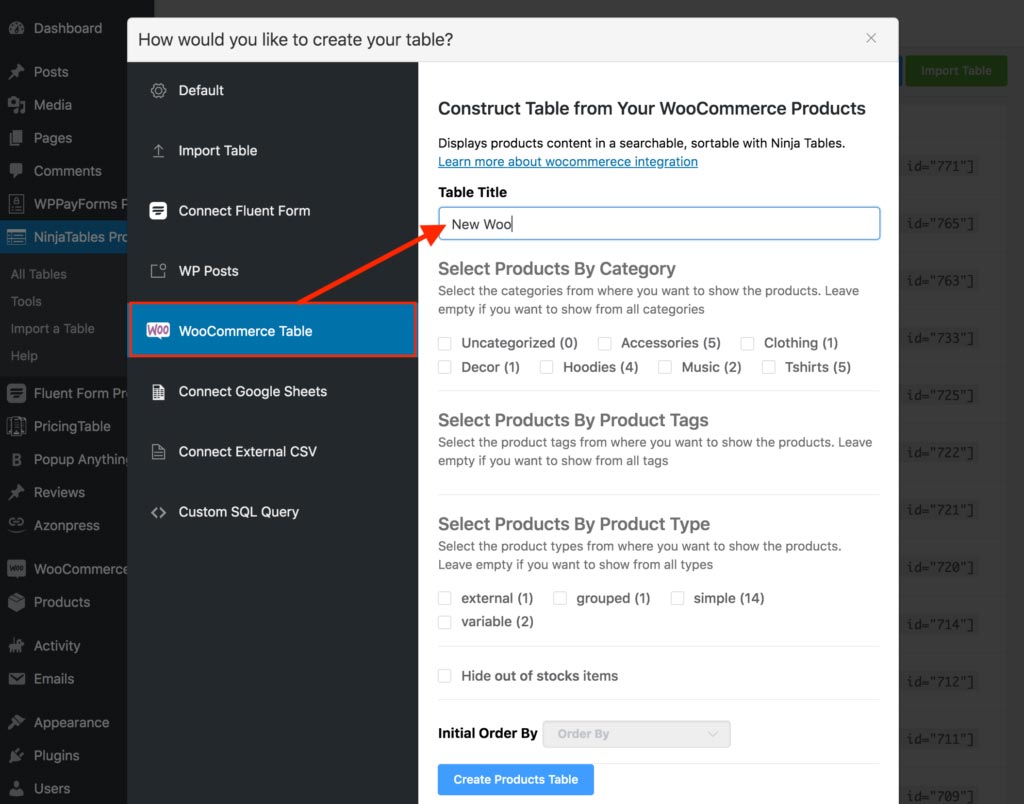
From the left sidebar, click on the WooCommerce Table option. Once you click this, there will have further options for constructing the table contents of your WooCommerce product tables.
Step 3: Creating WooCommerce product tables
On the same page, you will find an input field to put your table name. Simply type the table name that you want to provide. If you want to show all of your products, you don’t need to select any one of them. By default, it will show all of the products added to the WooCommerce table.
Step 4: Define product category, tag, and type
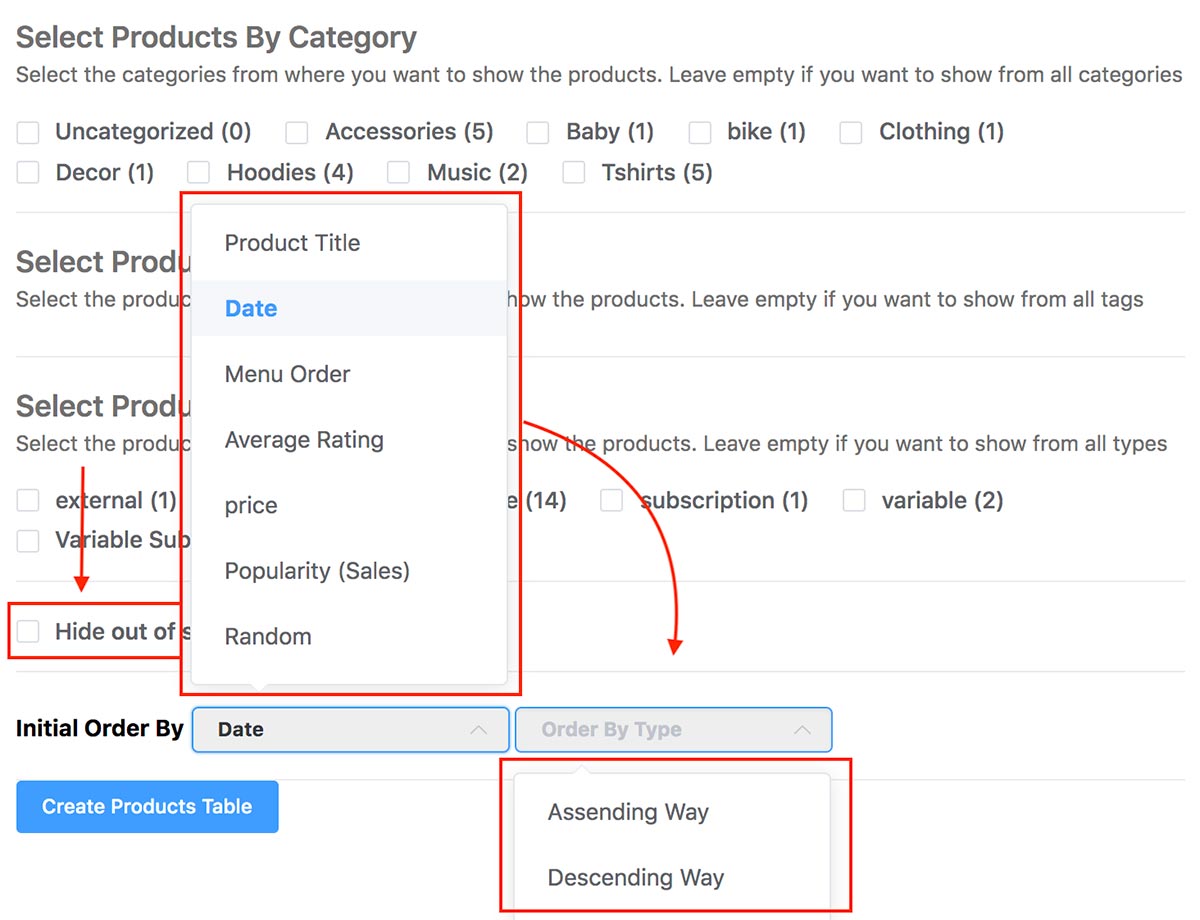
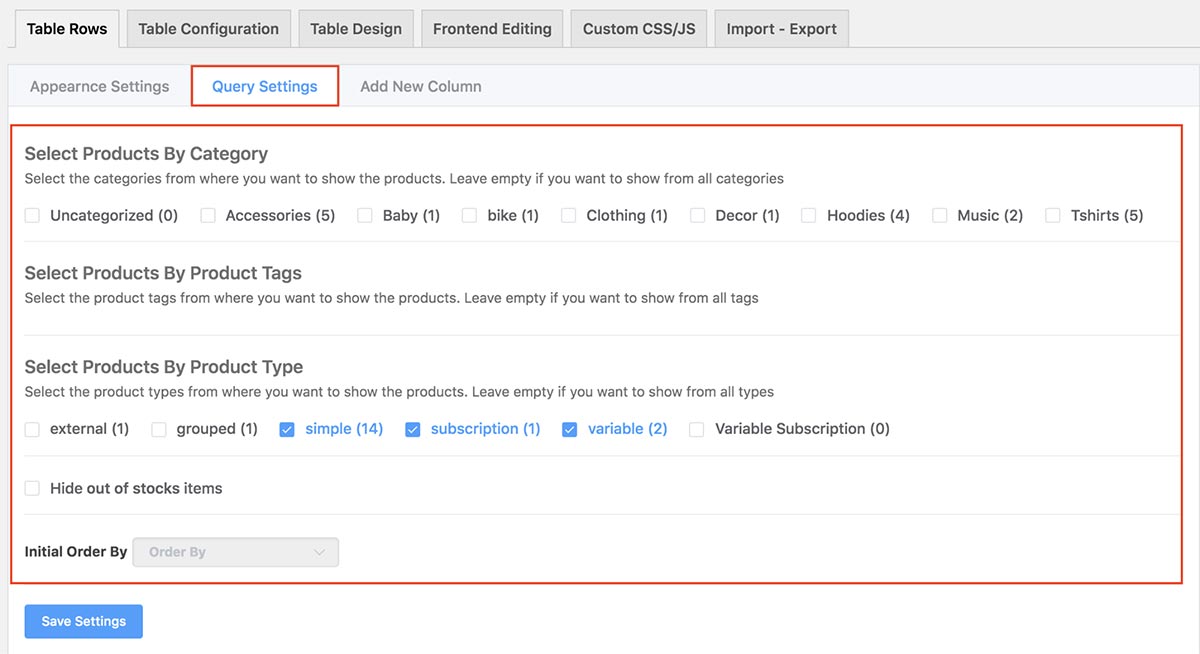
Right after the input field, you will find a number of checkboxes to select and define the product category. These categories are shown based on the categories created in the table of the WooCommerce plugin.
In addition to this, you will get a section for defining product tags and they are also shown based on the tags you provided within the table of the WooCommerce plugin. You can select the product tags that you want to show the products. If there is no tag provided on your core product table of the WooCommerce plugin, you will find the section empty. Leave it empty if you want to show all of the tags.

The next section is to define the product type. Here they are also shown based on the types you provided. You can select whichever product types you like. If there is no type provided on your core product table of the WooCommerce plugin, you will find the section empty.
You can hide stock items if you don’t want to show these in public. Moreover, you can sort data in ascending or descending order based on the product title, data, order, and so on.
Step 5: Customize advanced options
After configuring all the options mentioned above, you need to click on the Create Products Table option. Take a look at the video below to understand this better:
Once you click on the Create Products Table button, you will be taken to a new interface where you will find the back-end of your WooCommerce product table. Here, you will find more advanced options to make your product table dynamic.
To see the output of the product table that has created now, click on the Preview button located on the top-right corner of the page. Take a look at the output of the table that we just have created for demonstration purposes.
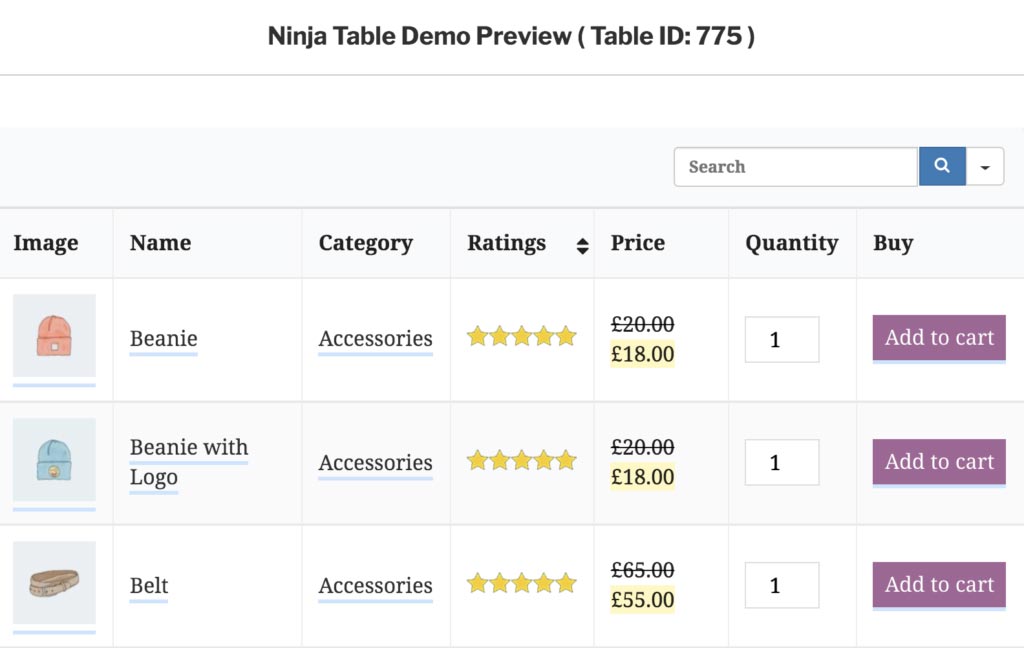
Now, you’ll see that you have created a WooCommerce product table with all of the basic features. If you want to make this WooCommerce table more scalable, you can do that using the Ninja Tables plugin.
To get the advanced option for your WooCommerce product tables, you will see that three different tabs that contain a ton of functionalities.
Step 6: Make your product table more personalized
As you just have created the WooCommerce product table, now you can expand it features-wise according to your own fancy. Using Ninja Tables Pro, it’s extremely easy to make this possible. After creating the basic product table you will find three different additional tabs specially for the WooCommerce product table.
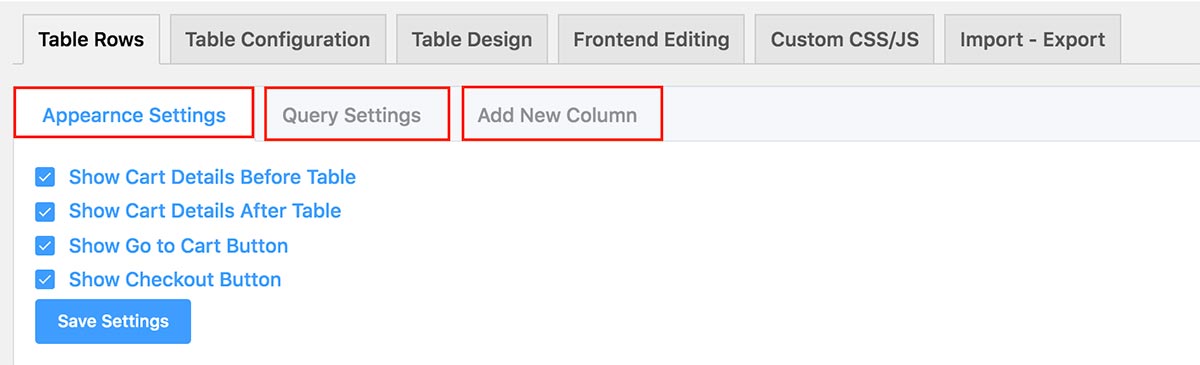
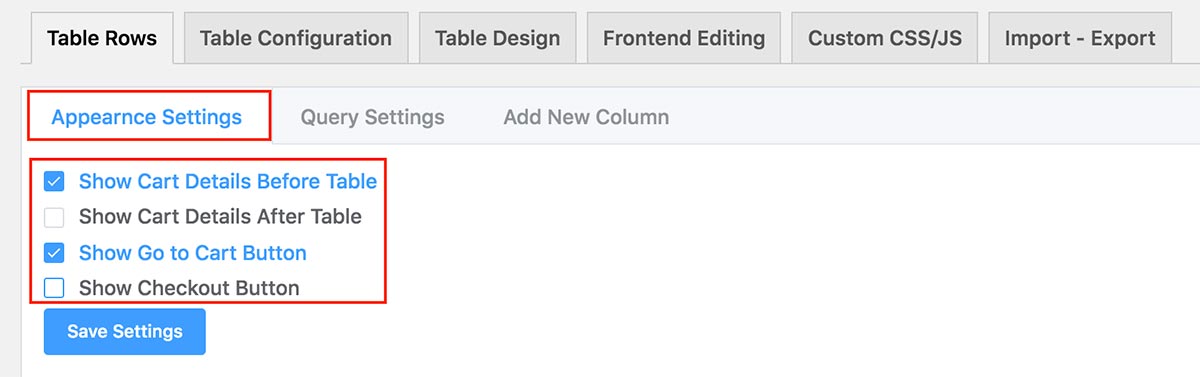
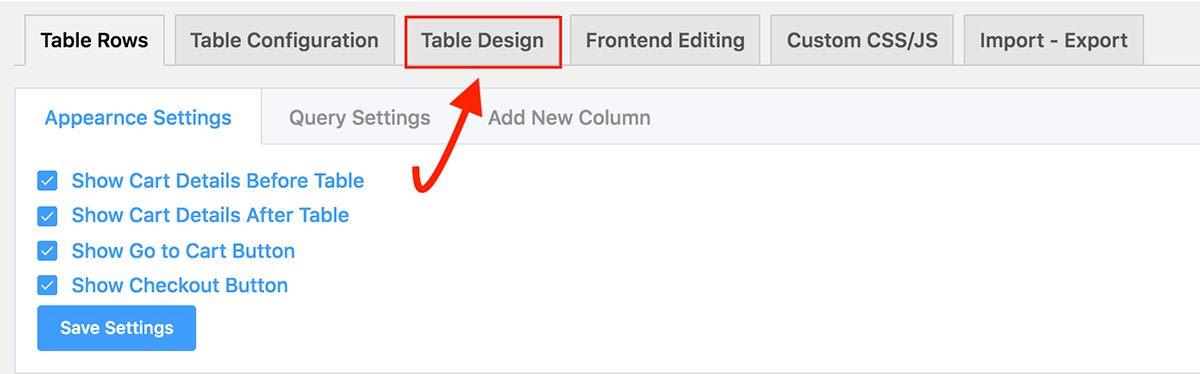
i). Appearance Settings
Appearance Settings will help you to show cart details before and after by ticking checkboxes. It also allows you to show the cart and checkout button. Generally, all will be checked by default. If you don’t want to show any one of them, you just need to uncheck each one, then it will be automatically applied.
ii). Query Settings
This is the second tab that allows you to customize the configuration you made while creating the table. You can add new functionality or remove existing features by clicking the tab.
Here you can customize the previously mentioned configuration of four sections. When you are done with the necessary customizations, click on the Save Settings button.
iii). Add New Column
If you want to add a new column onto your existing WooCommerce product listing table, you can do it easily using this tab. You can get a whole bunch of options for making your table more dynamic and seen in the screenshot below.
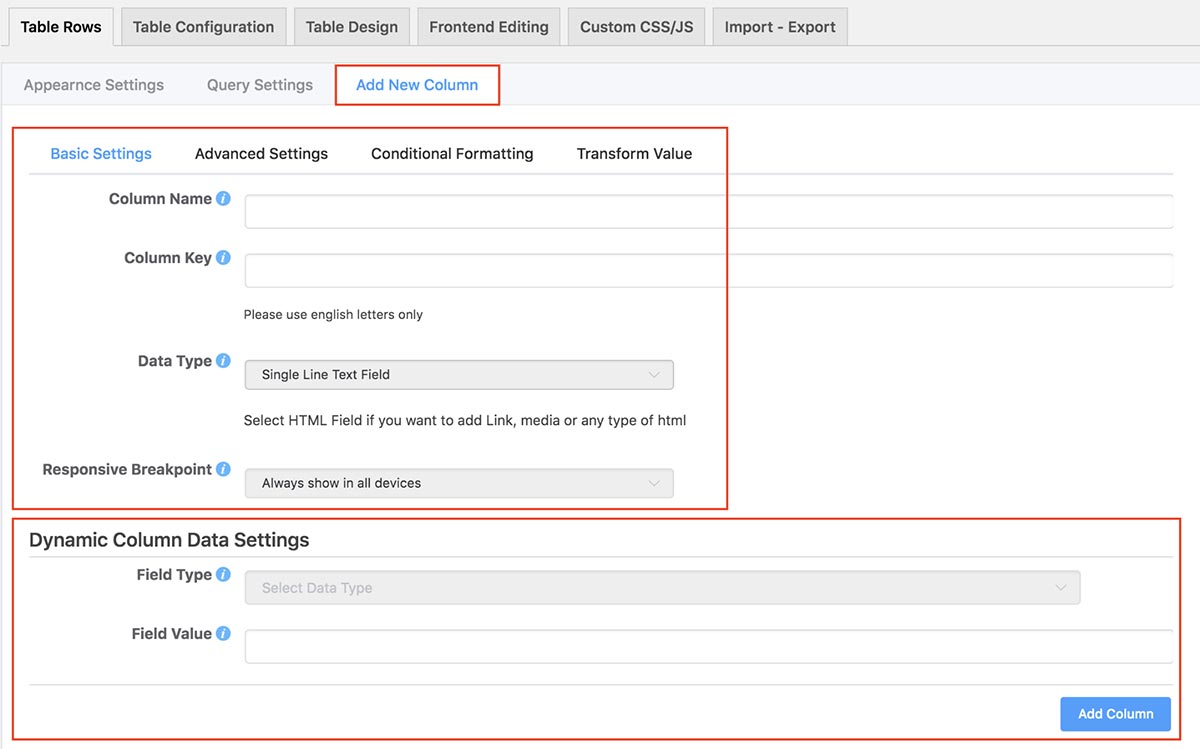
There are four tabs for making your table more compelling. You have Basic Settings, Advanced Settings, Conditional Formatting, and Transform Value. You will get the Basic Settings by default. In Basic Settings, you will have a section named Dynamic Column Data Settings to make your data more dynamic specifically.
Additional Functionalities Using Ninja Tables
We’ve mentioned features above especially for WooCommerce product tables. You can also have more generic features using the Ninja Tables plugin. Let’s have a look at a couple of them:
a). Designing WooCommerce Product Tables
Apart from the specific options, you will also have generic options as well as being able to design and configure your existing WooCommerce product tables.
You can know details about this part by visiting the documentation part of Ninja Tables.
b). Generic Table Configuration
We have seen the basic configuration earlier especially for WooCommerce integration but you can configure tables in a generic way as well. In the top navigation, you will find a tab named Table Configuration where you can configure your WooCommerce product tables.
Here you can find multiple advanced features in the left sidebar of the plugin.
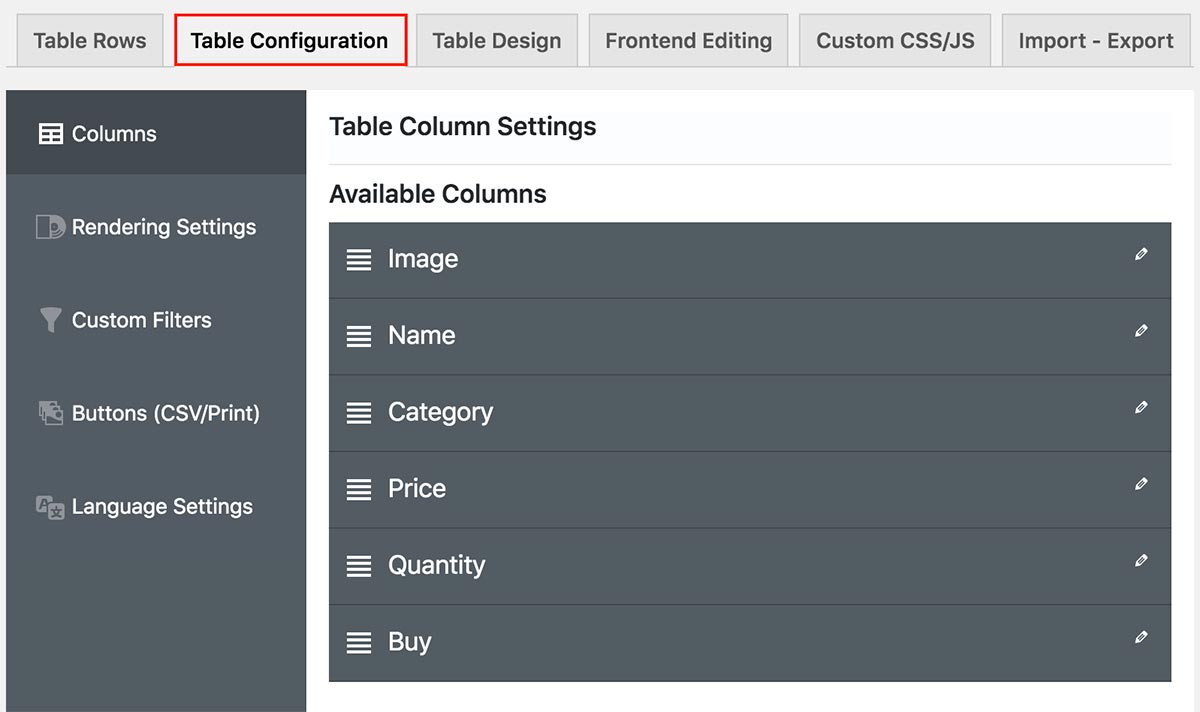
Columns: This option will help you to add a new one, edit, and delete the existing one.
Rendering Settings: You can use the Rendering Settings option for setting up an Ajax-based table. Here, you will have an option for creating advanced tables for legacy as well. You can enable HTML cache to cache the full HTML of the table and render that without interacting with the database. You can set the time how many minutes it will cache each iteration.
Custom Filters: This is another interesting feature that allows you to filter out table data in several ways. Using this amazing feature, you can set a dynamic table filter according to your choice.
Button (CSV/Print): This option allows you to export button settings in CSV format, and you also enable print button settings. Moreover, you can set the button positioning and alignment in three different ways.
Once you’ve finished creating WooCommerce product tables, it’s time to test and make sure that customers can find their desired product from your store. This is how you can create dynamic WooCommerce product tables in the most convenient way.
Wrapping Up WooCommerce Product Tables
Creating the most user-friendly eCommerce store is a dream for any online business owner. Furthermore, making the store more optimal by using WooCommerce could be a great option for WordPress users. Combined with an optimized WordPress plugin like Ninja Tables Pro, you can create a winning formula to make your WooCommerce store a success!
To maximize the revenue from the WooCommerce business, you need to present your products in such a way that allows consumers to choose and purchase their expected products without any hassle. WooCommerce product tables are a great way to list products on your site.
Conclusion
If you want to make your eCommerce store consumer-friendly, you’ll need to put some serious thought into its design and functions as well. If you’re going to get the best means of displaying your products in a way that’s both user-friendly and nice to look at; this might not be easy with the default options out there in WooCommerce.
Fortunately, this is easily feasible by using one of the best WooCommerce Product Table plugins named Ninja Tables Pro. By adding your product table shortcode, you can show off everything your site has to offer that’s truly dynamic.
I hope the article helped you to know more about how to create WooCommerce product tables dynamically for your eCommerce business. If you have anything to share with me regarding the topic, feel free to let us know by commenting below.