


Fancy making a quantum leap forward with the quality of your WordPress Code? If so, you’ve come to the right place 🙂
Today we’re going to walk you through the exact steps to take setup all sorts of wonderful tools to improve your PHP, Javascript and CSS for WordPress projects. Specifically, we’re going to go through how to setup Linters for WordPress.
If you’ve never used a Linter before, you’re in for a big treat. Quite simply, they’ll transform the way you approach ANY kind of software project – and for WordPress projects, they’ll help you elevate your code quality in ways you never even knew were possible.
Sound good? Let’s get on with it!
What is Linting?
Linting is the term used to describe the process of running software that will analyse your source code quality, compliance with coding standards and much more.
And as to the origins of the term Lint, Wikipedia as always helps:
“The term was derived from the name of the undesirable bits of fiber and fluff found in sheep’s wool.”
Why is Linting it important?
I like to think of linters as being a bit like a spellchecker on steroids for anyone who spends a lot of time looking at code. Even the best coders in the world make mistakes and a good linting setup goes a long way to catching silly mistakes before they sneak into production.
Once you’ve got linters setup to analyze your every keystroke, you’ll wonder how you ever lived without them. Over the past few years I’ve slowly being introducing more and more linters to my workflow when working on our WordPress Themes and it’s really helped to improve the quality of our work. If you write code for WordPress, a kickass Linting setup will:
- help you to ensure you write code in a consistent manner. This is really important whether you’re a one man band or a 50 strong development team. (But particularly useful on large development teams).
- improve code quality and readability.
- fix syntax bugs.
Introduction to the WordPress Coding Standards
WordPress now powers over 31% of the web and has thousands of people contributing code from every corner of the planet. The wider WordPress ecosystem including plugin authors, theme designers and power users stretches out even further.
Can you imagine how many different coding styles there must be across that ecosystem?
If we let every developer apply their personality to the WordPress project we’d end up with an inconsistent, unreadable Frankenstein’s monster.
That’s where the WordPress Coding Standards come in. These coding standards allow the community to collaborate in a consistent manner. For the most part, WordPress it helps to ensure that the core of WordPress looks like it was written by a single person. If you’ve spent time contributing to WordPress or making your own themes and plugins you’ll most likely be familiar with many of these standards simply through seeing them time and time again. But even if you’ve studied the standards inside and out, it’s very easy to lose sight of them in the heat of the hunt.
And that’s why our linters are so important. When we configure our linters to enforce the WordPress Coding Standards, we end up with an extremely powerful automated QA ally sitting on our shoulder as we go about our work.
The purpose of this post is to walk you through the process of configuring your development environment with a wicked smart, WordPress optimized, set of Linters. By the time we’re done you’ll wonder how you ever lived without them!
What can we Lint?
WordPress Coding Standards exist for PHP, HTML, CSS and Javascript. Thankfully we can setup Linters for pretty much all of these. Let’s dive in!
Step 1 – Setup the basics
Before we dive into the nitty gritty of each Linter, we need to get some basic things up and running. My development machine is running on macOS but most of the steps below carry across to Linux and Windows environments but YMMV!
Setup PHP
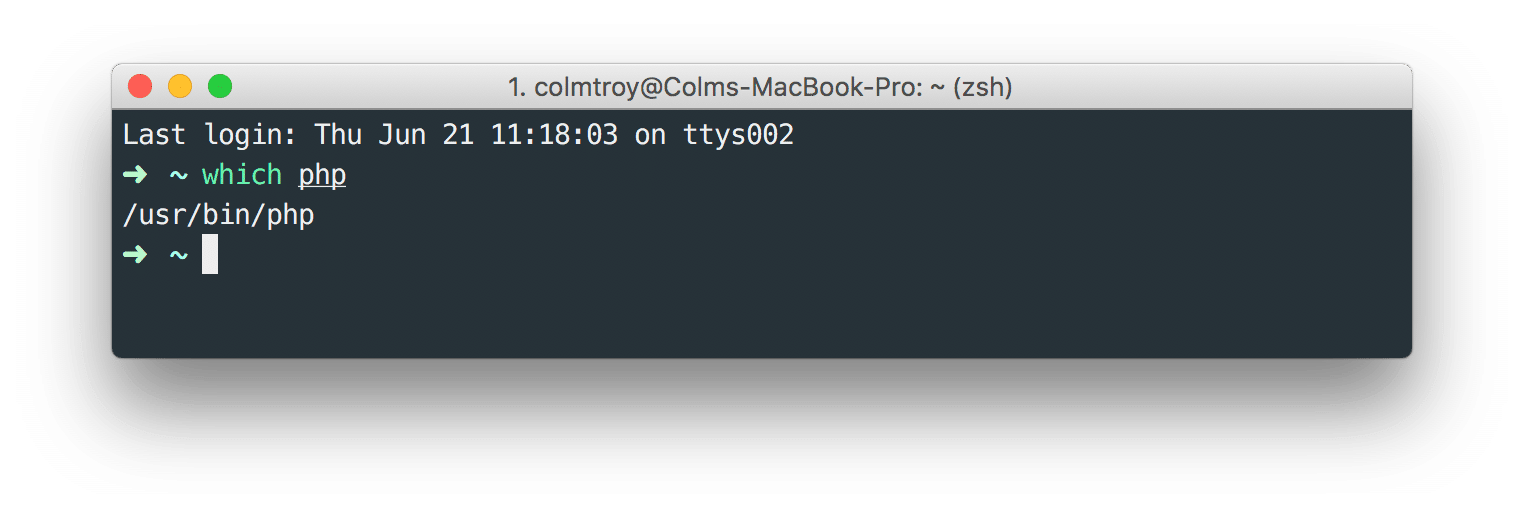
PHP is installed by default on macOS. To confirm it’s installed and from where, open the terminal (or a better alternative ) and run:
|
1 |
which php |
If you’re on macOS you should see something like this
If you get a blank line you’ll need to go ahead and install PHP.
- For macOS, I find it best to install PHP via homebrew
- For Windows, you should give the WSL a shot
- For Linux, c’mon you know what to do 🙂
Setup PEAR
There’s a few ways to install some of the addons for PHP that we’ll be using for our PHP linter, but I’ve found the most reliable method on macOS is to use good ‘ol PEAR. Let’s set it up, jump back to the terminal from your home directory and do the following:
|
1 2 |
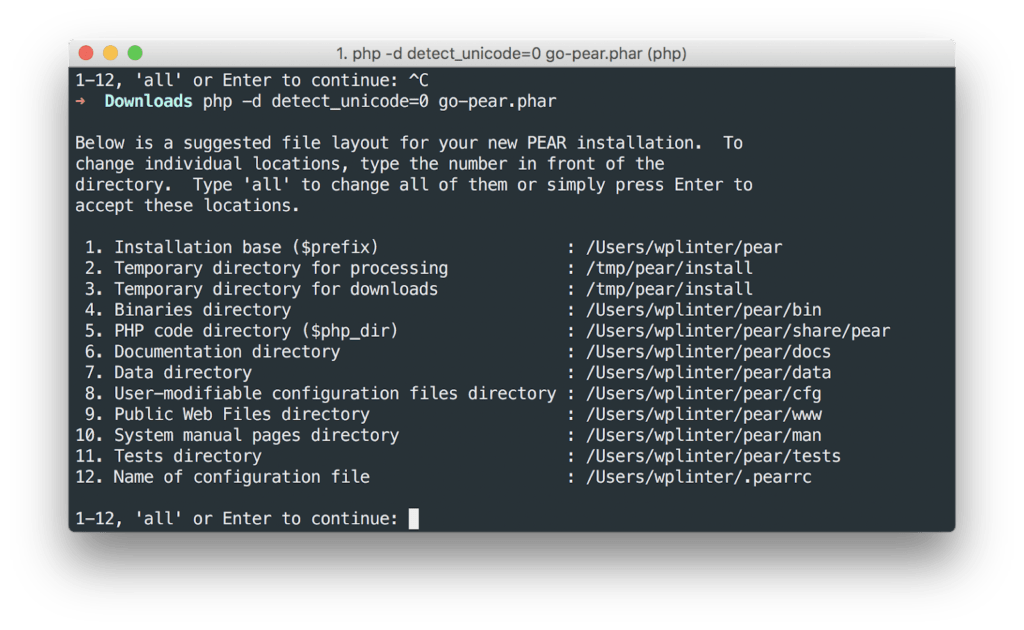
curl -O https://pear.php.net/go-pear.phar php -d detect_unicode=0 go-pear.phar |
This will launch the PEAR install process.
NOTE: If you see permissions errors/warnings after running the command above and going through the steps below you may have attempted to install PEAR from a system location that wouldn’t typically have permissions to do so – which you really shouldn’t do. If you’ve no other choice you can try running sudo php -d detect_unicode=0 go-pear.phar instead – but I recommend avoiding that if possible.
If you see /Users/myuseraccount in the path recommendations you’re on to a winner.
Hit Enter to continue. This will complete the install. You may be prompted to update your PHP include path.
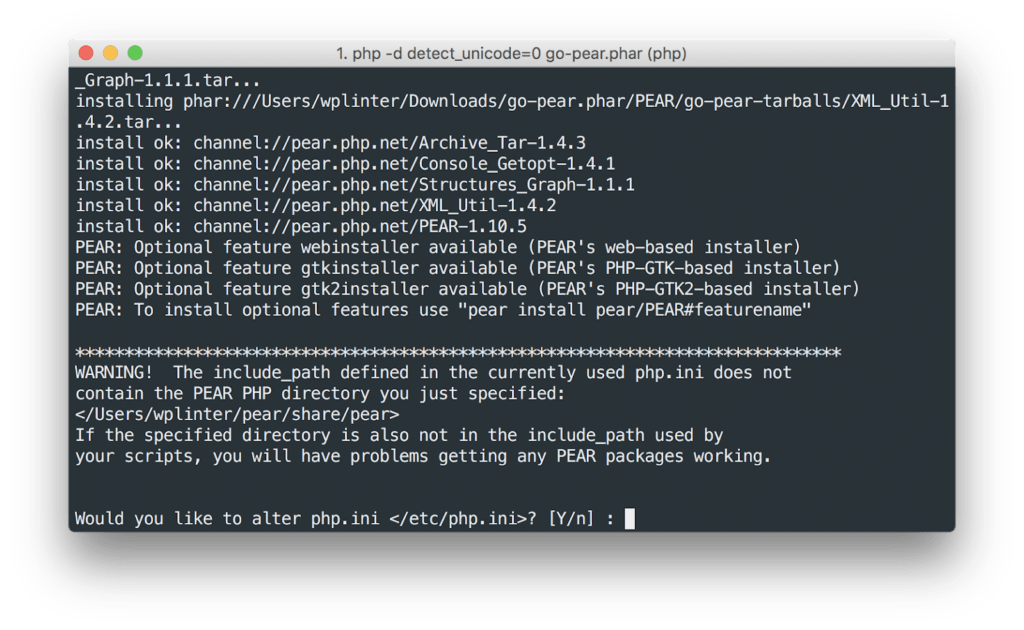
Enter Y to complete the php.ini update.
If you’re not prompted to update your include_path, see instructions below.
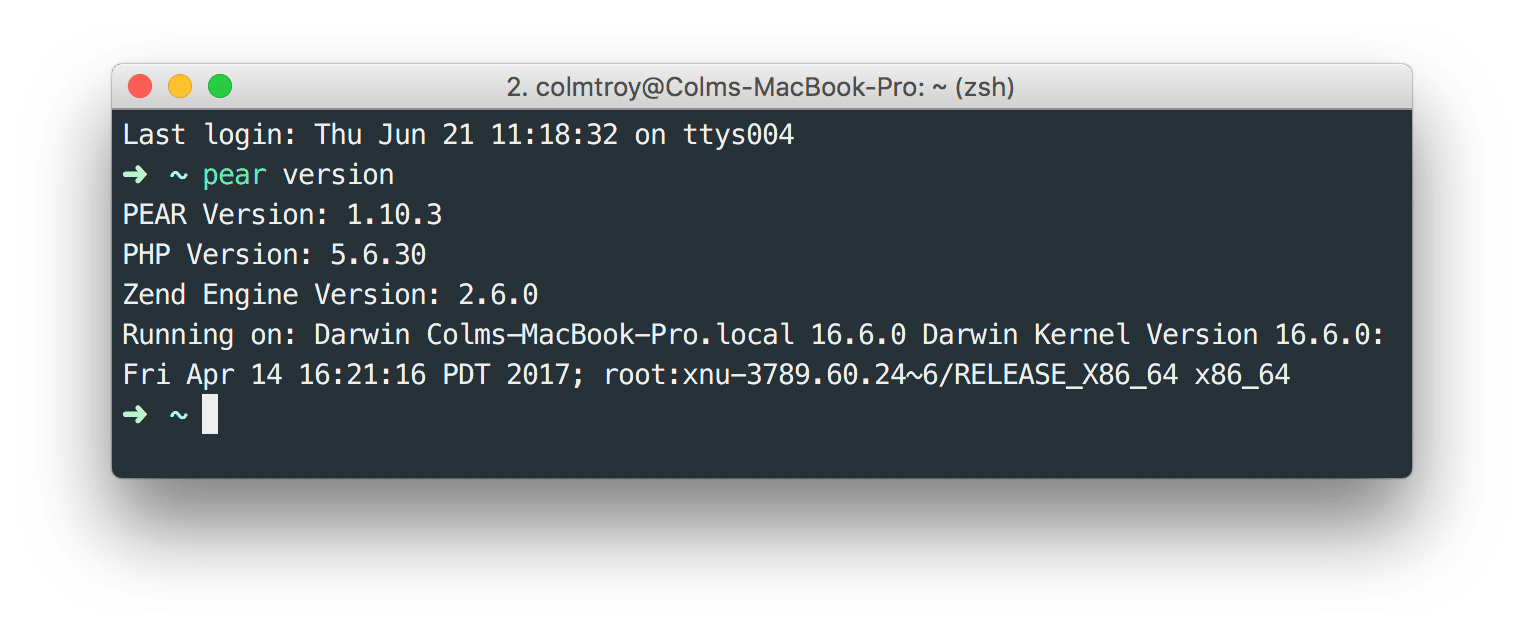
Finally, you can confirm you’re all set with PEAR as follows.
Typing pear version should give you something like this:
The final step in our PEAR config is to tell PHP we’ve got it installed. To do that you’ll need to find and edit your php.ini file. Running php --ini will show you where your ini is located. On macOS, it’s usually /etc/php.ini
Go ahead and open that file and update the include path as follows:
sudo nano /etc/php.ini
Find ;include_path
Replace with
include_path = ".:/path/to/your/pear/"
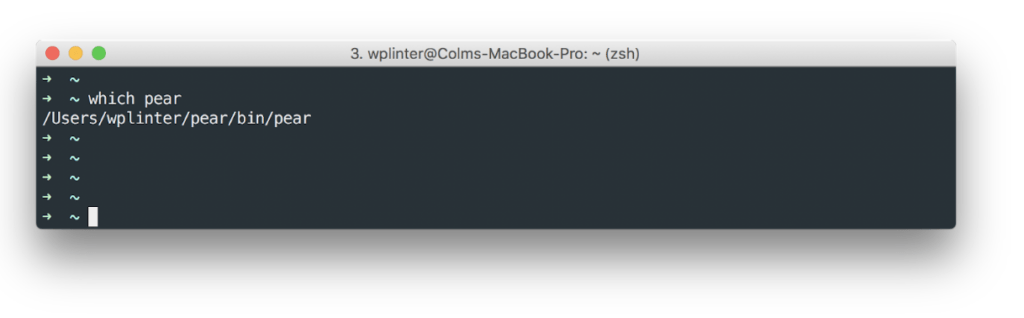
If you’ve been following along, this value should be /Users/myuser/pear/bin/pear but you can confirm your path by running which pear
Ok that’s PEAR all sorted, let’s move on!
Setup Node.js and NPM
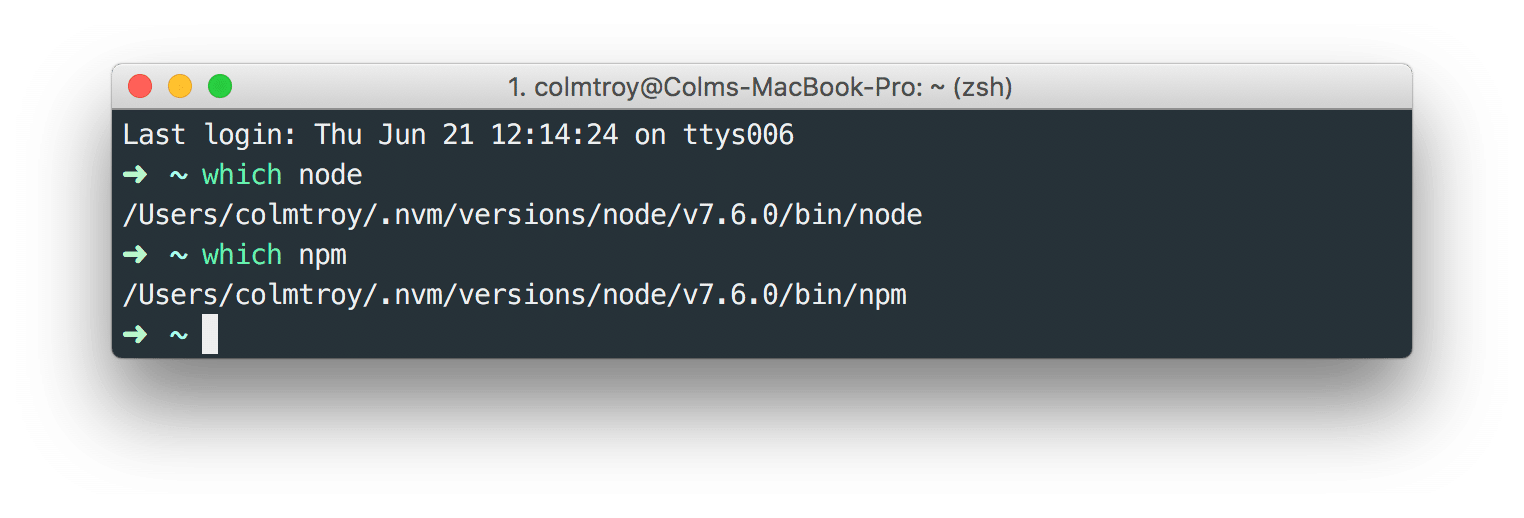
Node.js is almost become a must have for doing any kind of modern frontend engineering. Node will be the foundation upon which many of our linters run. If you’ve already got Node up and running great! If not, I’d recommend installing it via NVM which allows you to run multiple Node versions in parallel. NPM should also be setup with your Node install. We can confirm both as follows:
The only downside to using NVM for managing node is that many Editor packages make poor assumptions about where Node is installed. For that reason, we’re going to create a symlink which should resolve those kind of assumptions.
|
1 |
ln -s ~/.nvm/versions/node/v7.6.0/bin/node /usr/local/bin/node |
NOTE: Make sure to adjust your symlink to reflect your Node path.
Setup Git
You’ve probably already got Git installed, but if not Homebrew has you covered on macOS:
|
1 |
brew install git |
For Windows check out this install guide.
Install Sublime Text
This guide is very much orientated towards using Sublime Text. It’s been our text editor of choice for many years now. VS Code has been doing it’s best to tempt me away the past couple of years. In many ways I think it’s now superior to Sublime Text, but old habits die hard and while I find myself spending increasing amounts of time in VS Code, I still do come back to Sublime Text – for now 🙂
Many of the steps here transfer nicely to VS Code and we’ll be circling back to using our Linter setup with VS Code in a separate blog post in the future.
Ok that’s all the basics sorted, let’s get our PHP Linter up and running!
Step 2 – Setup Linting for PHP and WordPress
Install PHP_CodeSniffer
PHP_CodeSniffer is the workhorse for our PHP Linting setup. It’s actually 2 separate scripts.
- phpcs – detects violations of a defined coding standard
- phpcbf – automatically fixes coding standard violations
Both are vital, indispensable tools you’ll be using all day, every day. We install both via PEAR:
|
1 |
pear install PHP_CodeSniffer |
Many other guides install phpcs via Composer or using the Phar files, but I’ve found PEAR to be extremely stable for ensuring phpcs “just works” on macOS. Once the install is done you can verify it as follows: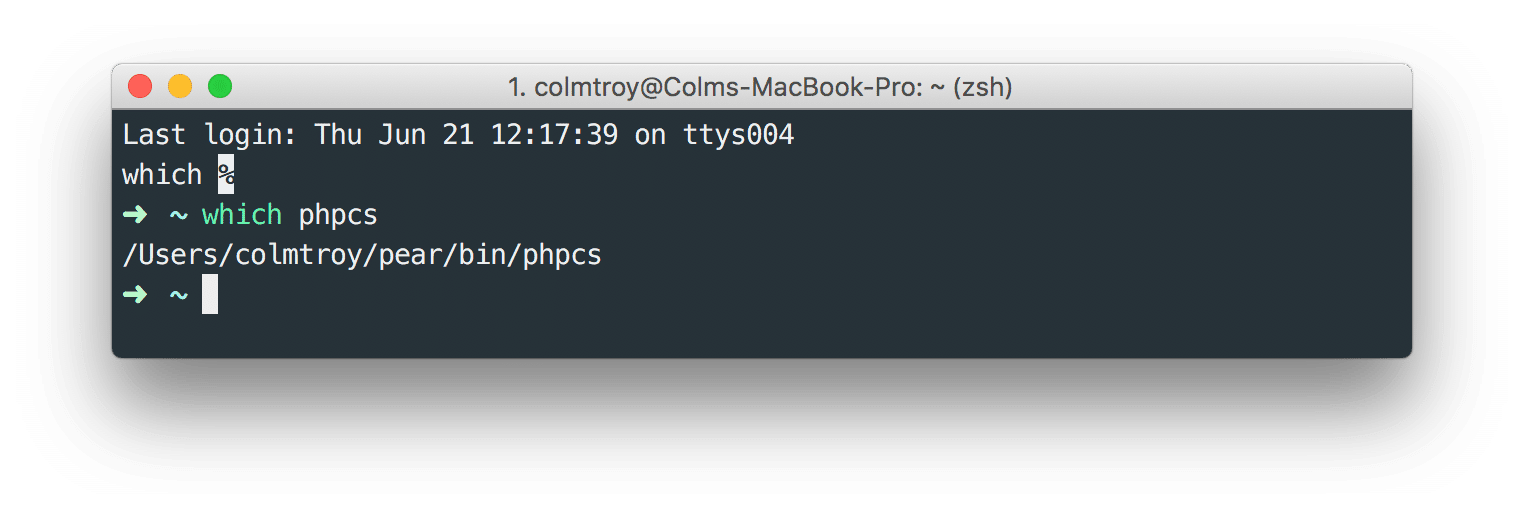
NOTE: Don’t worry if your path is different to mine (in fact yours should be different!).
Install the WordPress Coding Standards Sniffs
‘Sniffs’ are basically coding standards config rules for phpcs. Thankfully there is a wonderful set of sniffs available for the WordPress PHP Coding Standards. To install these, I recommend the Standalone installation method.
Create a directory somewhere safe on your machine like ~/DEV/WPDEV/ and open a terminal session from inside that directory.
Then, use git to clone the rules:
|
1 |
git clone -b master https://github.com/WordPress-Coding-Standards/WordPress-Coding-Standards.git wpcs |
This will clone the sniffs into the directory ~/DEV/WPDEV/wpcs
Configure phpcs to use the WordPress Coding Standards sniffs
Now we’ve got phpcs installed and our sniffs downloaded, we need to configure phpcs to use them. You can easily configure phpcs via the terminal:
|
1 |
phpcs --config-set installed_paths ~/DEV/WPDEV/wpcs |
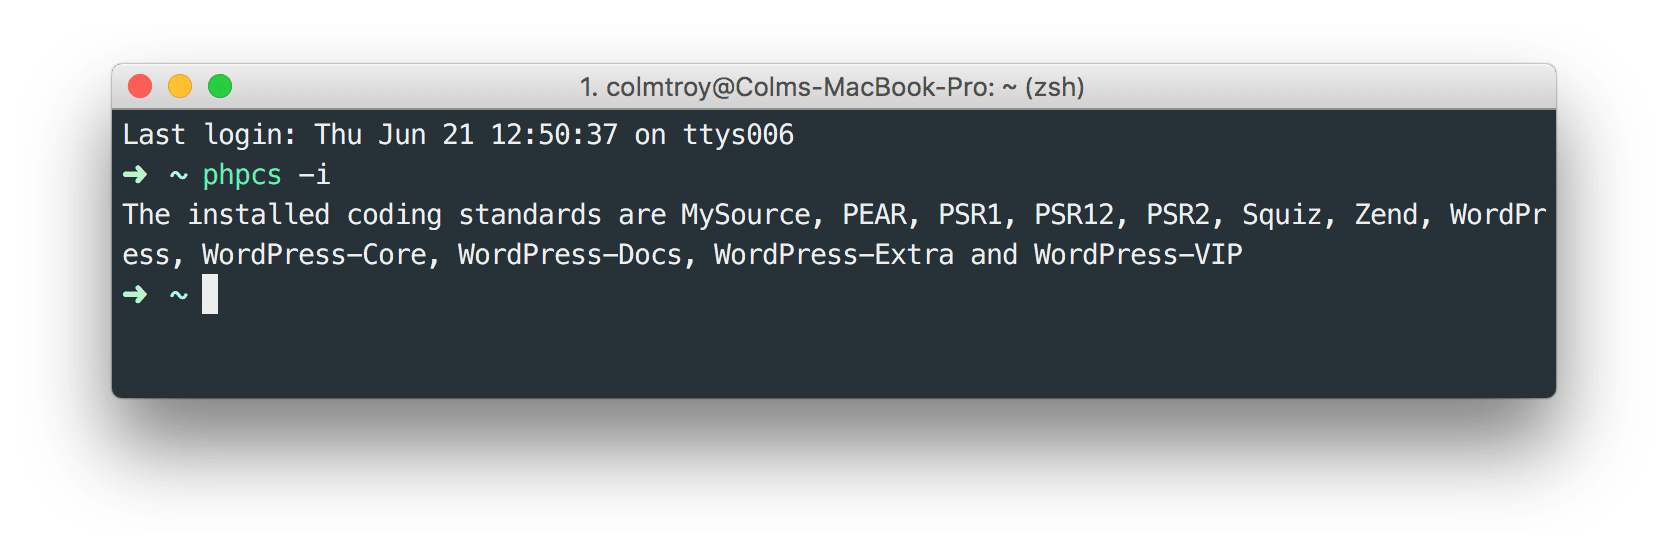
To verify you’ve configured phpcs correctly, run phpcs -i . You should see the following:
The final step is to set the WordPress rules to be the default global rules that phpcs uses.
|
1 |
phpcs --config-set default_standard WordPress |
Congrats! You’ve now got phpcs configured correctly for WordPress projects!
Now let’s hook it up to Sublime Text so we can actually see it in action in our editor.
Install SublimeLinter
SublimeLinter is going to be the framework via which many of our linters will run. Go ahead and install Sublime Linter via Package Control.
Install sublime-phpcs
While sublime-phpcs has been deprecated it still works perfectly fine me. If you wish, you can install SublimeLinter-phpcs as an alternative. (I have both installed).
Use Sublime Text’s Package Control (Preferences -> Package Control -> Install Package -> phpcs) to install this plugin.
Configure sublime-phpcs
Once installed, you’ll need to configure it as follows:
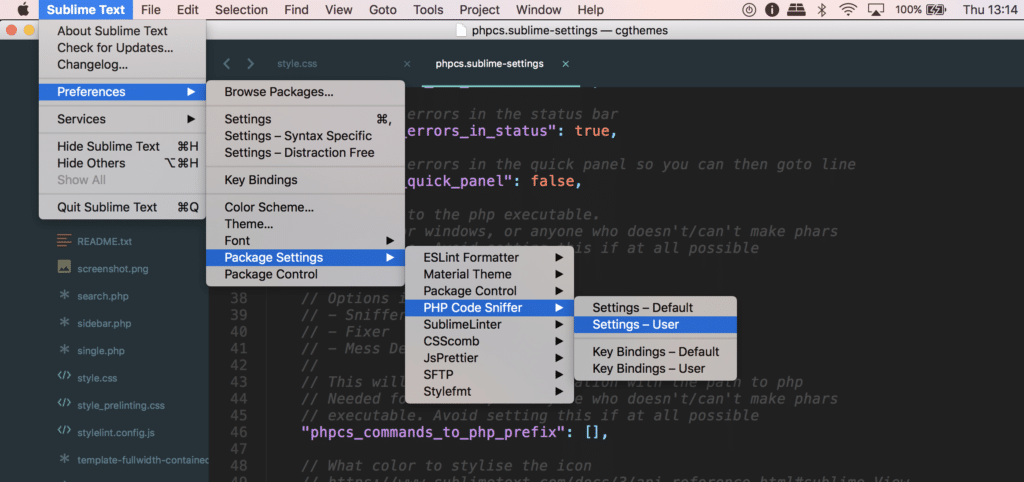
If your user settings are blank, you can copy them from Settings – Default, or, grab a copy of my phpcs user settings over on Github.
NOTE: If you use my settings as a starting point for your own, please make sure to update phpcs_executable_path to point to your phpcs path.
- phpcs_execute_on_save – We’ve set this to true which will execute phpcs each time you save your file.
- phpcs_additional_args – Our config ensures that the full set of WordPress rules are run
- phpcbf_on_save – This is set to true, which will mean that phpbcf will attempt to fix any standards violations each time you save your file (which is awesome!)
Configure SublimeLinter
To configure SublimeLinter go to Preferences -> Package Settings -> SublimeLinter -> Settings
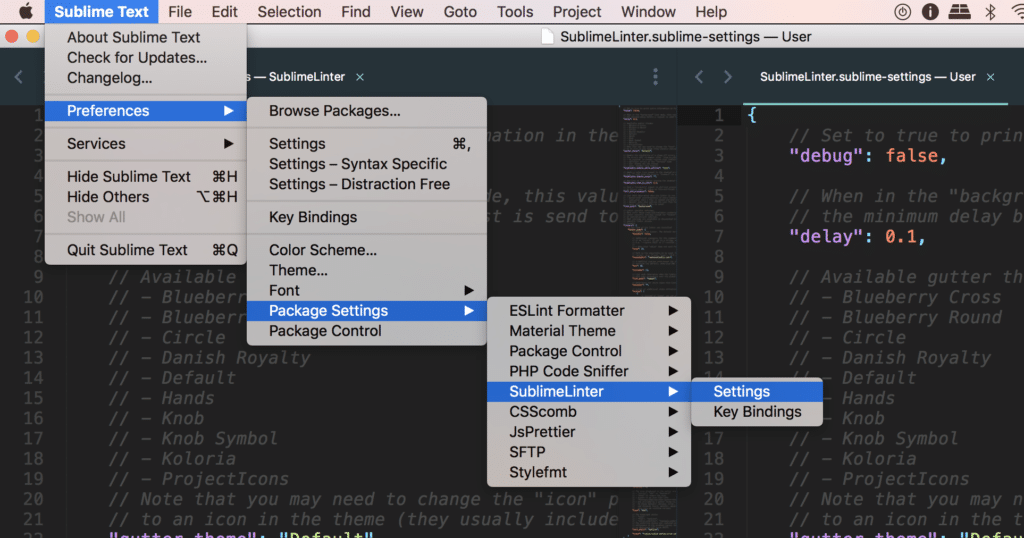
You can grab my settings from Github. Again, don’t forget to update all paths to match your environment.
The really important paths are in the main linters config. You’ll need to update those paths to match where your node path is. If you’ve installed Node.js globally it might live in /usr/local/bin/node so you would use /usr/local/bin as the path below. (ESLint will then find node inside that directory).
|
1 2 3 4 5 6 7 8 9 10 11 12 13 14 15 |
"linters": { "phpcs": { "@disable": false, "args": [], "executable": "~/pear/bin/phpcs", "excludes": [], "standard": "WordPress" }, "stylelint": { "env": {"PATH":"~/.nvm/versions/node/v7.6.0/bin/"} }, "eslint": { "env": {"PATH":"~/.nvm/versions/node/v7.6.0/bin/"} } }, |
(Sidenote: we’ll come back to the Stylelint and ESLint stuff a bit later).
And the generic paths config:
|
1 2 3 4 5 |
"paths": { "linux": [], "osx": ["~/.nvm/versions/node/v7.6.0/bin/"], "windows": [] }, |
By setting up SublimeLinter phpcs settings in this manner it means our Linters will run globally in Sublime Text, which is actually what I want as WordPress is all we do 🙂 But if you prefer more granular control over your linting config, you can define a phpcs.xml file which should live in the root of your theme or plugin.
You can also use a project specific phpcs.xml file in tandem with the global settings. The phpcs.xml rules will override your global config.
Here’s an example phpcs.xml file for one of our projects.
Configure .editorconfig
We’re almost ready to test out our PHP Linter! Just before we do, a very useful asset to include in your project is a .editorconfig file. While not as strict as a dedicated Linter, it helps to inform your editor of choice on what syntax conventions your project should use.
Grab our .editorconfig file and drop it into your project root.
See your PHP Linter in action!
Finally!
Ok so to see your PHP Linter in action simply relaunch Sublime Text and open a PHP file from your WordPress project. With the Linter config we’ve implemented, the Linter will automatically run when you open any PHP file. Unless you’re some sort of natural PHP ninja, the Linter is almost guaranteed to find something it doesn’t like. But just in case, I’ve prepared something appropriately awful for our Linter to complain about – and do it’s best to fix!
Grab a copy of our disgusting PHP file and save it to your project. Open it up and if everything has been installed and configured correctly you should see something like this:
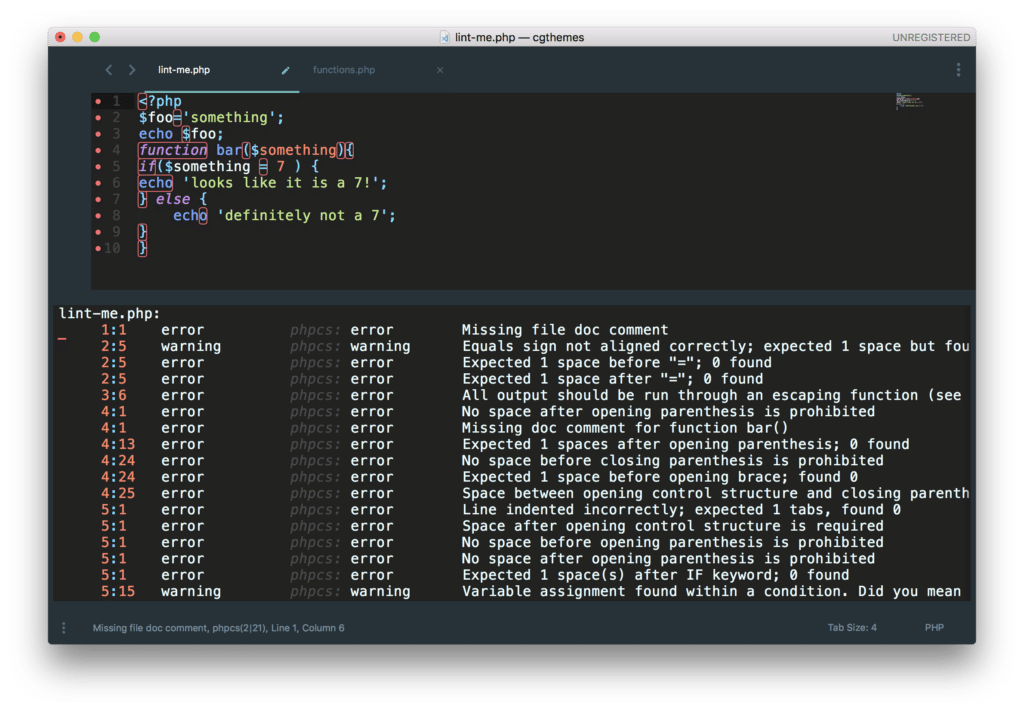
NOTE: If you’d like to see a summary of all your errors/warnings at the bottom of the screen like in the screenshot above simply open the console in Sublime Text.
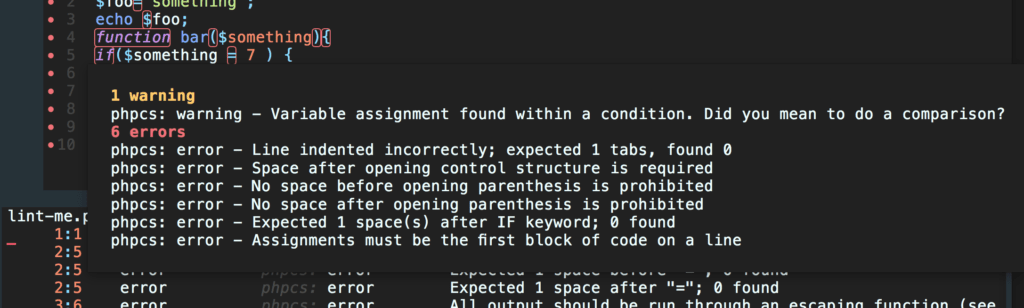
That’s an impressive number of errors for a 10 line php file 🙂 If you hover over any of the red dots you’ll see the detail of what the Linter found. For example, hovering over line 5 gives us 1 warning and 6 errors.
As we’ve configured phpbcf to run upon save, simply saving this file will instantly fix 15 of the errors!
How cool is that!
Now you’ll see phpbcf couldn’t fix everything – and that’s fine. A linter isn’t supposed to cut your dinner and eat it for you too. It’s there to help and support your own coding decisions. So to fix the remaining errors and warnings the Linter finds you’ll need to roll up your sleeves and fix ’em 🙂
Here’s a copy of the same file that I’ve now cleaned up and which passes our WordPress sniffs.
And that’s our PHP Linter fully setup and integrated with Sublime Text.
Don’t forget you can also deploy your sniffs in lots of different ways – not just within your text editor. Many teams choose to run their code through Linters as part of their code commits using Travis CI or Jenkins. Another great way to use phpcs is via a Gulp task. My personal preference is to catch things early in Sublime Text or simply via the terminal.
Now that we’re over the hump of getting our PHP Linter setup, let’s power on and get our Javascript linter rocking!
Step 3 – Setup Linting for Javascript and WordPress
The good news is that if you’ve already done all the hard work in Steps 1 and 2, this step is a doddle 🙂 If not, get back up to Steps 1 and 2 before proceeding!
Install ESLint
There are TONS of Javascript linters out there. At the time of writing a good portion of the world seems to have settled on the wonderful ESLint as the preferred choice so that’s what we’ll be setting up.
Fire up the terminal and bang in the following:
|
1 |
npm install -g eslint eslint-config-wordpress |
The above will install 2 Node.js packages we need for our Javascript Linter setup. We’re globally installing these as we’ll be using both across lots of WordPress projects. But equally you could just install these at a project level as follows:
|
1 2 |
npm install eslint --save-dev npm install eslint-config-wordpress --save-dev |
This will add both packages to your package.json file. To avoid having to hardcode absolute paths to global NPM package locations, I would recommend installing your NPM packages locally.
Install SublimeLinter ESLint Package
Next, we’ll install the SublimeLinter ESLint Package via Package Control just like we did with our earlier Sublime packages.
If you recall earlier, we added the following to our SublimeLinter settings.
|
1 2 3 |
"eslint": { "env": {"PATH":"~/.nvm/versions/node/v7.6.0/bin/"} } |
That basically means we’ve already configured SublimeLinter to work with ESLint. Paying it forward FTW!
Setup .eslintrc.js
For our PHP Linter we used a combo of a Sublime package and a phpcs.xml file. For our JS Linter, our config is managed via a .eslintrc.js file in the project root. For our projects we’ve settled on using a config which largely matches the amazing config from the WebDevStudios wd_s project. (Props to Greg Rickaby over at WDS for his brilliant post describing the Linting setup at WebDevStudios)
See your JS Linter in action!
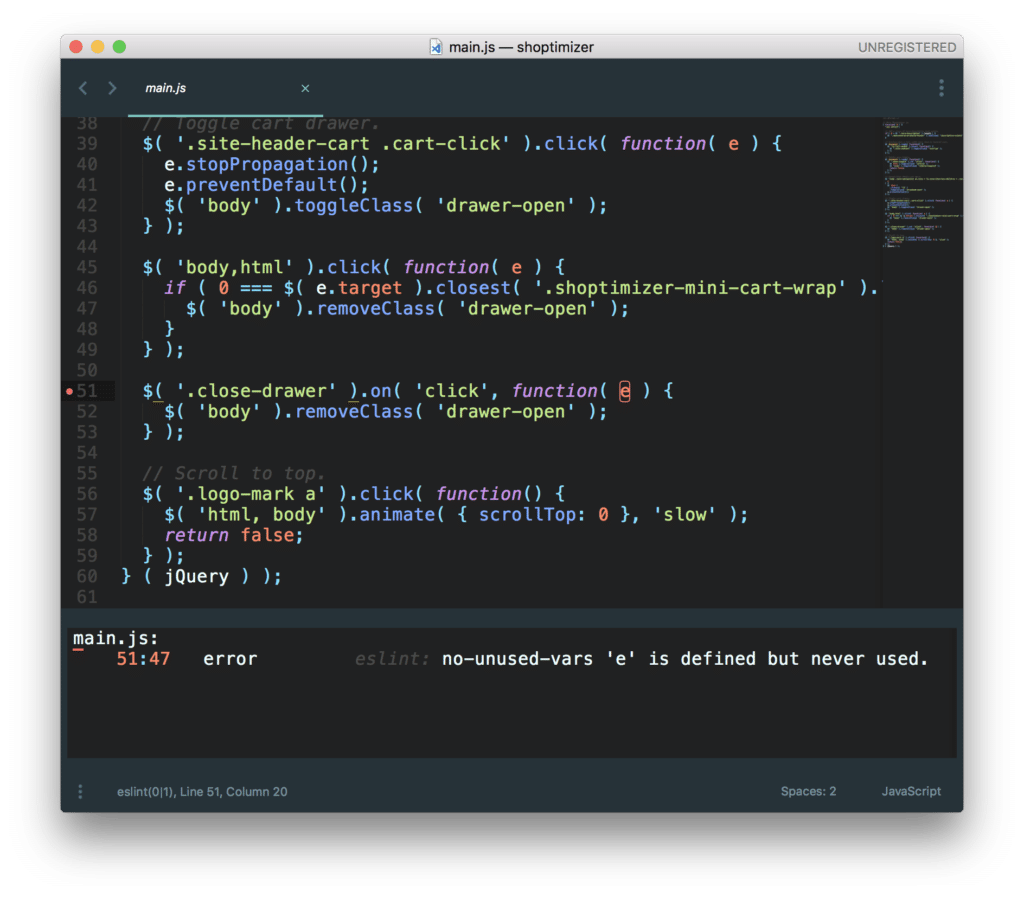
As before, SublimeLinter will use your Linter config to highlight in your editor any code standards violations. Go ahead and open any of your WordPress project js files. Here’s an example of an error in one of my files.
There’s no equivalent of phpbcf built into ESLint directly, but we do have the wonderful ESLint Formatter Sublime Text Package which does an awesome job at reading our .eslintrc.js and autofixing a ton of violations.
Go ahead and install the package and then head over to the ESLint Formatter settings.
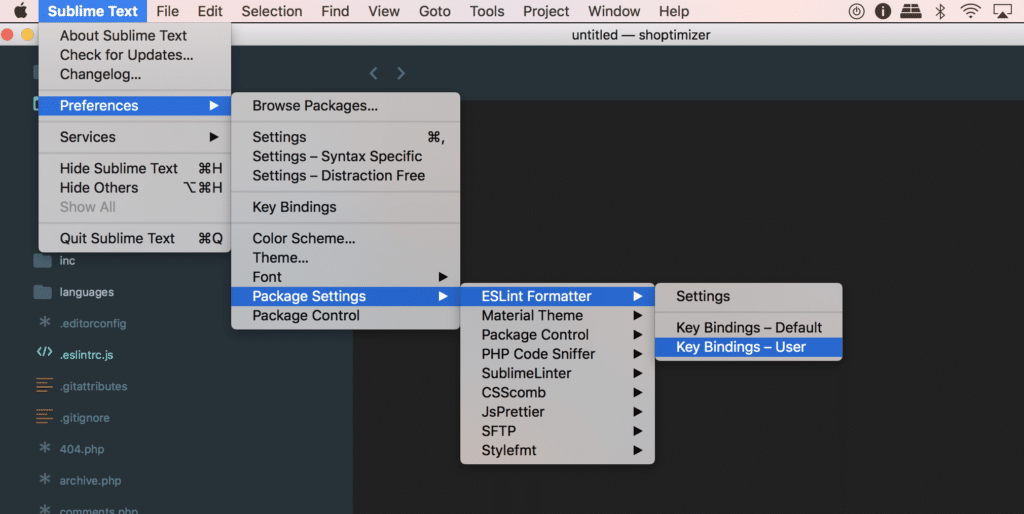
As before, I’ve uploaded a copy of my settings to Github.
Again, the main things to watch out for are your Node.js paths and the path to your ESLint install. (And watch those paths! Unlike SublimeLinter, ESLint Formatter expects the FULL path to both Node and ESLint as shown in my sample config).
You’ll also notice that the formatter will run on save just like our phpbcf config. ESLint Formatter will automatically look for your .eslintrc.js config so no need to explicitly reference it.
And that’s it! Your Javascript Linter now works just like your PHP Linter!
If anything ESLint Formatter does a better job at autofixing standards violations.
Step 4 – Setup Linting for CSS and SASS and WordPress
We’re now on to the final Step in our WordPress Linter setup!
Install stylelint
We’re going to install our main Style Linter, aptly named stylelint 🙂 Again there are tons of Linters for CSS/Sass/Less/CSSNext, but stylelint for me is the pick of the bunch. It’s made by the same people who make ESLint – and that’s enough for me.
If you’ve adopted SASS as your CSS pre-compiler you’ll want to check out sass-lint instead of stylelint.
Fire up the terminal and do:
|
1 |
npm install postcss stylelint stylelint-config-wordpress stylelint-order |
Install SublimeLinter-stylelint
Good news, this is the last Sublime Package you’ll need to install in this guide! Head over to Package Control and install it as normal.
This line should already be in your SublimeLinter config we added earlier:
|
1 2 3 |
"stylelint": { "env": {"PATH":"~/.nvm/versions/node/v7.6.0/bin/"} }, |
If so, you’re good to go!
Add a styelint config file
Your last step to get your CSS Linter up and running is to add a config file for stylelint to read.
There are a few accepted naming conventions for styelint config files, but we’ve settled on stylelint.config.js
You can download a typical one that we use in our projects over on Github. (Credit to Christoph Herr for the original )
This config file tells stylelint to load the WordPress ruleset, which is then extended to include rules for the ordering of properties which are not currently included in the main WordPress ruleset we installed earlier.
NOTE: If you’ve installed stylelint-config-wordpress and stylelint-order globally, you’ll need to ensure that the path in your stylelint.config.js file is the full absolute path to the package (i.e. something like /usr/local/lib/node_modules/stylelint-config-wordpress). If you’ve installed stylelint-config-wordpress and stylelint-order locally then the path included in our sample config is fine.
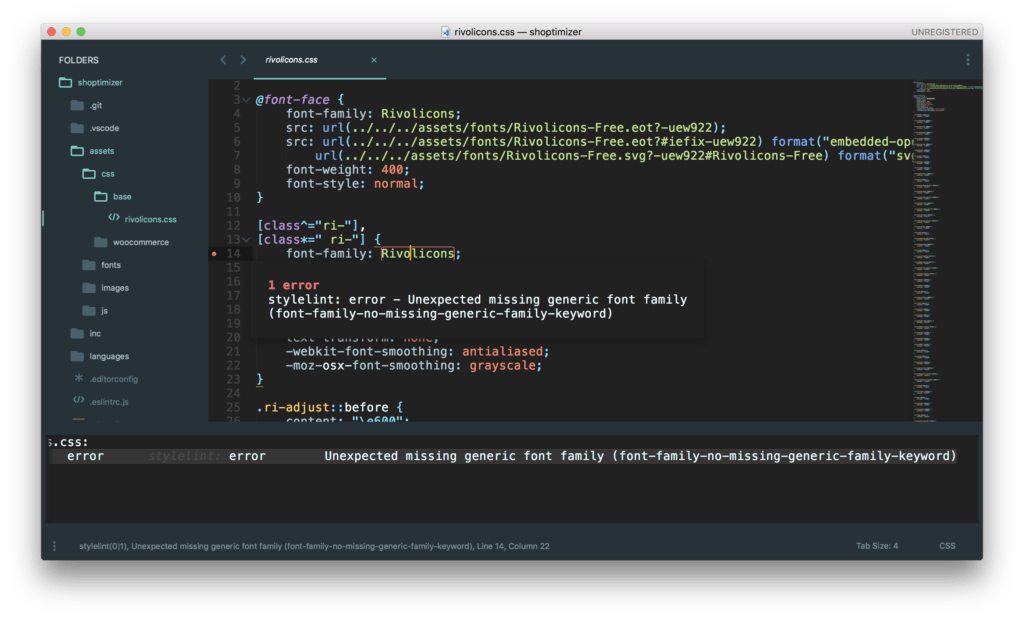
See your CSS Linter in action!
Just like our PHP and JS Linters, your CSS Linter should now run automatically when you open any of your CSS files in your WordPress project.
Autofixing CSS Coding Standards violations
You would think autofixing CSS Coding Standards violations would be just as simple if not simpler than Javascript violations. NOTHING could be further from the truth! After spending a ton of time experimenting with different linters and fixers I’ve settled on a workflow that I think works really well for WordPress projects. Let’s dive in.
Install Prettier
Prettier has taken the code formatting world by storm (if such a thing is possible!) since it first appeared in 2017. It has quickly been adopted by many modern frontend frameworks as the formatter of choice. But it’s greatest strength “it just works!” is also the cause of one of it’s biggest weaknesses – it is VERY opinionated. That would be fine if those opinions lined up nicely with the WordPress CSS Coding Standards – but alas, they don’t. Nevertheless, Prettier is so damn effective at formatting CSS files, we can’t ignore it. So we’re going to use it to catch most code formatting issues in our projects, and THEN we’ll run a stylelint --fix operation to bring things in line with our WordPress CSS Coding Standards.
(Sidenote: Pupils at the top of the class might notice that Automattic actually maintain a fork of Prettier for the Calypso projects that brings Prettier in line with the WordPress coding standards. While that is the case it didn’t work very well for me when it comes to CSS code formatting (i.e. it replaced all double quotes with single quotes which is the opposite of what is in the WP CSS Standards), so I believe the Automattic fork is more concerned with JS formatting).
To install Prettier globally, fire up the terminal and run:
|
1 |
npm install --global prettier |
Again, if you prefer a project specific install, go with this instead:
|
1 |
npm install --save-dev --save-exact prettier |
Install Prettier Sublime Text Package
To complement the Node package we also install the Prettier Sublime Text Package.
Then, head over to the Prettier package settings:
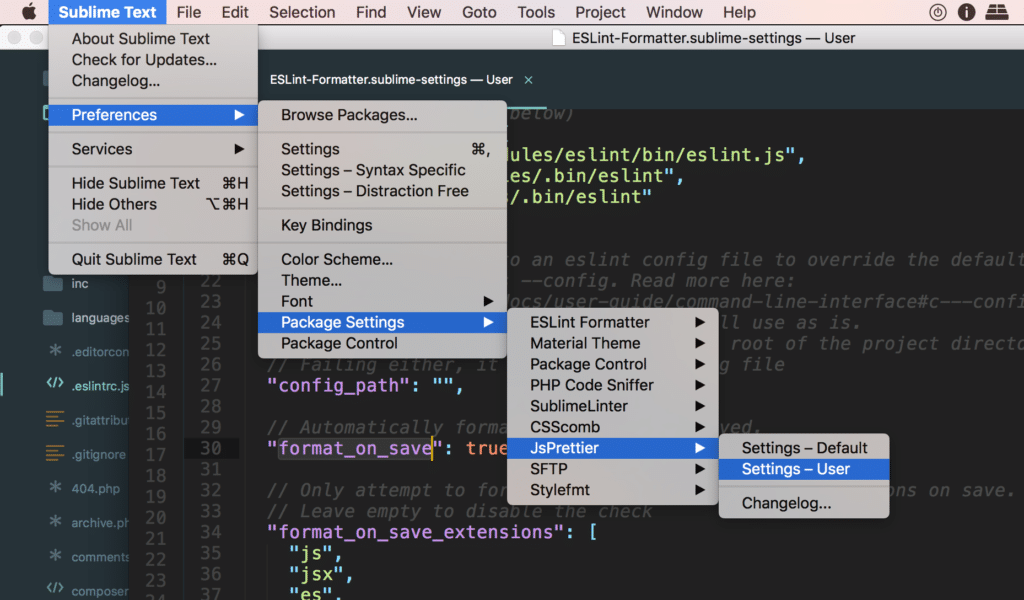
As is now customary, here’s my Prettier user config on Github 🙂
Again, we have a couple of paths to watch out for:
- prettier_cli_path – this should point to where ever you’ve chosen to install Prettier
- node_path – you know the drill with this one
- auto_format_on_save – this is set to false. You’ll recall with our previous fixers we’ve always set to them to true so that they run instantly each time we save a file. We’ve elected NOT to do that for Prettier and we’ll see why now.
Prettier + stylelint –fix = CSS Autofixing Dream Tag Team!
After spending a ton of time experimenting with different autofixing workflows and settling on the combo of Prettier and stylelint –fix, I discovered Chris over CSS Tricks came to the same conclusion.
Here’s the workflow I landed on – which is particularly useful if you’re going back over older projects that need some TLC to improve code quality:
- Step 1: Open CSS file, let stylelint do it’s thing to tell you how many errors your CSS has.
- Step 2: Manually run Prettier
- Step 3: Run a gulp task to run stylelint –fix (or run it via the command line)
Neither Prettier or stylelint on their own are good enough to do a really good job autofixing and formatting our CSS. But with their powers combined they end up doing a seriously good job at fixing your CSS.
To run Prettier manually in Sublime Text, open the command palette and start typing Prettier like this:
Prettier will do a really good job at removing a lot of the crap from your messier CSS files. But it won’t autofix WordPress specific rules like the use of Tabs vs. Spaces and other WP specific rules – which is why we need stylelint --fix to come behind Prettier to catch and enforce things Prettier misses or simply doesn’t care about.
For now, there’s no Sublime Text package available to run stylelint –fix upon saving a file, so you’ve 2 choices:
- run stylelint –fix via the terminal or,
- run it via Gulp task.
Running it via a Gulp task is awesome as you can create a watch task in Gulp which can run straight after you’ve run Prettier.
Setup Gulp to run stylelint –fix
First, you’ll need to install a few more Node.js packages.
|
1 |
npm install gulp gulp-cli gulp-stylelint |
Then, create a file in your project root called gulpfile.js and add the following:
|
1 2 3 4 5 6 7 8 9 10 11 12 13 14 15 16 17 18 19 20 21 22 23 24 25 |
/** @format */ const gulp = require( 'gulp' ); gulp.task( 'fix-css', function fixCssTask() { const gulpStylelint = require( 'gulp-stylelint' ); var paths = [ 'assets/css/**/*.css', 'style.css' ]; return gulp .src( paths, {base: './'} ) .pipe( gulpStylelint( { failAfterError: false, fix: true } ) ) .pipe( gulp.dest( './' ) ); } ); |
NOTE: You’ll want to tweak the paths to your CSS files to match with your project.
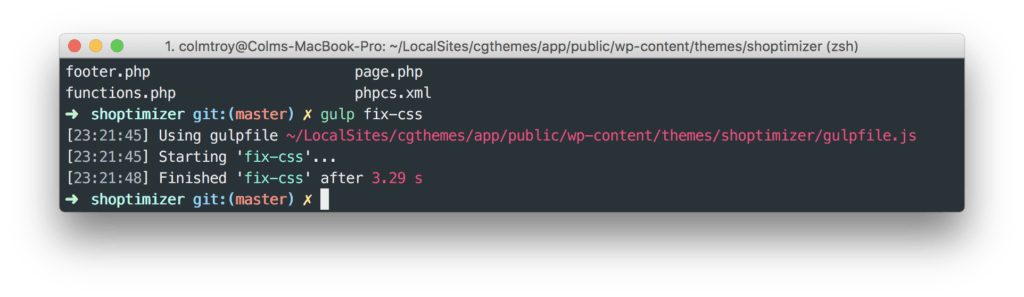
Now, jump back over to the terminal and run gulp fix-css
All going well, you should see something like this.
For now, I’m happy to run both formatters manually when I need them. But I could just as easily create a Gulp watch task to trigger the fix-css task any time my CSS files are saved.
And that’s your CSS Linter and Autofixer workflow setup 100% complete! Now you can sit back and marvel at how beautiful your CSS looks 🙂 Remember the formatters and autofixers won’t solve everything. You should still go through your CSS files manually and manually fix other issues detected by stylelint.
Wrapping things up
If you’ve made it this far give yourself a massive pat on the back! It’s sometimes difficult to justify taking the time to improve your development workflow but getting a reliable set of Linters up and running for your projects is one of the best investments you can make in your WordPress software development processes.
The obvious area we only skimmed over today was SASS and Linting for CSS Pre-processors. In fact, if you’re already a heavy SASS user, you may not be too concerned about Linting your CSS, but, for me that would be a mistake. Many WordPress projects inherit standalone CSS files from other sources that should be subject to the same level of code quality we apply to everything else. We plan on revisiting SASS Linters in the near future.
But for now, it’s time for you to get stuck into using your new arsenal of toys to significantly improve your code quality. As always, feel free to ask us any questions in the comments below.


This is a great tutorial!
Thanks Ricardo!
Hey,
This is an epic article. I’ve done all kinds of configuration on both linux and mac for my team and most of the steps I created in our documentation is on this page. The setup of PEAR and PHP_CodeSniffer on both linux and ESPECIALLY mac has been extremely difficult, and you covered it well in this article. Thanks for your work.
– Jim