


WordPress widget visibility is one of the main concerns we have when we think of meeting our websites’ functional and non-functional requirements. We want to make sure that the widgets we place help users find their way around the websites smoothly. Furthermore, we see to it that the widgets we add to every page and post have relevance to the main content. In addition, we don’t want widgets to overcrowd the pages or overshadow the main contents. In order to address these concerns, the key is to completely control widget visibility. Read on to find out how.

To completely control WordPress widget visibility means to choose a page, a post, or even a device where they should be shown or hidden. Choosing which widgets to appear on a certain page, post, or device is another concern you should address, but the main key factor is relevance. Once you decide which widgets are relevant to a specific page or post, you can now focus on managing their visibility. Sounds tiresome to just even think about it because of too much coding work? Well, not anymore. In this article, I’m going to show you how you can control WordPress widgets visibility using the all-in-one free plugin called Widget Options, which helps you get the job done with very minimal coding or none at all.
Control WordPress Widgets Visibility with Widget Options
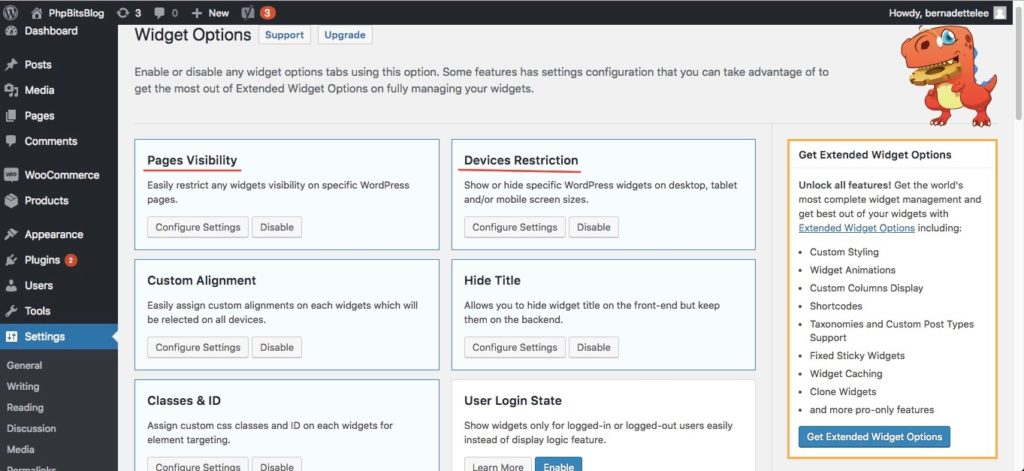
To get started, download Widget Options for FREE. Simply go to Plugins > Add New from your WordPress dashboard, and search for Widget Options, as shown on the image below. Make sure you activate it and see that the following features are enabled on the Settings page:
- Pages Visibility
- Device Restriction
The Steps
Control WordPress Widgets Visibility Per Page
You can hide or show widgets per page. To demo, I’m going to hide the Recent Comments widget from my blog page.
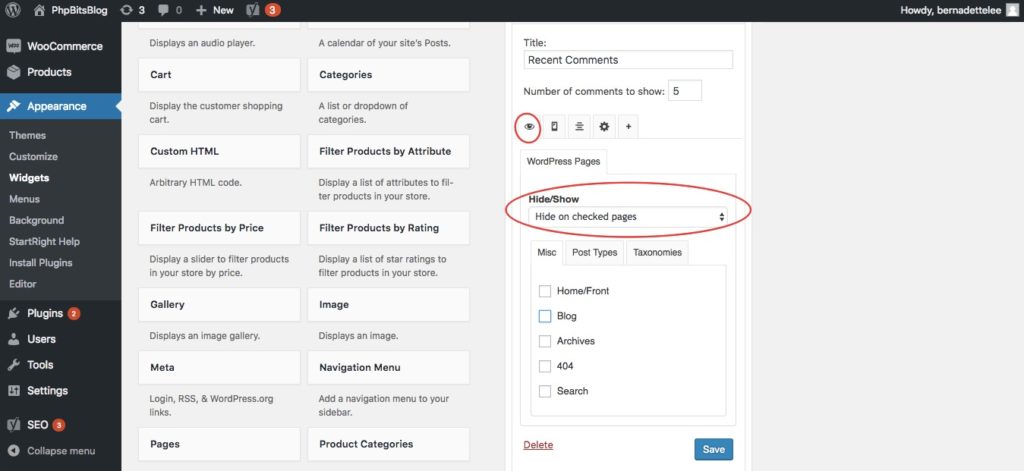
I go to Appearance > Widgets and look for my list of active widgets. I should be able to find the Recent Comment widget there and click on it to see the options. Here, it’s in the main sidebar.
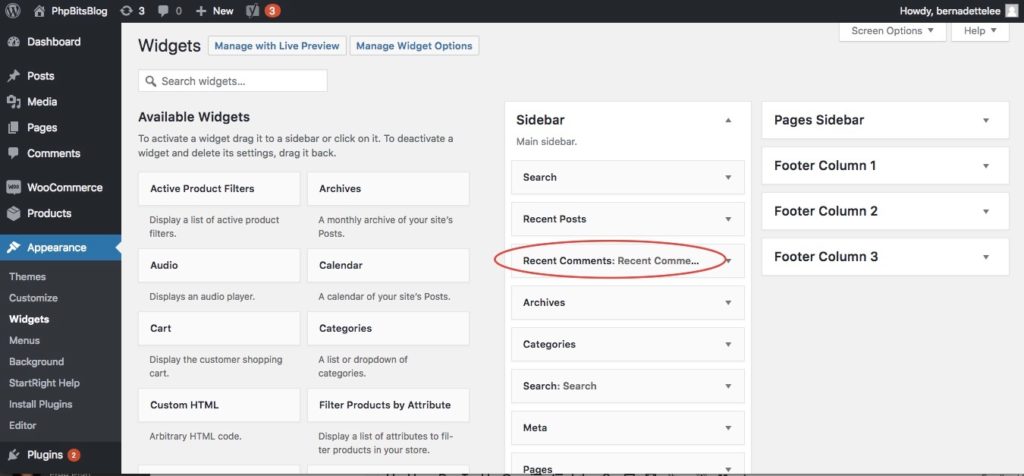
Note: The theme I am using for this demo is Create and Code’s “StartRight”. This theme allows for a lot of widget areas. Should you choose to place widgets in any of them besides the main and pages sidebars, the options to control widgets, including for page and post type visibility, are just the same.

Next, I click on the visibility tab and select “Hide on Checked Pages” from the Hide/Show menu.
Then, under the Miscellaneous tab, I tick the boxes next to Blog wherein I want the widget hidden from. Click the Save button.
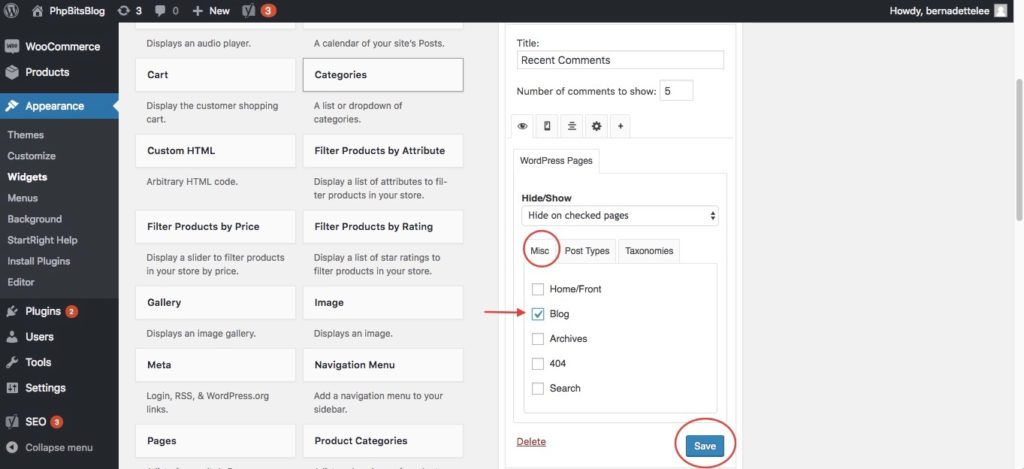
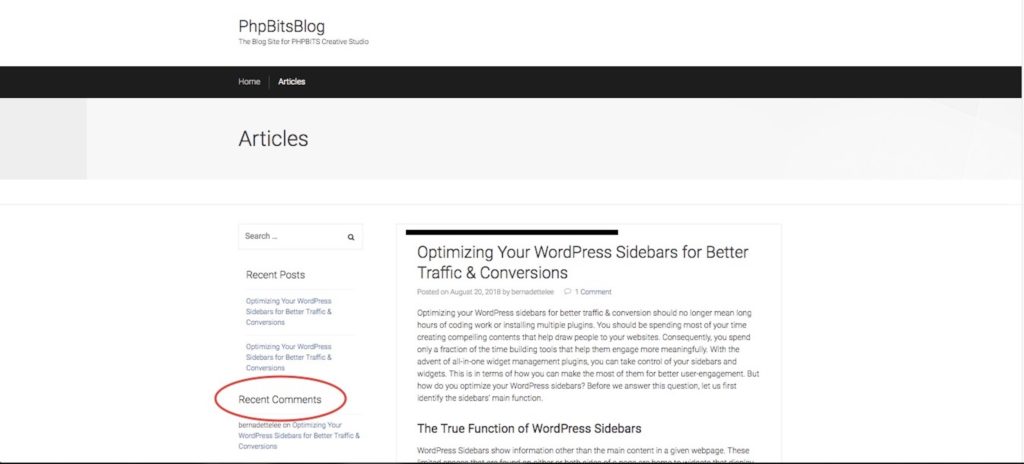
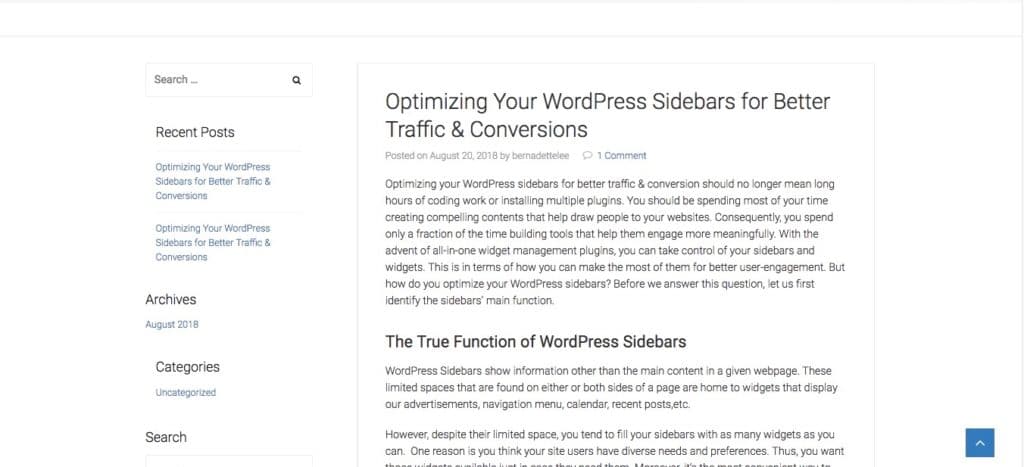
After clicking on the Save button, the Recent Comment widget should no longer be visible from that page.
Control WordPress Widgets Visibility Per Post Type
Now, let me walk you through the steps on how to show or hide a widget from certain posts. I am using the Recent Comments widget again. Here, I need two things:
- Post IDs
- Conditional Tags
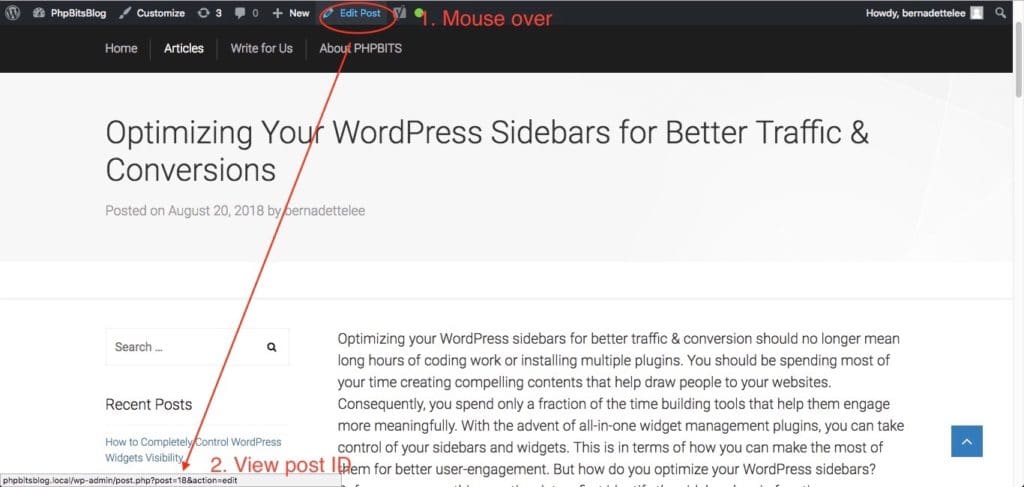
Get the Post IDs
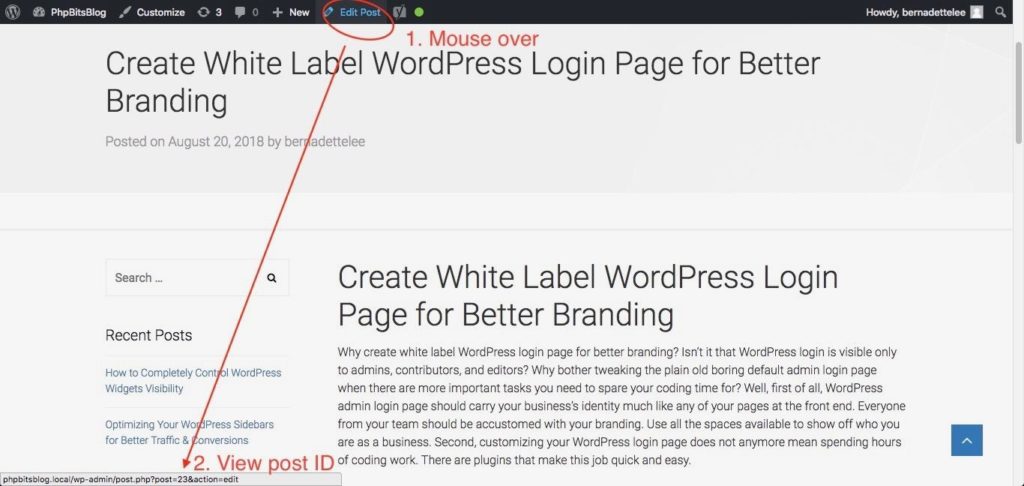
I can get the post IDs of the specific posts I want certain widgets to be visible (or hidden) from by doing the following:
- Go to the post’s page from your WordPress dashboard.
- Hover over the Edit Post link found at the top of the browser in order to reveal the Post ID at the bottom.
- Take note of it; then, repeat the steps for the other posts you want to work on, if there are any.
At this point, I already have the post IDs, so I can now go back to Appearance > Widgets. Same thing; I click on the Recent Comment widget to reveal the options.
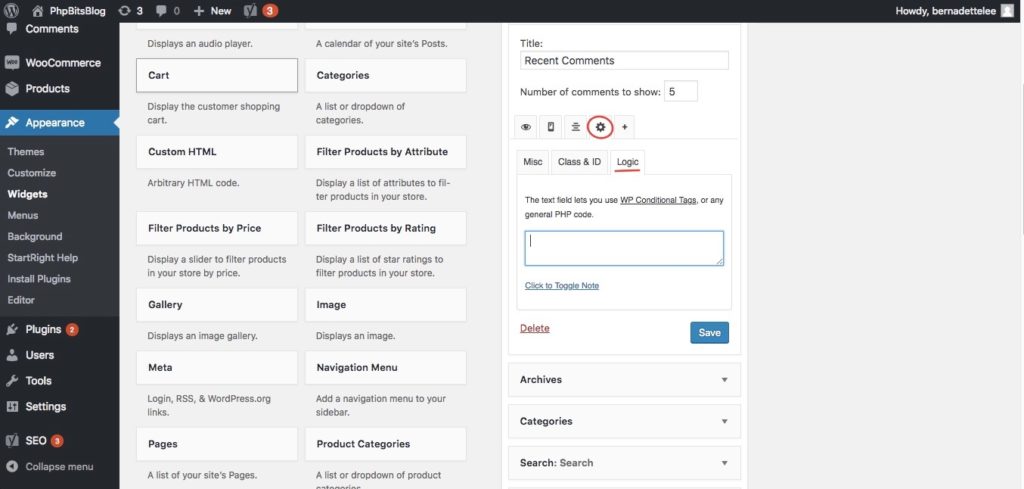
This time, I am using conditional tags. I click on the Logic tab under Class, ID & Logic. In the box, I type in one of the following:
to hide the widget from multiple posts:
!is_single(array(’18’, ’23’))
to show from multiple posts:
is_single(array(’18’, ’23’))
To hide and show widget on single post:
!is_single( ’18’ ) and is_single( ’23’ )
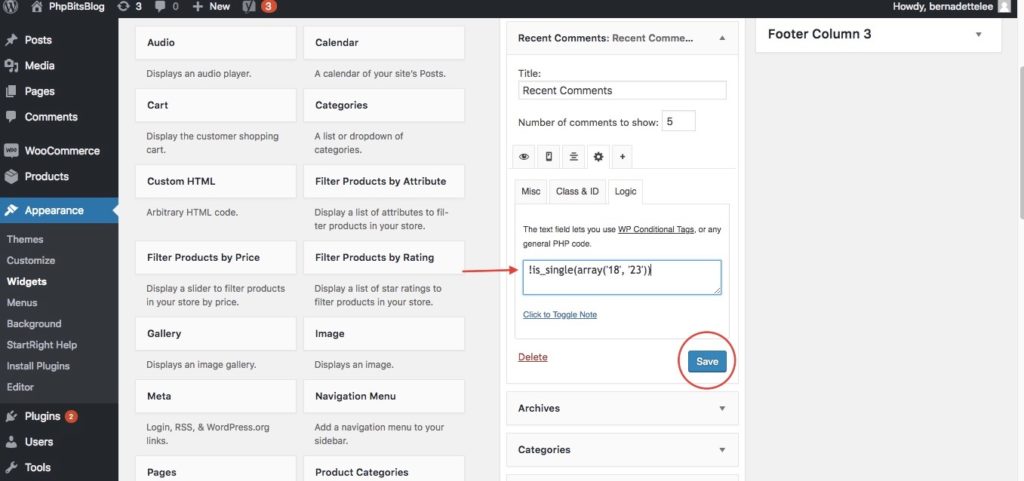
Notice that I place the post IDs into those conditional tags.
Lastly, I click the Save button and go to the front end to see that the Recent Comment widget is now gone from those posts.
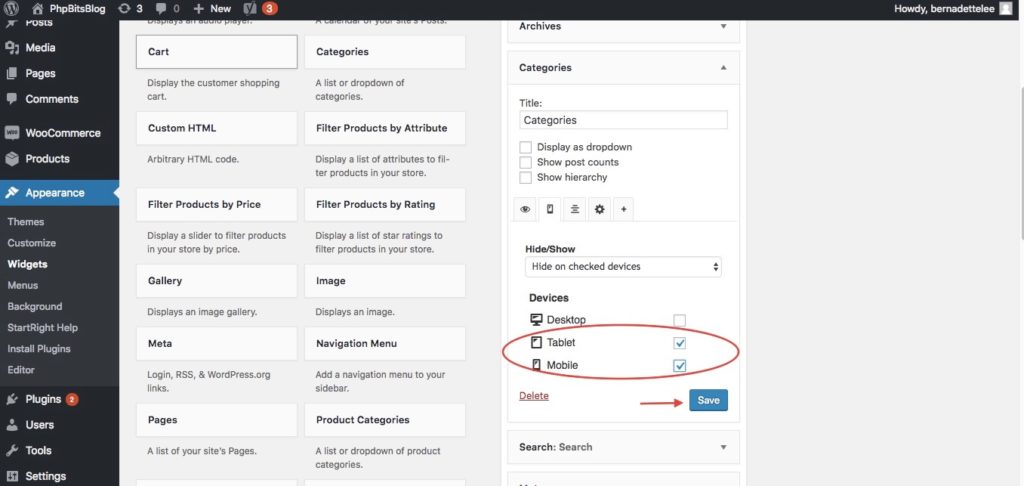
Restrict Widgets Visibility to Specific Device Types
One of the ways to make widgets easily accessible is to place them in more than one widget areas, such as the left and right sidebars, the header, and the footer. This way is very useful when you view pages on desktop screens. However, it may not be necessary in mobile devices, like smartphones and tablets which have relatively smaller screens. So you want to hide widgets from certain areas when on mobile view.
- From the list of active widgets, choose which one you want hidden from mobile view. I choose the Categories widget.
- Click on it to reveal the options; then, under Mobile Tab, select “Hide on Checked Devices” from the Hide/Show menu.
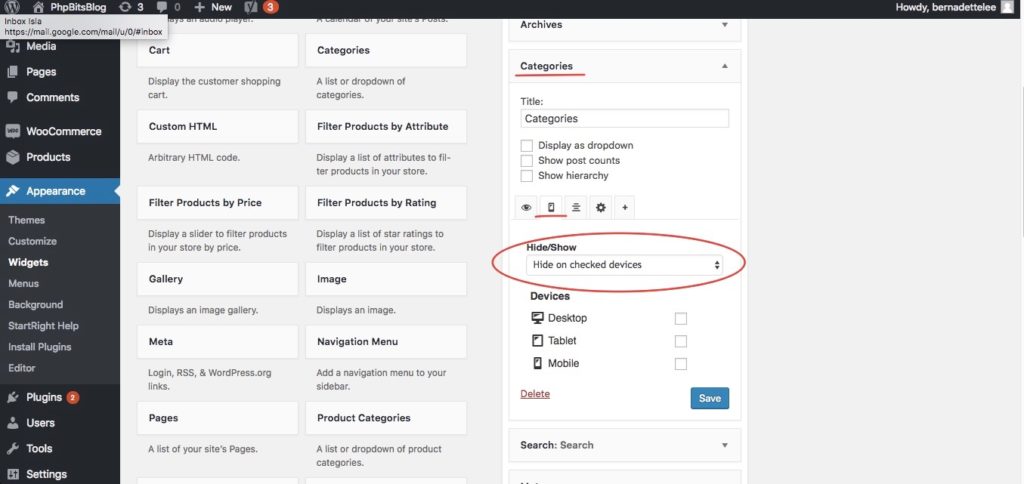
Finally, I check the boxes opposite Tablet and Mobile to hide this widget from those device types. Don’t forget to click the Save button before you check out if the change has taken effect.
Controlling WordPress widgets visibility has never been easier and quicker; hence, you can save more time for more important tasks, such as creating traffic-drawing contents for your dear customers or site visitors. Plus, making sure they have a pleasant experience exploring your website is always one of your top priorities, so the ability to make a thoughtful arrangement of all the elements, including widgets, is an advantage.
Thanks for reading! Please leave your comments below.