


Want to install Cloudflare on your WordPress site? Cloudflare offers a lot of benefits in one neat (and free) package.
Not only do you get a content delivery network to speed up global delivery of your assets, but you also get DNS management, DDoS protection, and lots of other security features that you can use to keep your site safe.

In this post, I’ll show you how to install Cloudflare on your WordPress site and then go through some additional WordPress-specific configurations at Cloudflare to create the optimal partnership.
But First…Do You Even Need To Follow This Guide?
Ok – it might seem kind of silly to tell you that you don’t need this guide. But some WordPress hosts have actually partnered with Cloudflare to make it stupid simple to install Cloudflare.
So…before you start following this Cloudflare tutorial, it pays to take a quick peek at your host’s support docs or ask your host’s support about a special Cloudflare feature.
For example, in my SiteGround cPanel, I can turn on Cloudflare just by clicking a single button:
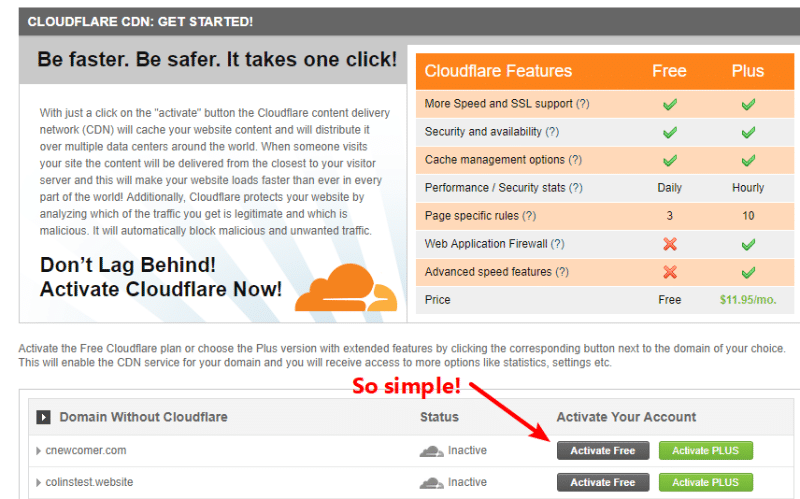
While the process of manually installing Cloudflare on your WordPress site is still pretty simple, nothing beats a single button click!
No luck? If you determined that you’ll need to manually install Cloudflare on your WordPress site, here’s how to do it!
How To Install Cloudflare On WordPress: The Setup
I’ll break this guide into two parts:
- The basic setup to get your site connected to Cloudflare
- The extra configuration steps that you should take to optimize Cloudflare for your WordPress site
Let’s cover the basic install…
Step 1: Create An Account At Cloudflare
To get started, head to Cloudflare and create a new account. Once you sign up, Cloudflare should take you straight to the Add your site interface.
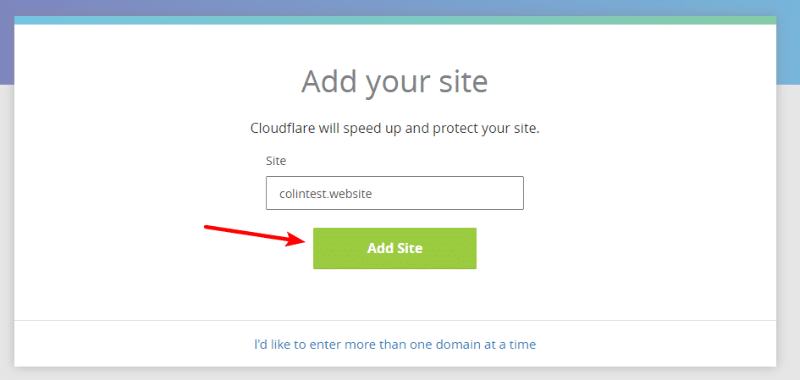
Step 2: Add Your Site To Cloudflare
To add your site, enter your domain name in the box and click Add Site:
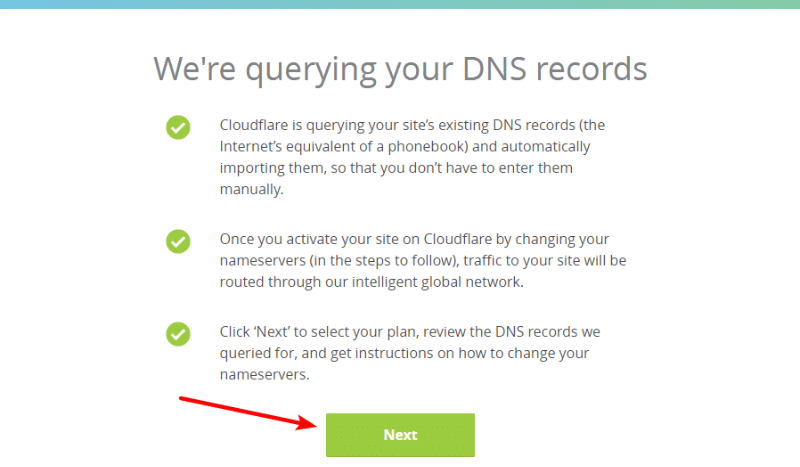
Cloudflare will then automatically query your DNS records. If you’re confused about what that means, Cloudflare provides you with a nice little explanation. Once you’re satisfied with the explanation, go ahead and click Next:
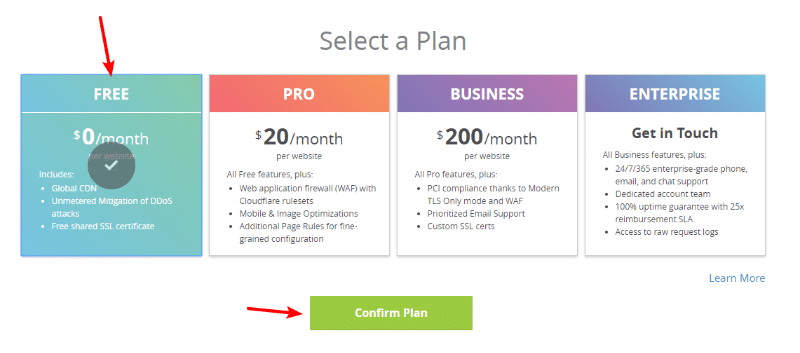
Cloudflare will try to upsell you to its paid plans. But for now, you’re totally fine to stick with the free plan. You can always change later if you want:
Step 3: Verify Your DNS Records
Once you’ve confirmed your plan, Cloudflare will ask you to verify your DNS records.
If you’re not a developer, this might be confusing as all get out. Don’t worry, though. There’s an easy trick – just make sure that you see the orange icon next to your primary domain name*.
It should be like that already without you needing to take any action:
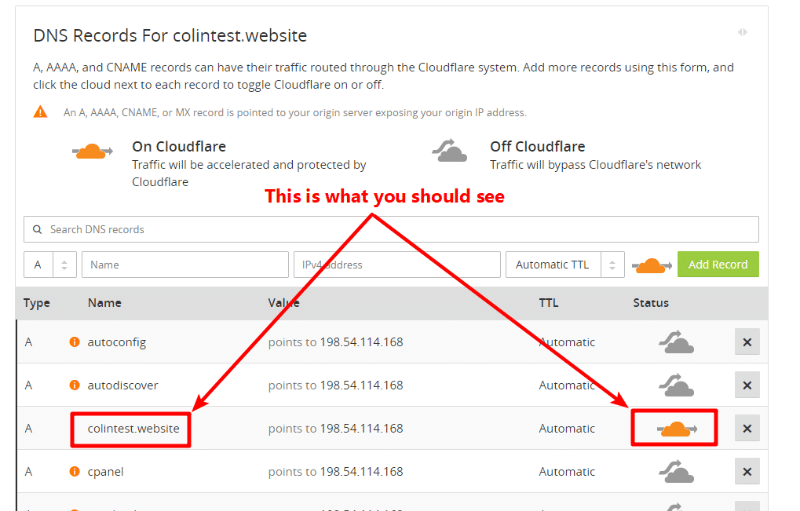
Once you verify that everything looks how it should, click Continue at the bottom.
*While there are some more complicated situations, you probably already know what you’re doing if you’re going to encounter them, which is why I feel fine simplifying it like this.
Step 4: Change Your Nameservers To Point To Cloudflare
Here’s where things get a little trickier. Now, you need to change your domain’s nameservers to point to Cloudflare’s nameservers so that Cloudflare can manage everything at a DNS level.
You can see your current nameservers on the left, and Cloudflare’s on the right:
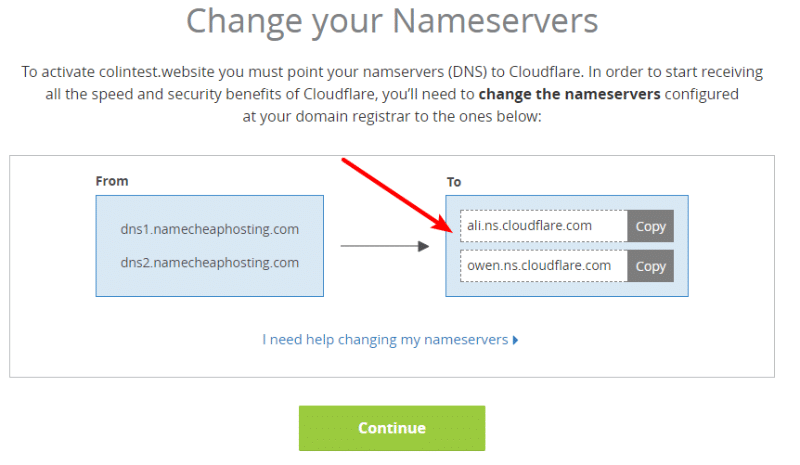
You’ll need to do this at the place where you registered your domain name. This could be a domain name registrar like GoDaddy or Namecheap. Or, it could be your actual host.
If you need help, try clicking the I need help changing my nameservers link in the Cloudflare interface or ask your host’s support for help.
Once you’ve changed your nameservers, go ahead and click Continue.
It might take some time for your new nameservers to take effect (up to 24 hours). Until they do, you’ll see something like this:
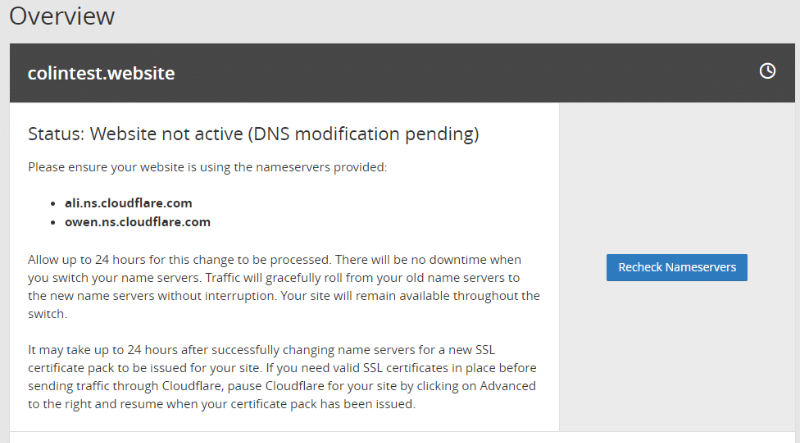
Don’t worry, though. Even if the Cloudflare interface hasn’t updated, your site won’t experience any downtime.
Once the change goes through, the interface will switch to this:
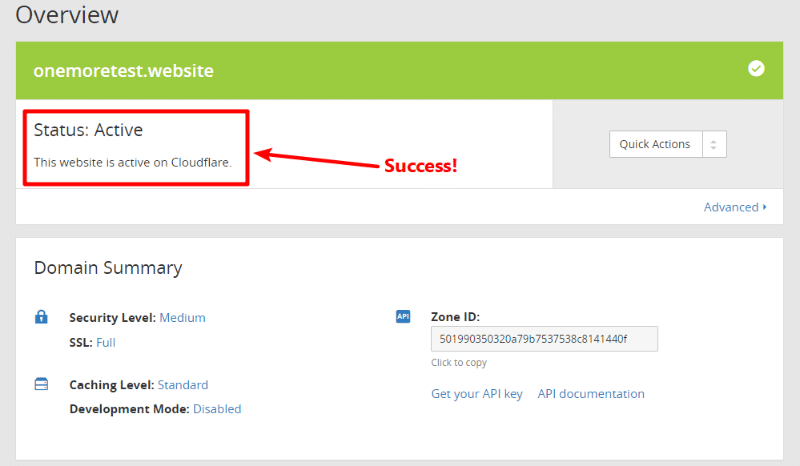
And that’s it for the basic Cloudflare configuration process!
Now, let’s jump into some specific configurations that you should set up to make sure everything works right with your WordPress site.
Configure Cloudflare Settings To Play Nice With WordPress
Cloudflare includes a dedicated WordPress plugin that will set you up with a pretty good baseline of settings.
If you’re using a caching plugin like WP Rocket or W3 Total Cache, both of those also include dedicated Cloudflare integrations that can help you do the same.
I’ll show you how to use the official plugin, though.
Install And Activate Official Cloudflare Plugin
*You don’t need to use the plugin. You can make all of these changes through the Cloudflare dashboard as well. The plugin just greatly simplifies the process and lets you manage Cloudflare settings via your WordPress dashboard, which is convenient.
Cloudflare’s plugin is listed at WordPress.org, so you can install it right from your dashboard like any other plugin.
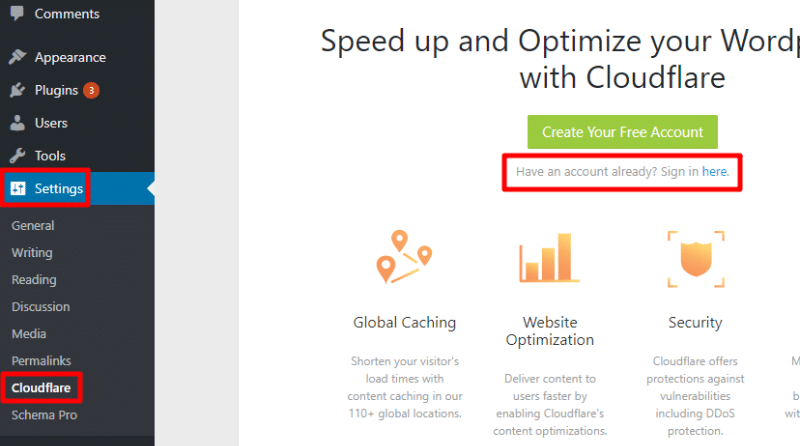
Once you activate it, go to Settings → Cloudflare and click the link to sign in to your account:
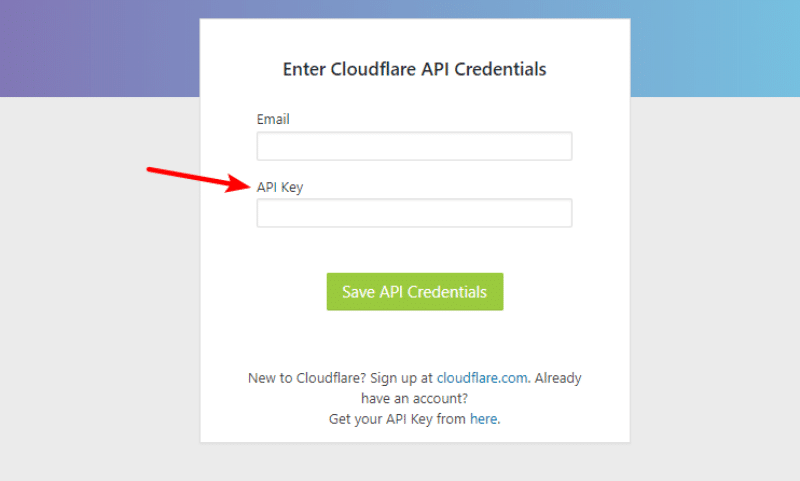
In addition to your email address, you’ll also need to enter your API Key on the next page:
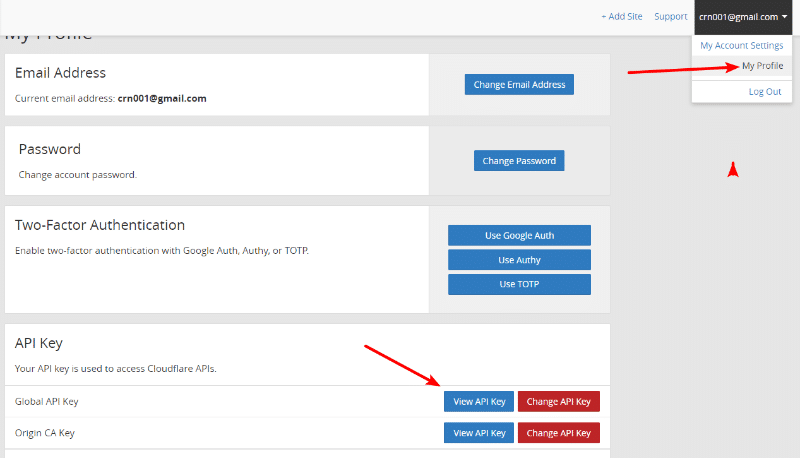
To find your Cloudflare API key, go to your profile page by clicking on your email in the top-right of the Cloudflare dashboard (or click here to go straight there).
Then, look for the API Key section and click View API Key next to Global API Key:
Copy that value and paste it into the plugin’s interface. Then, click Save API Credentials.
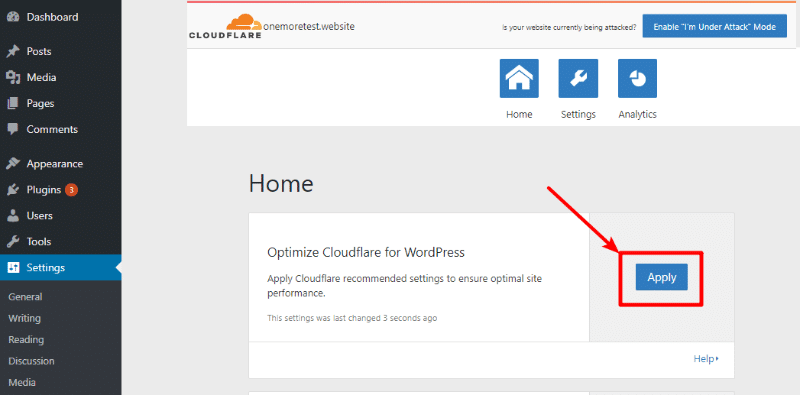
Once you save them, you should unlock the entire Cloudflare plugin interface. To quickly make all the recommended tweaks, just hit the Apply button next to Optimize Cloudflare for WordPress:
Configure WordPress-specific Page Rules
Almost done! Now, you just need to configure a few page rules to control how Cloudflare works with your WordPress site.
Page rules let you tell Cloudflare to perform specific actions for specific parts of your site. Generally, you’ll want to:
- Add extra security to your login page
- Exclude your wp-admin area from Cloudflare caching to avoid any potential issues
- Force HTTPS (only if you’re using HTTPS)
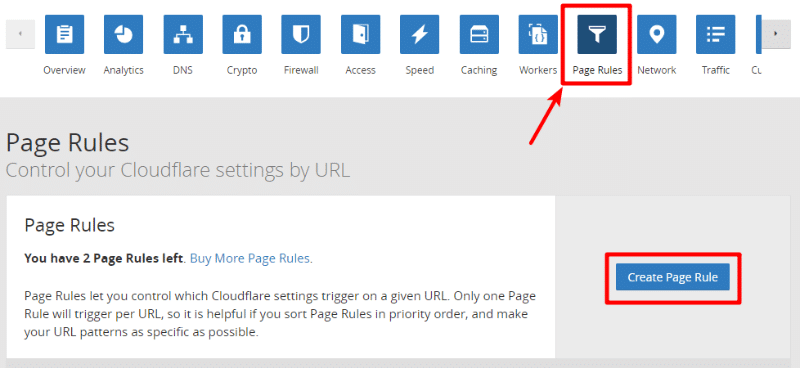
To access page rules, go to the Page Rules tab in the Cloudflare dashboard and click Create page Rule:
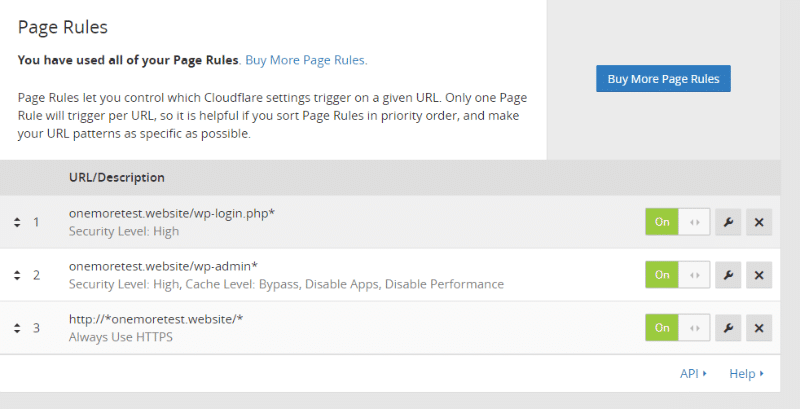
Set up three rules according to the below settings for:
http://*yourwebsite.com/*- Always use HTTPS
yourwebsite.com.com/wp-login.php*- Security Level: High
yourwebsite.com/wp-admin*- Security Level: High
- Cache Level: Bypass
- Disable Performance
- Disable Apps
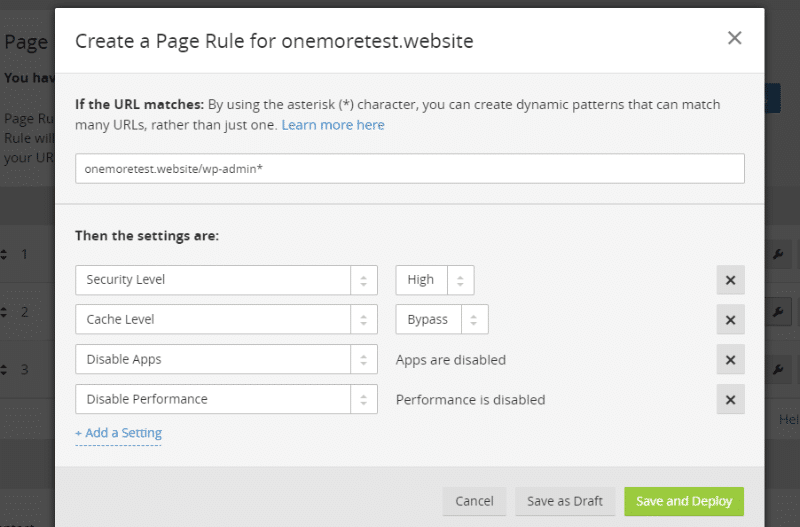
For example, here’s what it looks like to set up the page rules for your wp-admin area:
You can also watch this video for more information (starting at 2:50):
There are plenty of other cool things you can do with page rules and WordPress. But Cloudflare’s free plan only lets you create three page rules, so you’re full up for now!
Other Considerations For Using Cloudflare On WordPress
At this point, you’re pretty much done. There are just a few additional things to consider:
- If you already have SSL on your site, make sure to choose Full SSL instead of Flexible SSL in the Crypto tab at Cloudflare. Otherwise, you might run into the ERR_TOO_MANY_REDIRECTS issue.
- If you’re already using a plugin that minifies your site’s code, you might want to disable Cloudflare’s minification in the Speed tab (or consider disabling the plugin).
And that’s it! You should now be all set up to have your site’s performance and security boosted by Cloudflare.
If you have any other questions about how to install Cloudflare on WordPress, leave a comment and we’ll try to help you out!


Hey Colin! Thanks for doing this writeup. I’ve been looking for these settings everywhere, hoping they’ll solve some of the issues we’re having on a woocommerce setup. Apparently logged in customers have an issue where caching causes problems, and cloudflare’s official solution is to upgrade your plan to the $200 a month plan… :/ Not cool, guys, not cool. Hope this works to solve it instead!
Thanks for the article, it is the most detailed guide on this topic I’v seen.
Though, have you noticed the official Cloudflare plugin doesn’t update for more than 1 year, which people say got a ton of bugs, I want to use cloudflare only because it has CDN feature, but afraid the plugin will break my site, that’s why I am still hang in there, with too many negative reviews, I am scared to install the plugin, its a pain.
And more important, a lot of stuff and setting involved in cloudflare, I have no knowledge on this thing, so double scared me.
Super helpful, thanks! 🙌 This clarified several concerns/issues I’ve had with Cloudflare.
Great tutorial, thanks! I’ve had a few DDoS this year so am considering switching to Cloudflare. If (when) I switch, should still continue to use other protective plugins from within WordPress like Akismet Anti-Spam, iThemes Security, or certain options in Jetpack (like “Brute force attack protection”)?
I would us BBQ and Wordfence Security. That should cover all of your bases.
Fantastic article!! Question. You had mentioned to get both BBQ and Wordfence. Aren’t these both firewalls? Does one negate the other? Just wondering. Thanks again!
can you please tell me can I use Free cloudflare plan as CDN CNAME for WP Rocket CDN ? If yes, how can I retrieve this CNAME within the free plan? Thanks
Hello! All this done but I get error 525 SSL handshake failed. With a few options like disabling full setup on SSL/TPS
Great work, Colin. I have found your guideline on installing Cloudflare very much informative and helpful. It has helped me a lot during installing Cloudflare on my WordPress site. Thanks for this great post.