If there’s one thing that WordPress users seem to universally love, it’s WordPress slider plugins. Two of the top four best-selling plugins at Code Canyon are, you guessed it, slider plugins.
This fascination has led to the bundling of Slider Revolution with pretty much every theme for sale at Theme Forest. But Slider Revolution and Layer Slider (#4 at Code Canyon), are far from your only options for creating sliders for your WordPress site.

Smart Slider offers a user friendly, well-designed slider experience. And in my Smart Slider review, I’ll take a deeper look at this freemium slider plugin and see if it can go toe-to-toe with the big names.
Smart Slider Review: The Feature List
Ok, I kind of set this as a David vs. Goliath story. But Smart Slider isn’t actually an upstart – the free version of its plugin has over 100,000 active installs at wordpress.org. Over all those active installs, it’s also managed to maintain an impressive 5-star rating on over 285 different reviews.
So what are the features that make people love Smart Slider so much?
First up, you get drag and drop “slide building”. You can manipulate different layers with drag and drop and then easily arrange them into rows and columns. It’s like a page builder…but for slides in your slider. If you love page builders like Elementor, you’ll feel right at home when building your slides.
That user friendliness is a big reason behind the plugin’s success. You don’t need to be a developer to create great-looking sliders.
Beyond that main driver, it also includes features like:
- 6 different layer types – image, heading, text, button, Vimeo, YouTube (more in the Pro version)
- Easy font and style management
- Background animation
- Dynamic slides based on WordPress posts (many more sources in the Pro version)
You can also use pre-made slide templates courtesy of the included slide library, though the free version only gives you a small taste of the available templates.
And because of the prevalence of mobile and tablets in the modern world, all of the sliders that you create with Smart Slider are both responsive and touch friendly.
Ok – so pretty cool feature list…but does it actually work as well in practice as it looks in the marketing copy?
Let’s find out…
Hands-on Smart Slider Review: Let’s Check It Out
Alright, I’ve installed the free version of Smart Slider on my test site. Let’s give it a run-through and see how it performs.
When you activate the plugin, you get a new Smart Slider tab in your WordPress dashboard. This is where you’ll manage all of your sliders.
One nice thing is that they give you a video tutorial front and center so that you can quickly get up and running:
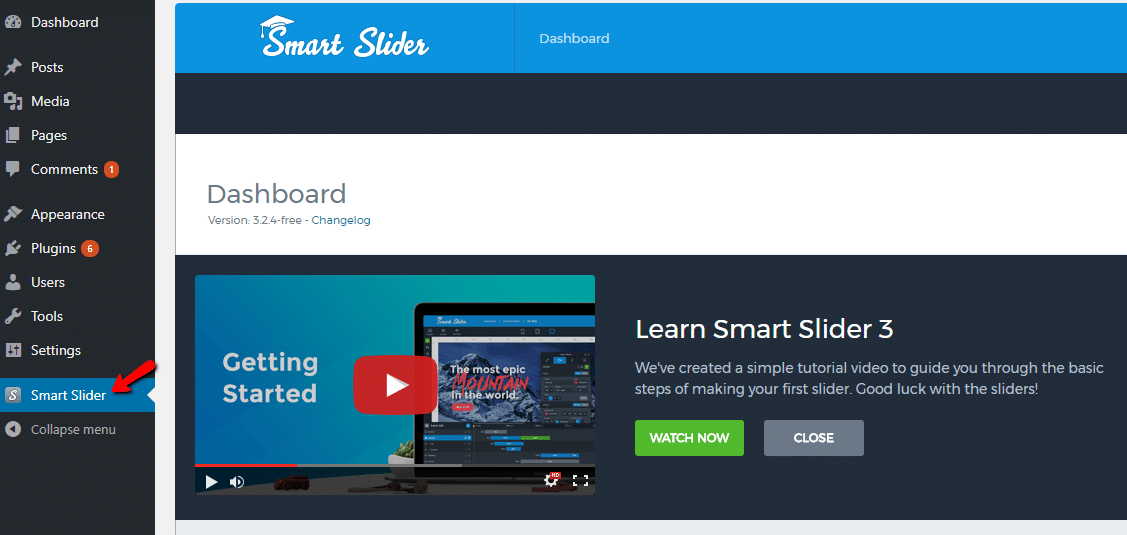
If you’re an experienced WordPress user, you probably won’t need this tutorial as the plugin is pretty intuitive. But for beginners, making help documentation easily available is a nice thing.
You’ll find multiple incarnations of these videos throughout the product, with each one explaining the specific page that it’s on.
Creating a New Slider With Smart Slider
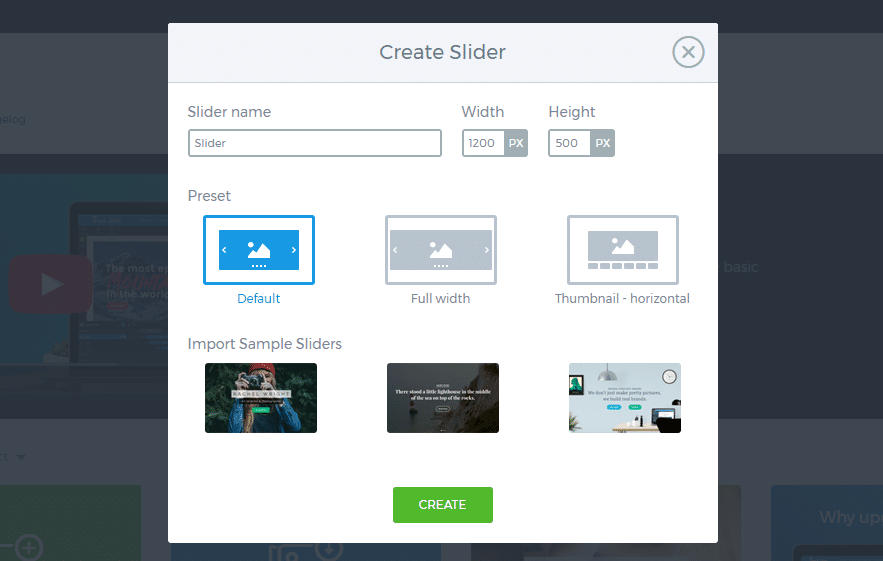
To get started with a new slider, all you need to do is click on the Add Slider button.
Then, you can configure some basic settings and/or import sample sliders from the slider library if you so desire:
From there, the plugin throws you into the Slider editing interface. You have two options to add slides:
- New Slide – creates a new slide from a blank canvas, image, video, or post.
- Slide Library – creates a slide from a pre-built template that you can edit as needed.
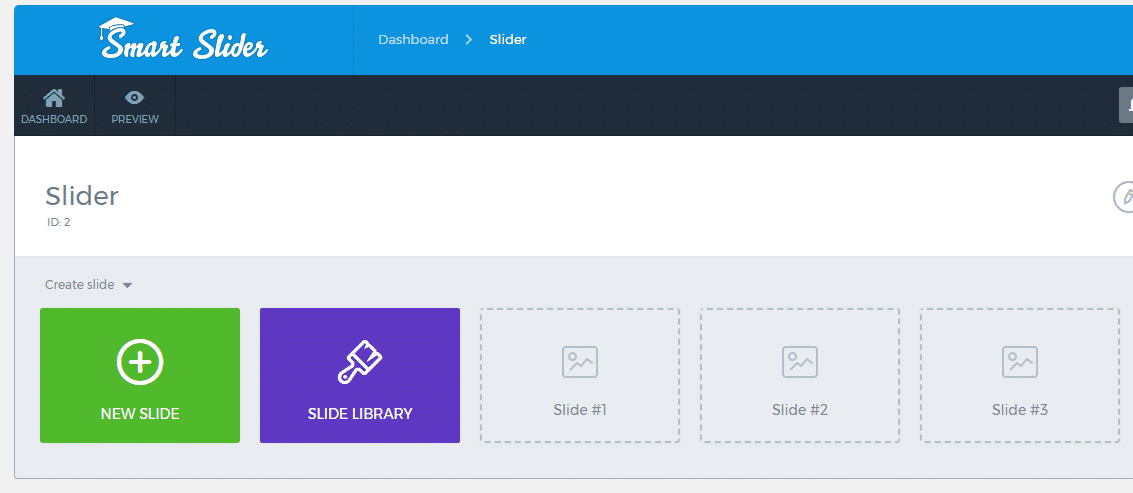
What’s cool is that if you’re using images from your computer, you can literally just drag and drop them onto the Smart Slider interface – no need to use the regular WordPress media library upload process. It’s a small thing, but it’s enjoyably user friendly.
Editing Individual Slides With Smart Slider
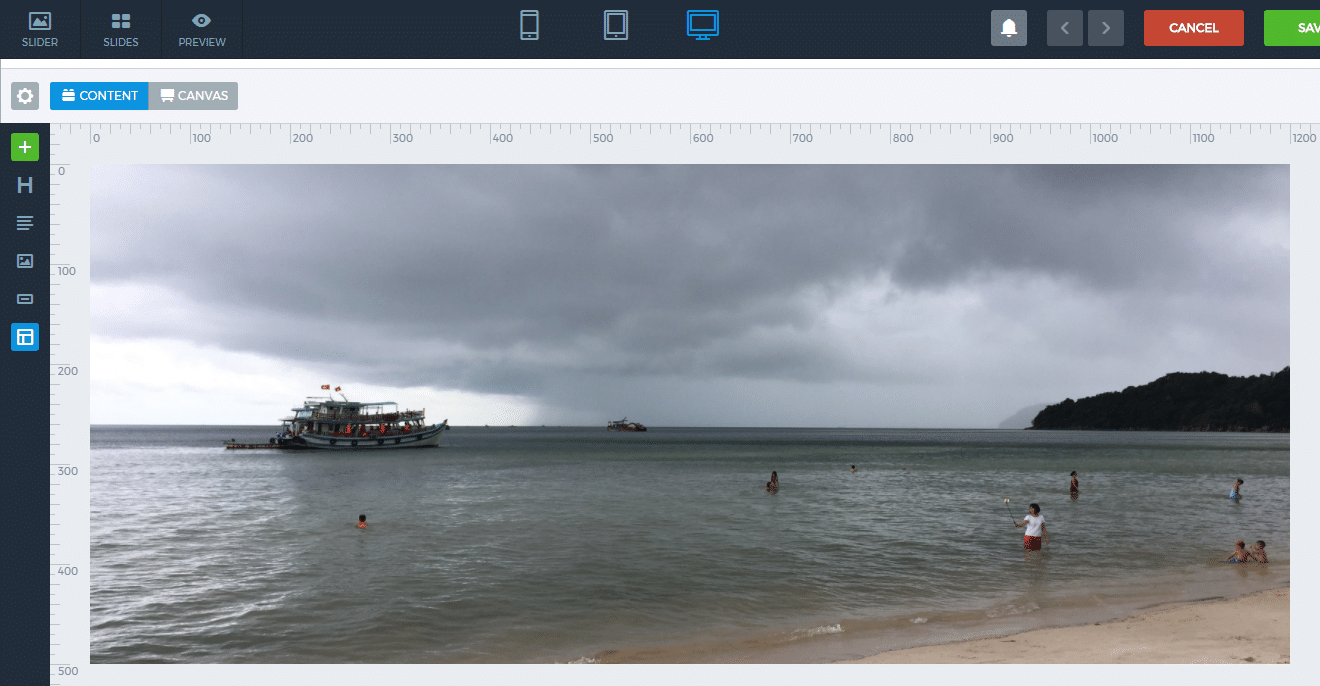
No matter how you’re creating slides, you can always go in and edit them with the drag and drop editor that’s included in the plugin.
For example, here’s a slide that’s created from an image that I uploaded:
If you wanted to add a bit of heading text to the slide, all you’d need to do is drag over the Heading element from the left sidebar. Then, you can edit the text and customize its functionality and style as needed:
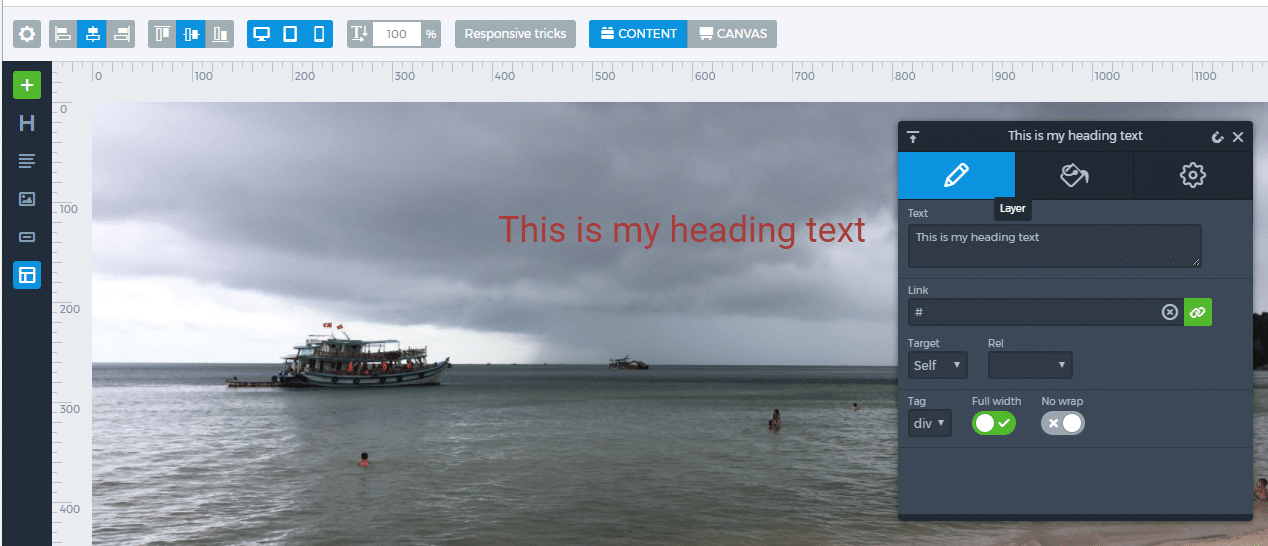
Not only is this interface super easy to use, it’s also pretty deep in functionality. Beyond the basic elements of:
- Heading
- Text
- Images
- Buttons
You can also go deep into styling, positioning, and responsive design.
Other settings include background animation, two different editing modes, and other helpful tools.
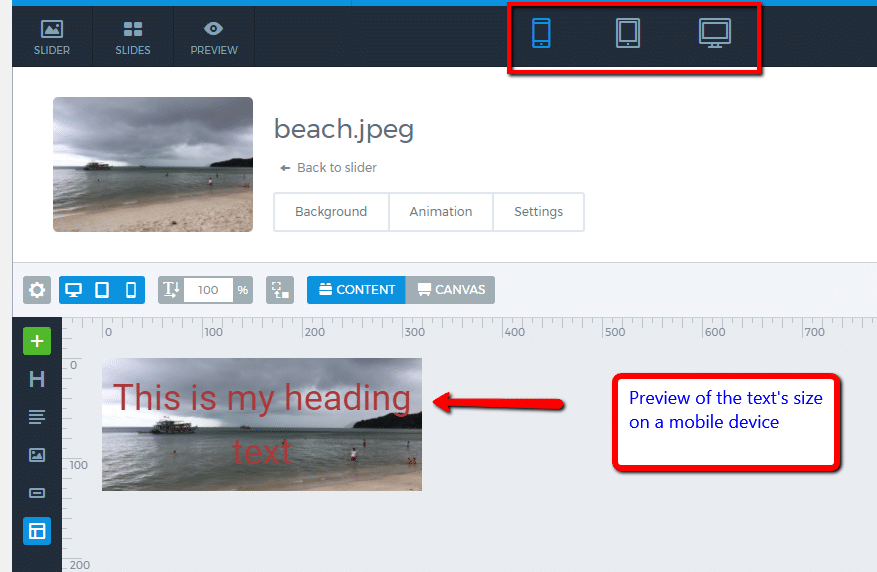
One final neat thing is that you can instantly switch between previews for:
- Desktop
- Tablet
- Mobile
This makes it super easy to see how your slide’s design will look on different devices.
Inserting Pre-made Slides from the Template Library
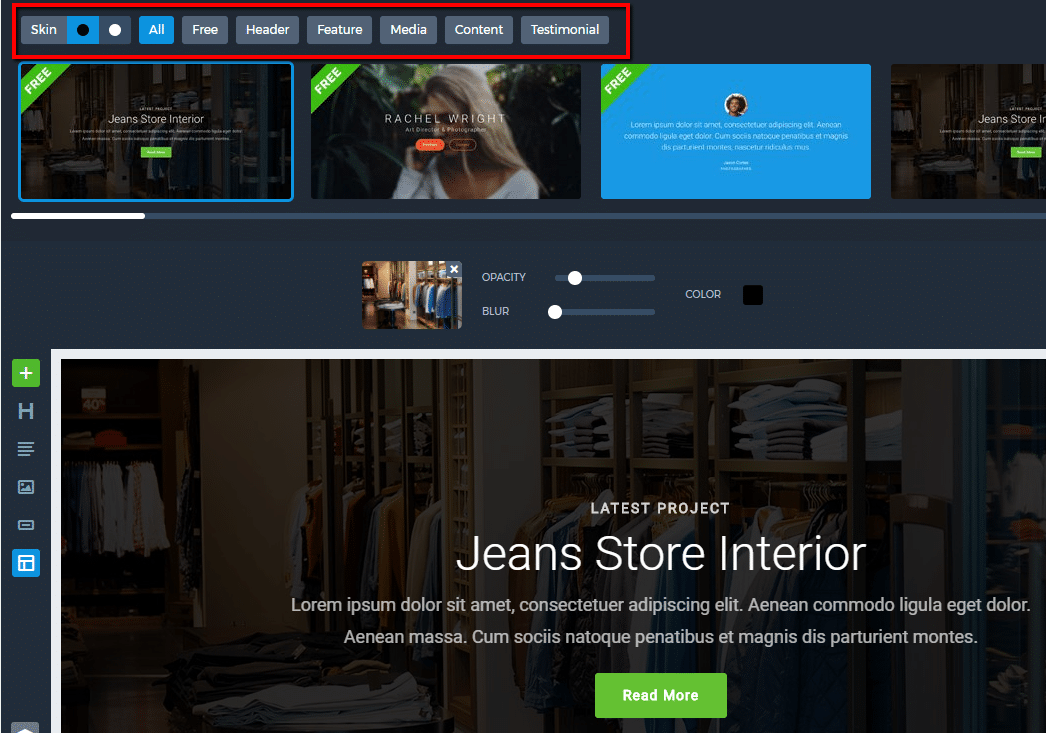
If you’re a horrible designer like I am, you might opt to insert pre-made slides instead of trying to build your own from scratch.
If you go that route, you can search from a variety of well-made slides, each divided into different categories. Many of these are only available in the pro version, though. There are only 6 pre-made slides available in the free version.
Once you pick a pre-made slide, you can further edit it using the same interface that I just outlined above:
Configuring General Slider Settings
Once you’re happy with your slides, you can configure some more general settings for your slider.
First up, you can configure some backend functionality for the whole slider like:
- Size and responsive settings
- Animation
- Performance optimization
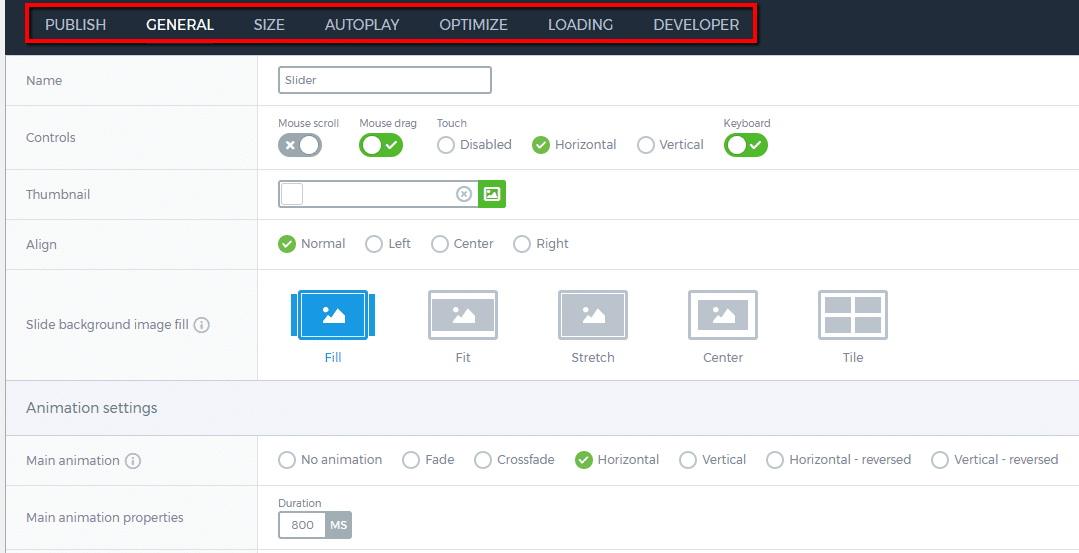
Further down the page, you can configure more general stylistic settings. Across the array of tabs, you can choose:
- Arrow styles
- Bullets
- Autoplay design
- Text bar over slides
- Thumbnails at bottom
- Shadows
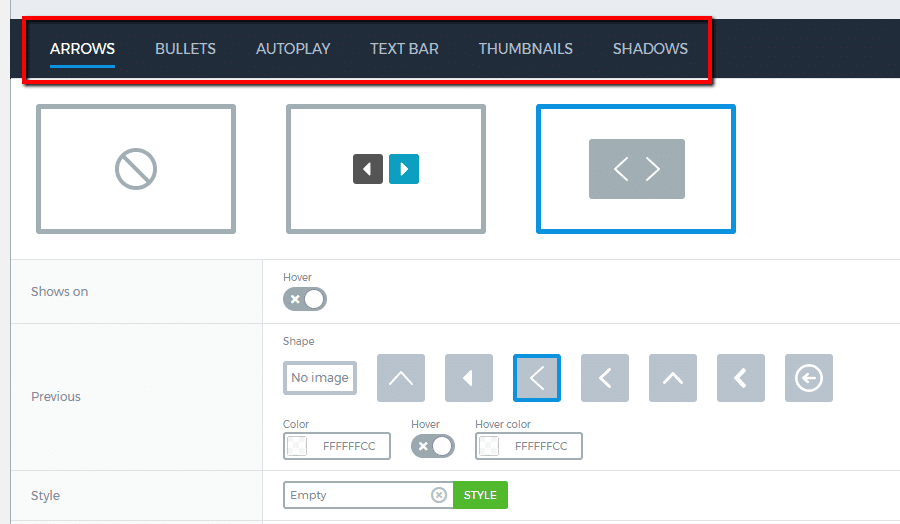
All in all, there’s a ton that you can configure. But don’t worry if the sheer number of settings feels overwhelming because you can leave most of them as the default and still have a perfectly functioning slider.
Those settings are just there for people who want more control.
Publishing Your Slider
Once you finish with the settings, publishing your slider to the live version of your site is quite easy.
You have three options:
- Grab the shortcode from the editor interface
- Use the Smart Slider icon in the WordPress Editor
- Put the PHP code directly in your theme’s template files (only for advanced users)

Smart Slider Pro For Even More Features
Smart Slider’s free version is impressively feature-rich. So if you’re just a casual user, don’t think that you necessarily need the Pro version.
But…the Pro version does add some nifty stuff.
Here’s some of what it does:
- 4 new slider types (5 total)
- 10 new layer types (16 total)
- 100+ sample sliders (vs. 4 in the free version)
- 80+ pre-made slides (vs. 6 in the free version)
- More ways to dynamically generate sliders (e.g. YouTube videos, WooCommerce products + lots more)
- Individual layer animations (vs. just background animations in the free version)
- Ken Burns effect
- Lightbox + image editor
Basically, you get more of many of the features that you get a taste of in the free version.
Personally, I think the huge slide library and the increased number of dynamic slide generators are the biggest reasons to upgrade.
So how much will that upgrade cost you? Not too much. Smart Slider Pro only costs $25 for a single site license. You can also grab a 10-domain license for $100 or an unlimited license for $200.
One neat thing is that price gets you automatic updates for life. Most developers make you pay again to continue receiving updates, so this is a big plus.
Final Thoughts on Smart Slider
Smart Slider intelligently walks the line between being user friendly for beginners and flexible for power users/developers.
That is, there’s plenty of depth there if you want it, but you aren’t forced to go through all of those options if you don’t want to.
Beyond that, the drag and drop editor is well-designed and easy to use. And I also love that the plugin has a focus on responsive, touch-friendly designs. Some slider plugins work horribly on mobile, but Smart Slider functions just as well across all devices (double checked on my iPhone!).
The responsive previews also make it easy for you to design your slides for different devices.
Finally, unlike Slider Revolution, you can get started with Smart Slider for free. And that’s tough to argue with!


