


Need to set up an appointment booking calendar for your WordPress site? Most of our themes are built for businesses, so we know how important a reliable scheduling system is.
In this post, I’ll take you through how to set up an appointment booking calendar using the free version of a plugin called BirchPress. Then, at the end, I’ll offer up a few other plugins that might be a better choice depending on your exact situation.

How to Set Up An Appointment Booking Calendar With WordPress and BirchPress
BirchPress is a freemium (free and premium) plugin that helps you set up appointment booking calendars. Here’s why I chose it for this tutorial:
- It gives you a clear calendar view of all of your appointments inside the WordPress dashboard.
- You can accept appointments at multiple locations. Great if you have different offices or storefronts.
- You can accept appointments for different service providers. If you’re solo, this doesn’t matter. But if you have different providers (e.g. multiple lawyers, doctors, personal trainers, etc), then this is quite helpful.
Best of all, you can accomplish all of this even in the free version.
Piqued your interest? Ok, here’s how you can set up your own appointment booking calendar with BirchPress.
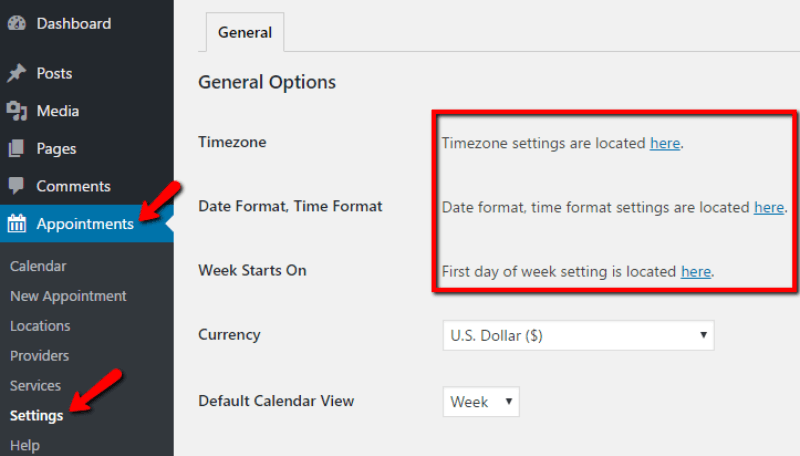
Step 1: Configure Basic Settings
Once you install and activate the plugin, the first thing you should do is configure the basic settings. Most of these revolve around date formats and currencies.
I know, it’s a bit mundane. But as an American living in Vietnam, let me tell you that I still get tripped up remembering when the week starts over here. So, make sure it’s squared away all proper! Go to Appointments → Settings and follow the links to configure time settings:
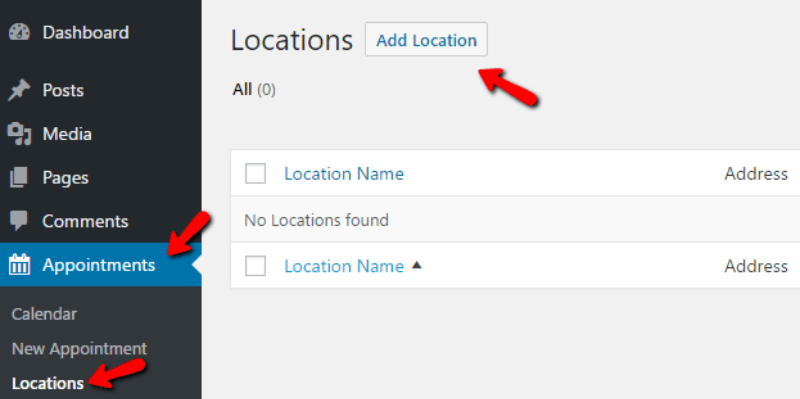
Step 2: Add Your Locations
Next, you need to add the different locations where you provide services. To do that, head to Appointments → Locations and click Add Location:
Give it a name, fill in the rest of the details, and click Publish:

If you only have a single location, you’re finished! But if you have multiple locations, you’ll need to repeat the same process for all of your locations.
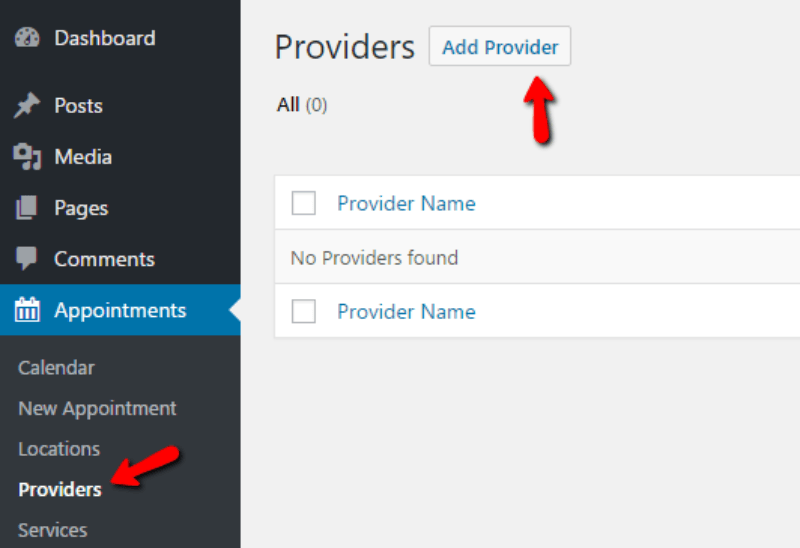
Step 3: Add Service Providers
Next, you’ll want to add your different service providers. Again, if you’re a solo-practitioner, you just need to add yourself. But if you’re setting up a booking system for, say, your entire law firm, you’ll need to add each lawyer who will accept appointments.
To do that, go to Appointments → Providers and click Add Provider:
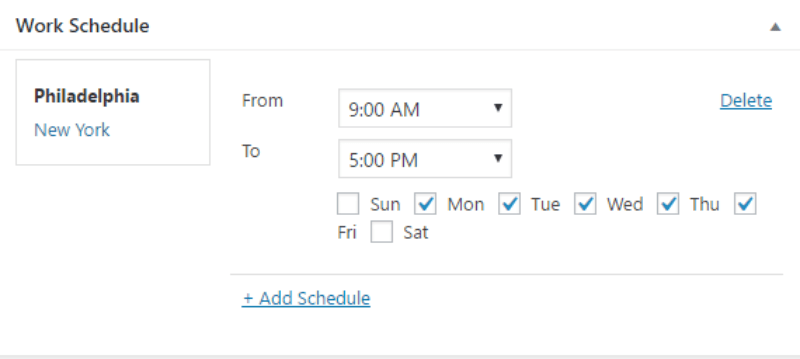
Enter a name and description. Then, at the bottom, choose a location and click + Add Schedule to add a working schedule:
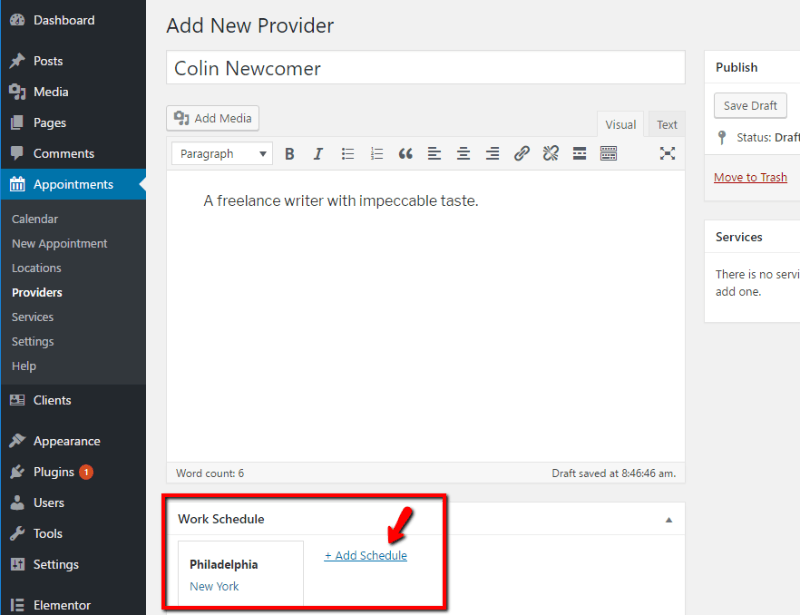
In the free version of the plugin, you can only add basic availability. But if you pay for the pro version, you can sync the schedule up with an existing calendar for a 100% accurate list of when each provider is available:
For that reason alone, you might want to consider upgrading to the premium version.
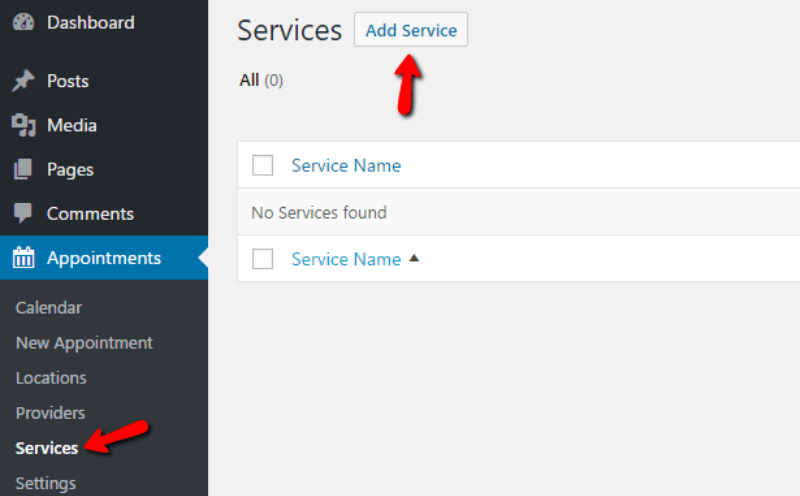
Step 4: Add Services That You Offer
Last major configuration step! Now, you just need to add the services that you offer. For example, if you’re running a personal training website, you might want to add services like:
- Personal training during workout
- Nutrition consultation
- Etc.
To add a service, go to Appointments → Services and click Add Service:
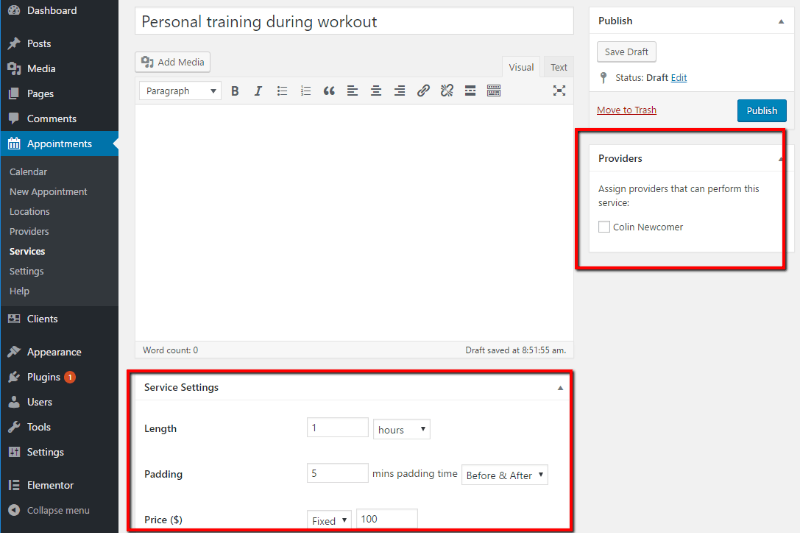
In addition to the title and description, make sure you specify length, padding and price. Length and price are self-explanatory. Padding is just a small buffer zone that you can set before or after the service is scheduled. It’s helpful because you don’t really want to schedule back-to-back appointments with zero buffer space in between.
You should also assign the service to the relevant providers on the right side of the screen:
And that’s it! Once you’ve added as many locations, providers, and services as necessary, you’re ready to display your form on your site.
Step 5: Add Your Booking Form to Your Website
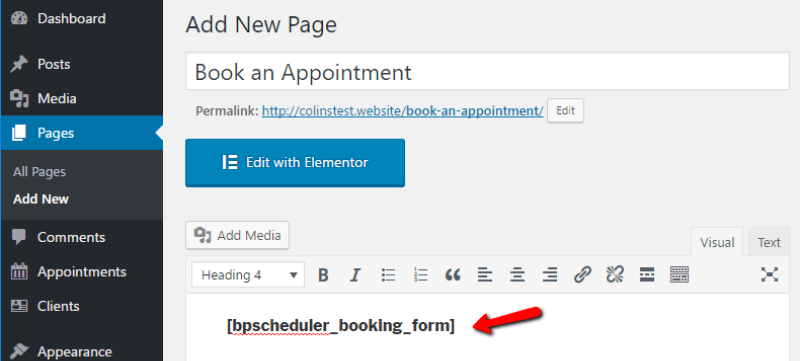
Now that everything is configured, you’re ready to add your booking for to your website. To do that, head on over to the page where you want to add your booking form. For my example, I’ll create a new page called Book an Appointment.
Then, just add this shortcode wherever you want your form to appear:
[bpscheduler_booking_form]
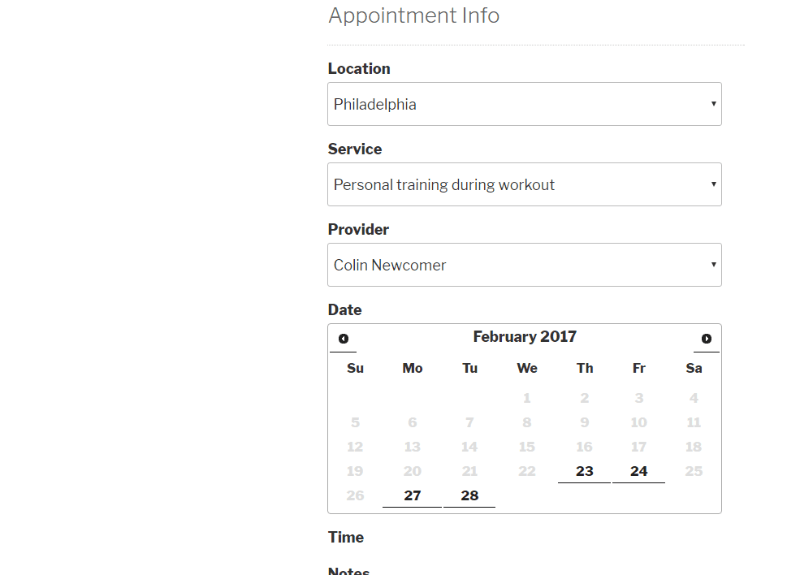
Then, on the front-end, you should see a form like this:
You could also add the booking form shortcode to an element in a page builder like Elementor.
And if you want to also add forms to reschedule or cancel appointments, you can use one of these shortcodes:
[bpscheduler_cancel_appointment][bpscheduler_reschedule_appointment]
Viewing Your Appointments
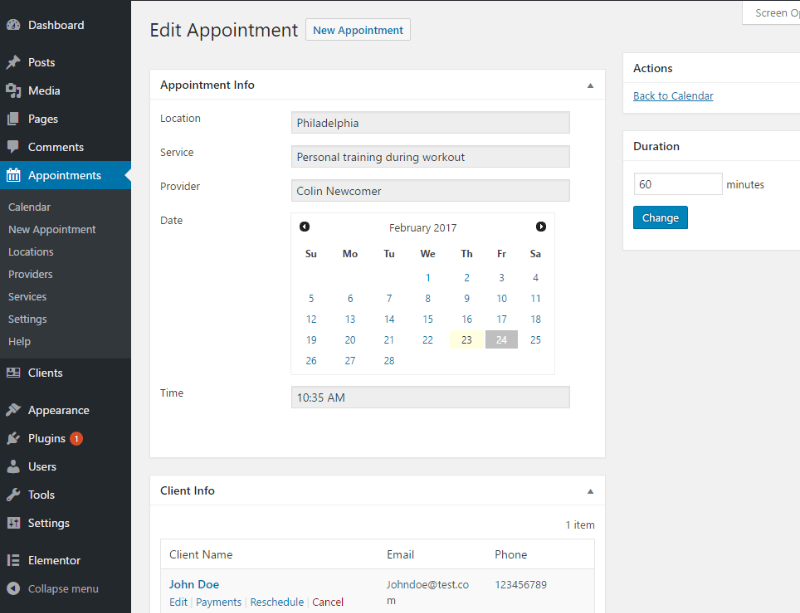
Once customers start booking appointments, you can view them directly from your WordPress dashboard by going to Appointments → Calendar:

And you can view more details for the appointment by clicking on it in the calendar:
Bam! You just created your very own appointment booking system using WordPress.
Other Options for Appointment Bookings on WordPress
BirchPress is one of the most popular options for appointment bookings. But to get the most from the plugin, you really need to go with one of the premium plans. And that can be pricey.
So if you want some BirchPress alternatives, here are some other free and premium options:
Booking Calendar
Booking Calendar is a popular free option for setting up appointments through WordPress. You can use it for scheduling appointments or for something like renting out a vacation home.
If you’re a solo-provider, Booking Calendar is a great option. But if you have multiple locations or providers, BirchPress will give you more flexibility for implementing your booking form.
WPForms

WPForms can basically create any type of form that you throw at it. One of those form types is…appointment forms!
You can add date and time fields to any of the forms that you create. Then, you just need to sync your WPForms form with your calendar using Zapier and you can automate the whole appointment process.
Easy Appointments
Easy Appointments is a free option that functions similarly to BirchPress. You can add multiple locations, services, and providers and allow customers to choose what they need when booking.
And if you pay for a premium extension, you can also get 2-way sync with Google Calendar or iCalendar so that you have one unified calendar for all of your appointments.
Wrapping Things Up
If you need to set up a booking form for multiple locations and/or providers, I recommend that you go with the free, or ideally premium, version of BirchPress. Easy Appointments is another option, though it isn’t nearly as popular as BirchPress.
If, on the other hand, you just need to set up an appointment form for a single provider (that is – just you or your client), then Booking Calendar and WPForms offer nice options.


interesting article… very informative & thoughtful message on Booking engine how to setup wordpress calender plugins.
This plugin was closed on January 15, 2019 and is no longer available for download.
Thanks for letting us know. I was in touch with the BirchPress team – they said this is only temporary and should be back soon.