


When you launched your WordPress site, you probably did a thorough test to make sure everything worked just like you wanted. On the first day of your new site, it’s like moving into a brand new apartment – everything is clean and works perfectly!
But as time goes on and wear and tear takes its toll, it’s all too easy for that to change…both for apartments and WordPress sites. So to make sure your WordPress site is still humming along perfectly, you need to be a little proactive and give your site periodic health checks.

That’s what I’ll be talking about today – how to give your WordPress site a health check to make sure it’s still in tip-top shape.
How Often Should You Give Your WordPress Site A Health Check?
I’m about to give you 8 different diagnostic protocols to check on the health of your WordPress site.
That might seem a little overwhelming – but most of these checks only take a couple minutes each, so you’re not in for a huge time investment here.
How often should you check them? Well, obviously more often is better. In a perfect world, you’d be able to check all of these things every single day.
But we live in the real world – which means you need to balance the scarcity of time with the need to keep your WordPress site healthy.
For that reason, we recommend that you:
- Check all of these things at least once every 3 months.
- Do a more in-depth review at least once per year.
With that out of the way, here’s how to check on the health of your WordPress site…
1. Check To Make Sure Your Site’s Still Loading Quickly
Do you know if your site still loads as quickly today as it did when you launched?
There are all kinds of little changes that could’ve negatively affected your site’s page load times since launch day.
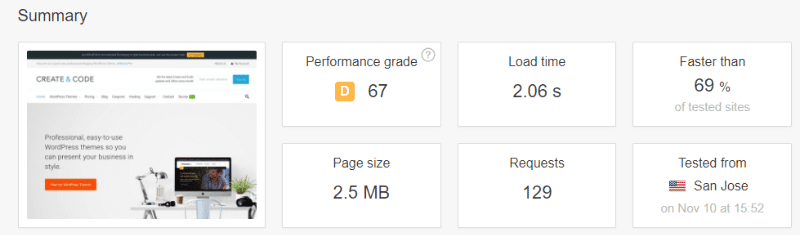
To make sure your site hasn’t slowed down, use tools like Pingdom and GTMetrix to periodically test your site’s load times.
All you need to do is plug in your site’s URL and each tool will tell you exactly how quickly your site loads:
If you’re not happy with your current page load times, you can read our guide on how to speed up WordPress. And one of the best things that you can do is upgrade to better hosting – we recommend SiteGround for fast, but affordable, WordPress hosting. For an even more comprehensive guide on how to speed up your WordPress website you should also check out the Speed Up WordPress guide over on Cloudliving.
2. Run A Security Scan And Clean Things Up If Necessary
With some security breaches, you know there’s a problem right away. Others are more insidious and never really show up unless you look.
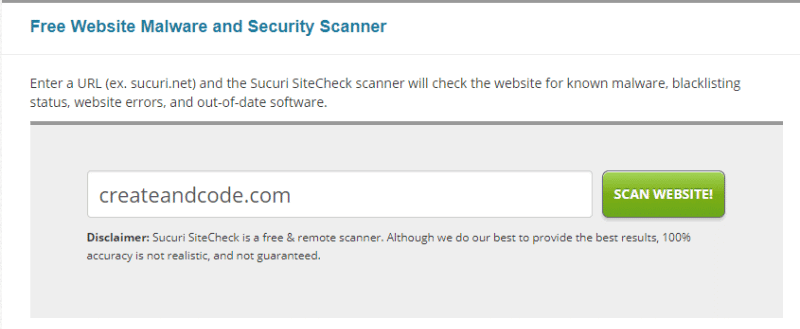
If you want to catch the latter type, you’ll need to take a more proactive approach. While part of that approach is installing a good security plugin, you can also manually check your site using the free Sucuri Checker tool.
You just plug in your URL:
Then Sucuri will give you a look at the basic security health of your site:
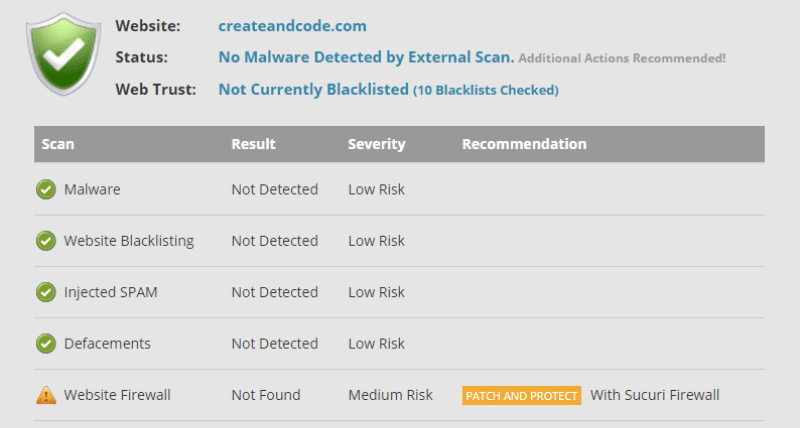
While hopefully everything comes up clean, if you find any issues you can use malware cleaning services like:
3. Make Sure Backups Are Running (And Test That They Actually Work)
A lot of people don’t care about backups until they need a backup. Don’t be like those people.
Let’s start at the beginning – if you aren’t currently doing anything to back up your site, you need a solution that lets you take automatic backups on a set schedule.
But even if you have taken that first step and are running automatic backups, you still need to check in on things from time to time.
Here’s what to do:
First, ensure that your backup solution is:
- Still actively taking backups on the assigned schedule.
- Properly storing these backups in the right place (e.g. cloud storage)

Once you’ve done that, you need to make sure those backups actually work. Think about it – a backup isn’t much use if you can’t restore a working copy of your site from it, right?
To check that:
- Find your most recent backup
- Try to restore your site to a development or staging site from your backup
- If it doesn’t work, you’ll need to go back to step one and find a backup solution that does work.
4. See How Your Site Is Doing In The SERPs
If you’re already focused on SEO, you probably don’t need a reminder to check your site’s positions in the SERPs. I bet you’re already watching those metrics like a hawk.
But even if you aren’t the SEO type, it’s still a good idea to periodically check in on how your site is ranking to make sure that you’re on the right track.
Unfortunately, doing this manually isn’t the best approach because of how Google personalizes search results pages (though it does work in a pinch as a rough estimate).
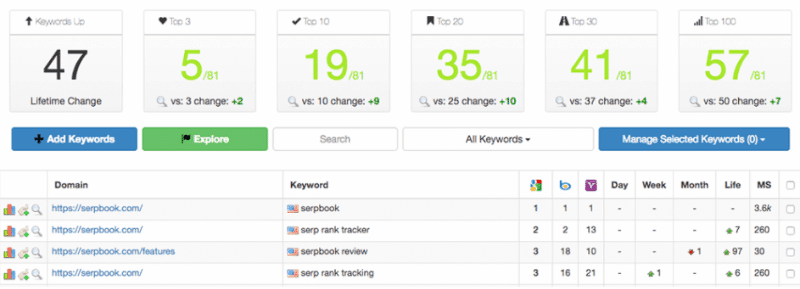
If you want a more accurate look at how your site is ranking, including whether it’s trending up or down, you can use a service like SERPBook.
SERPBook lets you track your keywords on a daily or bihourly basis so that you quickly pop in and see how your site is doing (and catch potential issues before they balloon):
5. Test Important Functionality Like Forms And Checkouts
Here’s a stupid thing I did that probably cost me some work:
I installed a new caching plugin on my portfolio site. After activating it, I checked my site and everything seemed to be working normally. Plus, my site was loading faster than before.
Success, right?
Well, mostly. What I didn’t realize is that the new caching plugin broke my contact form sometimes. So a significant chunk of the people who wanted to contact me couldn’t. As a freelancer, that means lost revenue potential…which sucks.
So what’s the point of that whole story? It’s important to periodically check the important functionality on your site.
Even small things that you wouldn’t think of – like changing caching plugins – can quietly break important functionality.
To avoid potential issues:
- Open an incognito tab (this is to ensure you experience your site as a normal user)
- Manually perform the actions you expect your users to do, e.g. send yourself a message via your contact form, register for your site, etc.
6. See How Your Site Does On Mobile
In 2016, mobile web browsing outranked desktop browsing for the first time ever. That means you need to be especially careful about the health of the mobile version of your site.
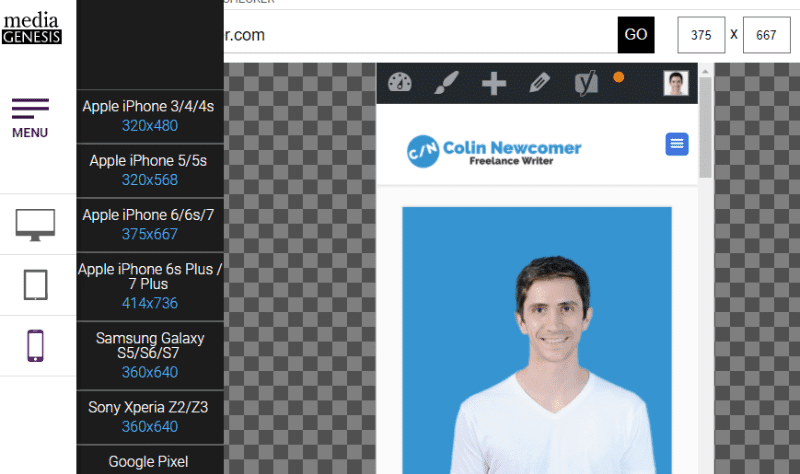
Here’s how to check that your site is healthy on both desktop and mobile devices:
- Use a tool like Responsive Design Checker to make sure your site is fully responsive
- Test your site with the Google Mobile First test
And if you need a dedicated solution to make your website mobile friendly, consider integrating something like Google AMP for WordPress.
7. See If You Have Any Broken Links (Then Fix Them)
Broken links are any links on your site that aren’t working as intended. These could be either links to your own site or to external sites.
Broken links are insidious because they drag down your user experience and might even cost you money (if you’re linking to something that makes you money).
How do you do find them? I actually wrote an entire post on how to find broken links on WordPress.
8. Check For 404 Errors And See If You Can Fix Them
404 errors occur when a visitor tries to access a non-existent page on your website. While checking for broken links should have fixed any 404 errors stemming from broken internal links, you can’t easily check for broken links on other people’s websites.
But by monitoring 404 errors, you can look for trends to find out if:
- Another site accidentally linked to the wrong page (then you can ask them to fix it and get more non-404 traffic!).
- Google is still indexing a page that you deleted or moved.
If you have Google Analytics installed, here’s how to check for 404 errors on your WordPress site:
- Go to Behavior → Site Content → All Pages in Google Analytics
- Choose Page Title as the Primary Dimension
- Add an Advanced Filter for “not found”
- Click Apply
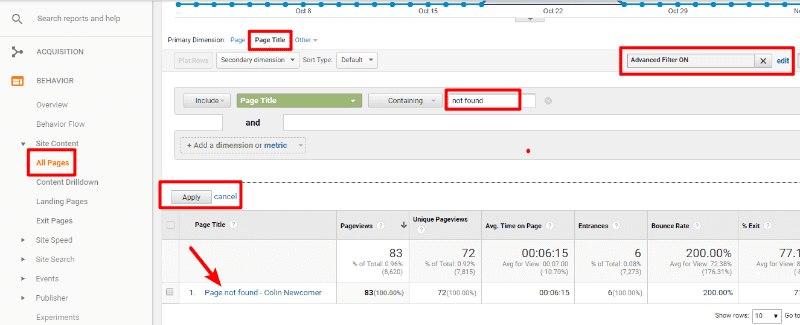
Then, to find the specific URLs, click on the Page not found result and Google will tell you the actual URLs that caused the 404 error(s):
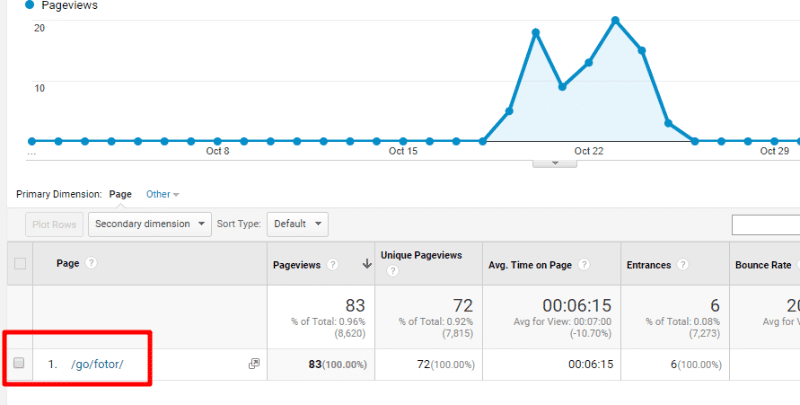
Looks like my one affiliate link was broken for a period in October – I guess I need to practice what I preach!
Wrapping Things Up
By proactively checking in on the health of your website, you can maintain its stellar performance and catch any potential issues before they become serious.
You don’t necessarily need to check every day – but checking these 8 tips at least once every 3 months will help ensure you have a healthy website that’s ready for the long haul.