It’s almost time – you’ve poured blood, sweat, and tears into your WordPress website, and now you’re ready to share it with the world (ok, maybe not a lot of blood involved, but your finger might be tired from clicking the mouse a lot!).
Before you click one more button to make your site live, though, what are the most important things you need to check to make sure your site launch is a success? What’s your website launch checklist?
That’s what we’ll cover in this post – we’re going to list out 16 important things that you should check and/or configure before you launch your WordPress website.
Ready to go? Here’s your WordPress website launch checklist…
1. Create an Optimized Site Structure with Internal Links
Your website’s structure matters for two big reasons:
- It helps your users find content more easily.
- It helps Google crawl your site and find all of your content.
There are a few things that go into an optimized structure.
First, there are your sitewide links. These are the links that appear in your header/primary navigation menu, your footer, and/or any sidebars that you may be using. These should make it easy for humans and search engines to quickly access your most important content. Search Engine Journal has a good resource for optimizing your overall website navigation.
Optimizing your website navigation isn’t just about those sitewide elements, though, you’ll also want to engage visitors and help them find content in your individual blog posts and pages. To do this, you can use internal links in the body of your content whenever relevant. As you’ll read through this post, you’ll see us link to a lot of our other blog posts, and that’s a perfect example of what you need to do!
2. Optimize Your On-Page SEO to Start Ranking from Day One
While optimizing your website navigation is one important aspect of on-page search engine optimization (SEO), there are also a bunch of other factors you’ll need to double check if you want Google to start ranking your site.
First, you’ll want to make sure you’ve installed a WordPress SEO plugin to help you with the basics:
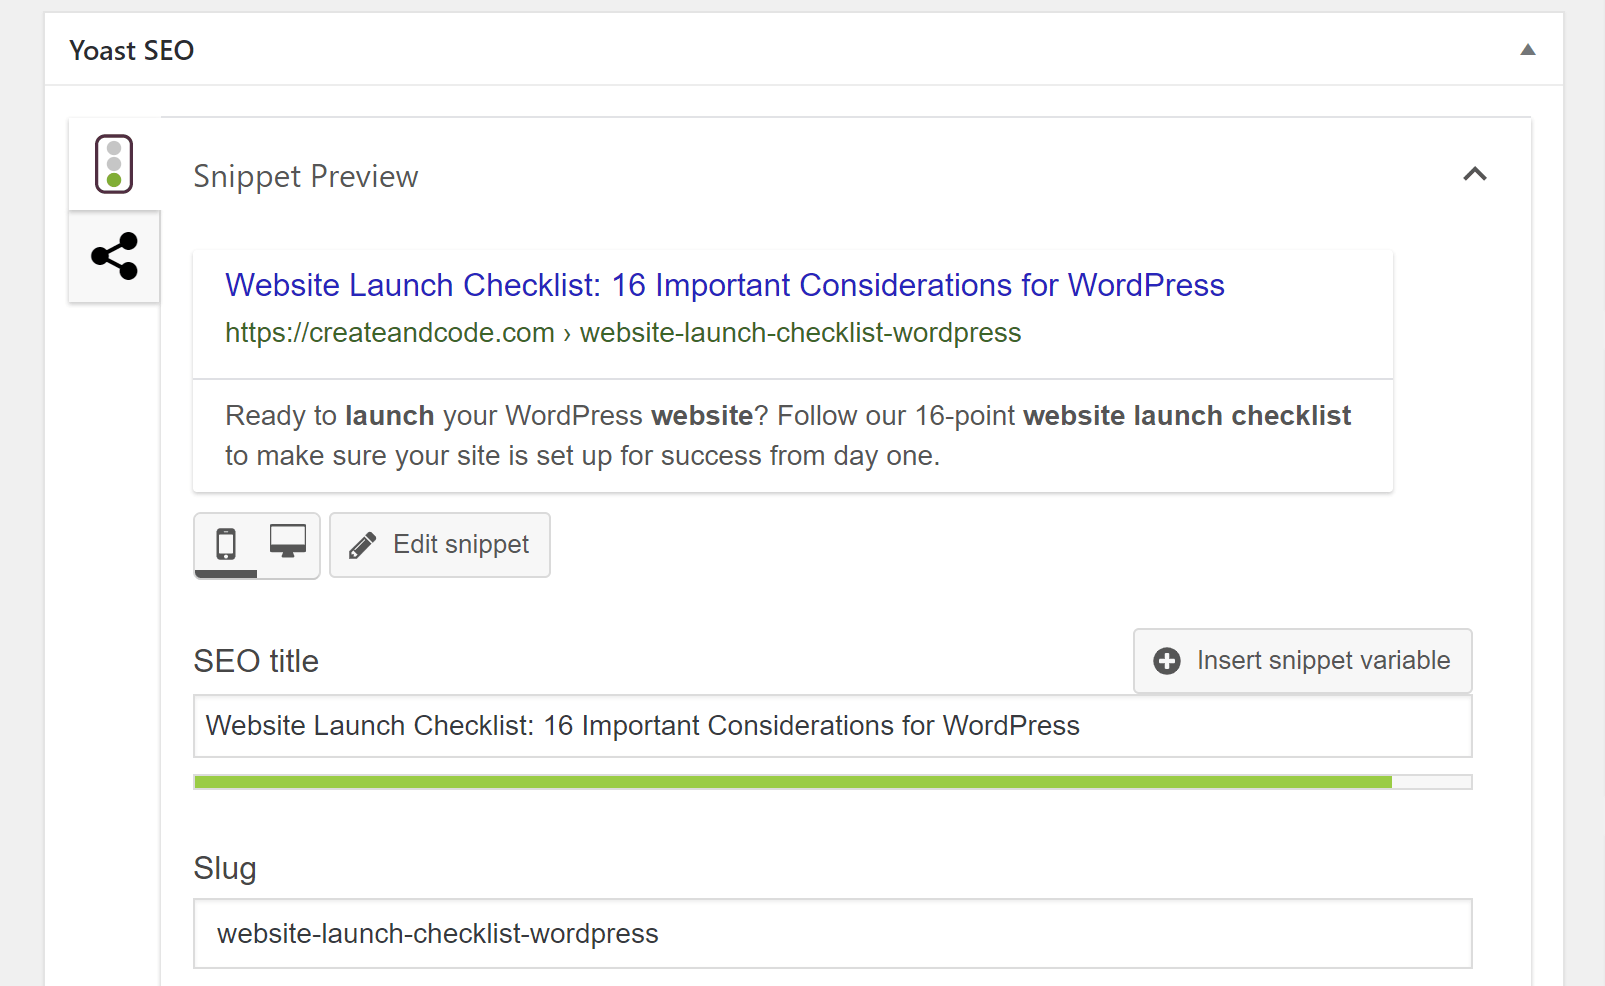
Then, double check things like:
- Your site’s permalink structure. When in doubt, we recommend just using the post name.
- Your heading structure. E.g. <h1>, <h2>, etc.
- SEO titles and meta descriptions. Make sure you’ve written them for every piece of content you want to rank.
- Thin pages. Whenever possible, get rid of thin pages or beef them up.
- HTTPS. In addition to being good for security, it’s also a positive ranking factor.
Check out our on-page SEO guide for a deeper look.
3. Test and Optimize Your Site’s Performance on All Devices
How quickly your site loads will have an effect on everything from user experience to SEO to conversion rates, so you’ll want to make sure your site loads fast.
Now, you don’t need to obsess over page speed scores or getting under one-second page load times. But you do want to make sure your site loads in under ~three seconds to avoid the worst effects of a slow-loading site.
To get started, use a tool like GTmetrix or WebPageTest to assess where you’re at. Then, depending on those results, consider optimizations like:
- Faster hosting. No amount of lipstick on a pig will make a horrible host load fast.
- Caching. Page caching is a great way to cut your load times and reduce the load on your server.
- Image optimization. Plugins like ShortPixel or Imagify make it easy to compress and resize your images.
- Minification. This shrinks the size of your code without changing functionality.
You can also consider AMP to speed up the mobile version of your page.
If you want an easy way to implement a bunch of WordPress performance improvements in one fell swoop, you can use the WP Rocket plugin. In our WP Rocket review, we found that it was able to cut our test site’s load times by 47%.
4. Make Sure You Don’t Have Any Broken Links
Broken links are bad for SEO and user experience. Before you launch, you’ll want to check for broken links and fix them if possible:
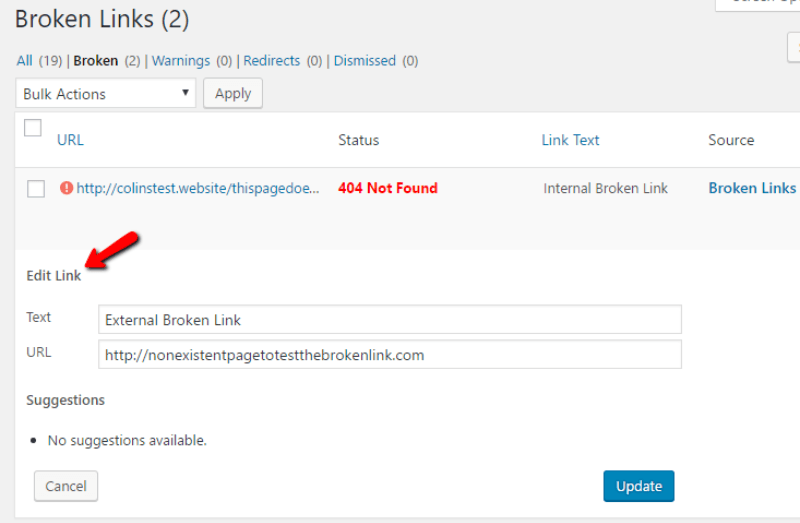
This isn’t a one-time check, either – finding broken links should be part of your routine WordPress maintenance plan.
5. Set up Google Search Console and Add Your Sitemap
Google Search Console is a useful tool that lets you control how Google treats your site and view important analytics.
Before you launch, you’ll want to verify your site with Google Search Console and also add your site’s XML sitemap in Google Search Console (most SEO plugins will automatically create a sitemap for you – all you need to do is submit it via Google Search Console).
6. Make Sure Google Can Index Your Site
When you’re developing a WordPress site on a live server, it’s common to add a noindex tag to make sure Google and other search engines don’t index your site before it’s ready to go live.
That’s all well and good…unless you forget to remove it when you push your site live.
Story time:
I actually saw this happen live with a startup that’s now worth millions of dollars. I tried to Google them before my job interview, but their site was nowhere to be found in Google. Turns out, they’d left the noindex tag in after their recent update.
So – as silly as it sounds, this can happen to you.
To double check, you can use this simple Noindex Tag Test tool.
7. Set Up Google Analytics and Other Analytics Tools
Analytics help you track your site’s performance and optimize where you spend your time and money.
You should definitely add some type of analytics to your site before going live, with Google Analytics offering a great starting point. Here’s how to add Google Analytics to WordPress.
There are also plenty of other analytics plugins to choose from. And, depending on your needs, you also might want other analytics tools. For example, a heatmap analysis tool can be especially helpful when you launch, as it lets you collect data about how real people use your site.
8. Monitor Your Site’s Uptime and Set Up Alerts
Any time your site goes down means lost revenue and opportunity. To keep track of when and how often this happens, you’ll want to set up uptime monitoring.
In addition to telling you how reliable your host is, you can also set up automatic email and text alerts so that you know as soon as there’s an issue with your site:
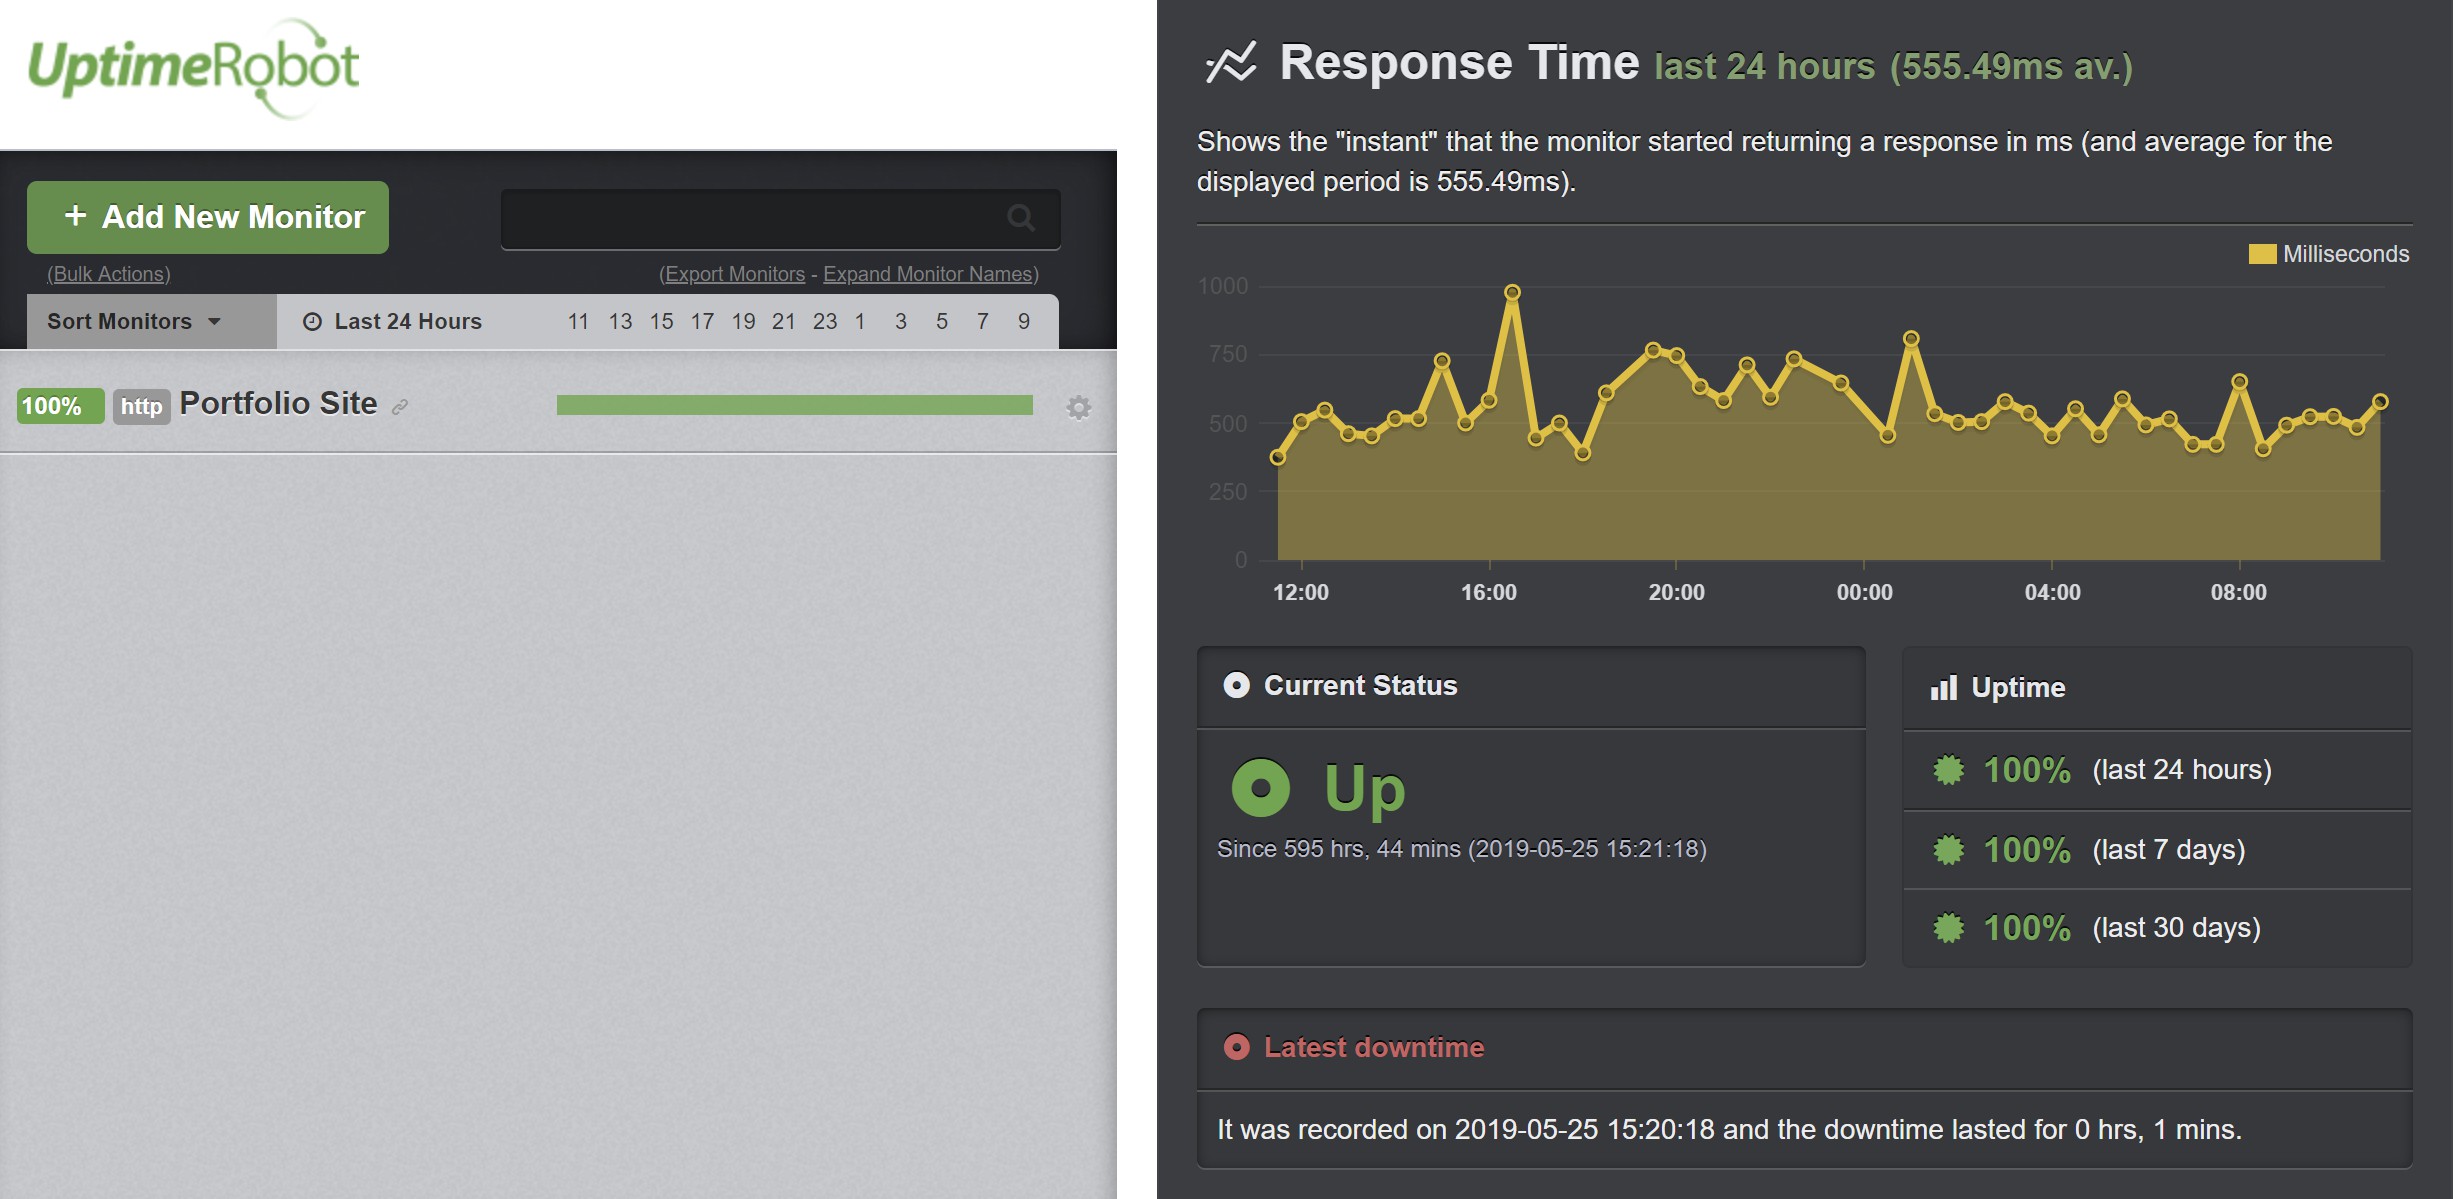
Uptime Robot, pictured above, is a great tool that can do this for you for free.
9. Lock Your Site Down Like Fort Knox
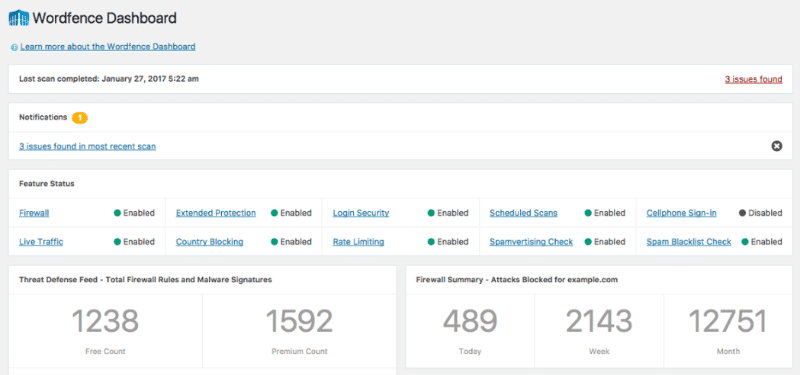
Because of WordPress’ popularity, it’s also a popular target for hackers and other malicious actors.
To prevent your site from falling prey to these folks, you’ll want to make sure you’ve got your security in order before launching. One simple way is to install a WordPress security plugin, but you’ll also want to make sure you’ve implemented other basics like:
- Strong passwords
- Limit login attempts or two-factor authentication
- Up-to-date WordPress software, plugins, and themes
- SSL certificate and HTTPS
Check out more WordPress security tips (this post is about law firms, but the same basic ideas apply to all WordPress sites).
10. Set Up Antispam Measures
In addition to people trying to hack or deface your website, you’ll also have to deal with a crowd of people who’d rather just fill your site up with spam.
In fact, almost as soon as you go live, you’ll probably start getting spam comments.
To stop these comments and save yourself from wasting time with comment moderation, you should install a WordPress anti-spam plugin like Akismet or Antispam Bee.
11. Test Contact Forms (and Other Important Functionality)
Your site probably has some type of form for people to get in touch with you. It could be a simple contact form or something more detailed.
Either way, it’s always a good idea to test it before going live to make sure it’s still functioning properly (you’d hate to miss out on form submissions because of an issue!).
12. Set Up Automatic Backups (If Your Host Isn’t Already Doing That)
If your WordPress host doesn’t already implement automatic backups for you, it’s essential that you set up your own backup solution so that your site’s data is always safe and secure. Your website launch checklist is not complete until you do.
A good free option is UpdraftPlus, which will let you automatically back up your site to off-site locations like Google Drive or Amazon S3 on a set schedule.
13. Integrate Your Social Media Accounts (Shares and Follows)
You don’t need us to tell you that people spend a lot of time on social media nowadays. You’ll want to make sure your website is there to connect with them. Typically, that means adding:
- Social share buttons to your content
- Social follow buttons that link to your profiles
Beyond that, you’ll want to consider setting up the Open Graph tags for your most important content (like your homepage). Most SEO plugins also let you set up Open Graph information in addition to SEO titles/descriptions.
14. Add the Little Details (Favicon, Author Bio, etc.)
This is kind of a catch-all for stuff that’s important, but doesn’t necessarily warrant its own section. Consider things like:
- Favicon, which you can set in the WordPress Customizer.
- Author bios, which you can set in your profile.
- Author display names, which you can also set in your profile.
- Comment settings, for example, do you want to automatically close comments after a certain amount of time?
15. Add a Privacy Policy
As a result of the GDPR, WordPress has added a dedicated privacy policy feature to the core, though you can also just create a regular page to house your privacy policy.
To set up the core feature, head to Settings → Privacy. If you’re not sure what to put there, you can use an online privacy policy generator.
16. Remove Unused Users, Test Content, Plugins, Etc.
Finally, make sure you’ve removed anything that you only put there for testing, or that you just generally don’t plan to use on your live site.
This includes:
- Unused users that you might’ve created for testing. Also, make sure there’s no generic “admin” account as this is a security risk.
- Test content.
- Unused plugins or themes (though you’ll want to leave the default Twenty Nineteen theme, just in case you have to manually deactivate your theme).
That’s Your Website Launch Checklist!
That wraps up our WordPress website launch checklist! After implementing and checking everything above, you should be all set up for a successful launch.
However, your work doesn’t stop when you go live (unfortunately!). No, once your site is live, you’ll also be responsible for maintaining it.
For some tips on how to do that, check out our routine WordPress maintenance guide, where we break down exactly what you should be doing and how often you need to do it.
Any questions about implementing any of the tasks in this website launch checklist? Ask away in the comments!







Hello Colin
Thank you for the awesome post.
My website isn’t new but I had issues with redirecting so looking at securing it better. Will check out Wordfence.
What hackers are doing a lot nowadays is they inject code into your core wordpress files and make your important pages redirect to spam pages. So terrible that we have to take all these extra measures to avoid issues.
I’m just worried that these security plugins block real customers
Mozie